✅ Winch Hooks — Types, Safety, Replacement
- Three core types: forged safety hook (with latch), grab hook (no latch), sling hook (narrow throat).
- Safety hook is the standard for winches — the latch prevents accidental disconnect under slack.
- WLL rating: most winch hooks list ~10,000 lb MBS with a 5:1 safety factor = 2,000 lb WLL.
- Closed-loop replacements (Factor 55 ProLink) eliminate hook weaknesses entirely — no latch to fail, no throat to open.
- Inspect every trip: look for latch-spring weakness, throat deformation, and stress cracks at the shank base.
Key Takeaways
- Four main options: J-hook, clevis hook, swivel hook, and soft shackle (hookless) all work, but each fits a different recovery style, rig type, and budget.
- Always match WLL: Your winch hook’s working load limit needs to be at least equal to your winch’s rated pull and compliant with ASME B30.10. Shortchanging this is how people break gear.
- Latch & throat width matter: The right throat opening, a latch that fully closes, and proper straight-line loading are more important than what logo is stamped on the side.
- Cable vs synthetic: Steel cable usually ends in a swaged loop and thimble. Synthetic rope needs a thimble eye and a hook or soft shackle that’s friendly to fibers and pins.
- Replacing a hook is simple but precise: Remove the old hook safely, measure the cable or rope, choose an ASME-rated How to Test a Winch Solenoid that matches the diameter and WLL, install it correctly, then proof it under a controlled load.
- Soft shackles are safer to handle: They’re light, don’t store as much energy, and don’t turn into shrapnel if something breaks. But they only stay safe if you protect them from abrasion, sharp edges, and heat.
- Good storage prevents accidents: Use a hook stopper or rubber boot, keep a little tension on the line, and keep metal parts clean and rust-free so they don’t surprise you on a bad day.
- Top picks in 2026: Factor 55, Warn, and Crosby hooks still sit at the top for safety, durability, and clean Best Winch Hooks in 2026 with both steel and synthetic winch lines.
Winch Hook Quick Definitions
 What is a winch hook? A winch hook is the connection point at the very end of your winch cable or rope. That can be a forged metal hook or a synthetic soft shackle, depending on your setup. Its job is to attach your winch line to recovery points, trees, anchor gear, or other rigging. It has to be correctly rated for working load limit (WLL), match your line diameter and termination, and be used in line with ASME B30.10 safety guidelines. Treat it like lifting hardware, not a random hardware-store hook.
Types of Winch Hooks (J-Hook, Clevis, Swivel & Soft Shackle Alternative)
Most winch setups you see on trucks, Jeeps, and wreckers fall into one of four categories. You’ll run either a simple J-hook, a common clevis hook, a swivel hook for heavy or awkward pulls, or a soft shackle setup where you ditch the metal hook entirely.Overview of Common Winch Hook Types
There isn’t one universal “best winch hook.” The right choice depends on how you wheel, what you hook to, and how often you’re doing recoveries versus the odd pull here and there.- J-hook –
 A basic J-shaped hook, usually open with no latch. It’s cheap, fast to clip on, and you see it a lot on tow dollies, light-duty straps, or specialty gear. The trade-off is security. If the line goes slack, a J-hook can walk out of the connection, so I rarely recommend it for serious off-road recovery.
 - Clevis hook –
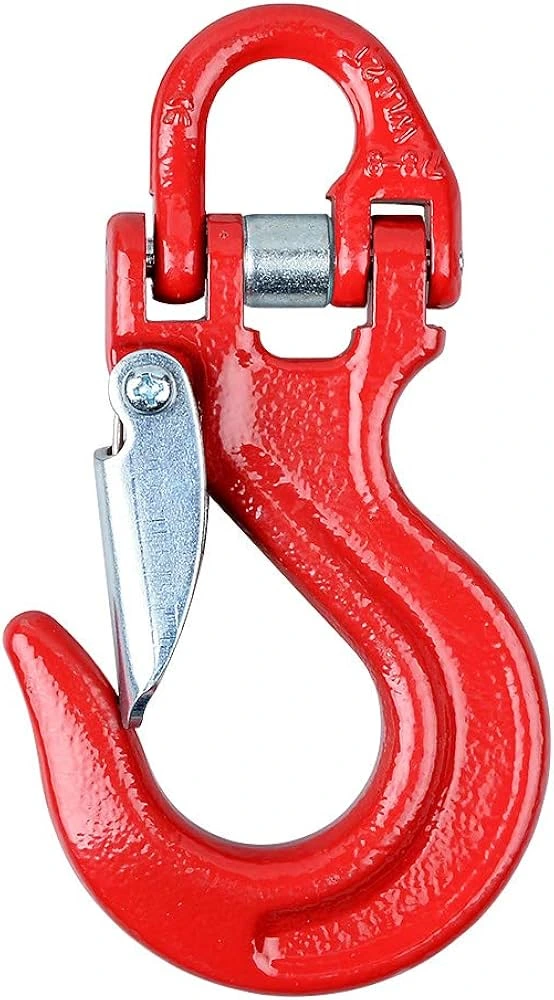
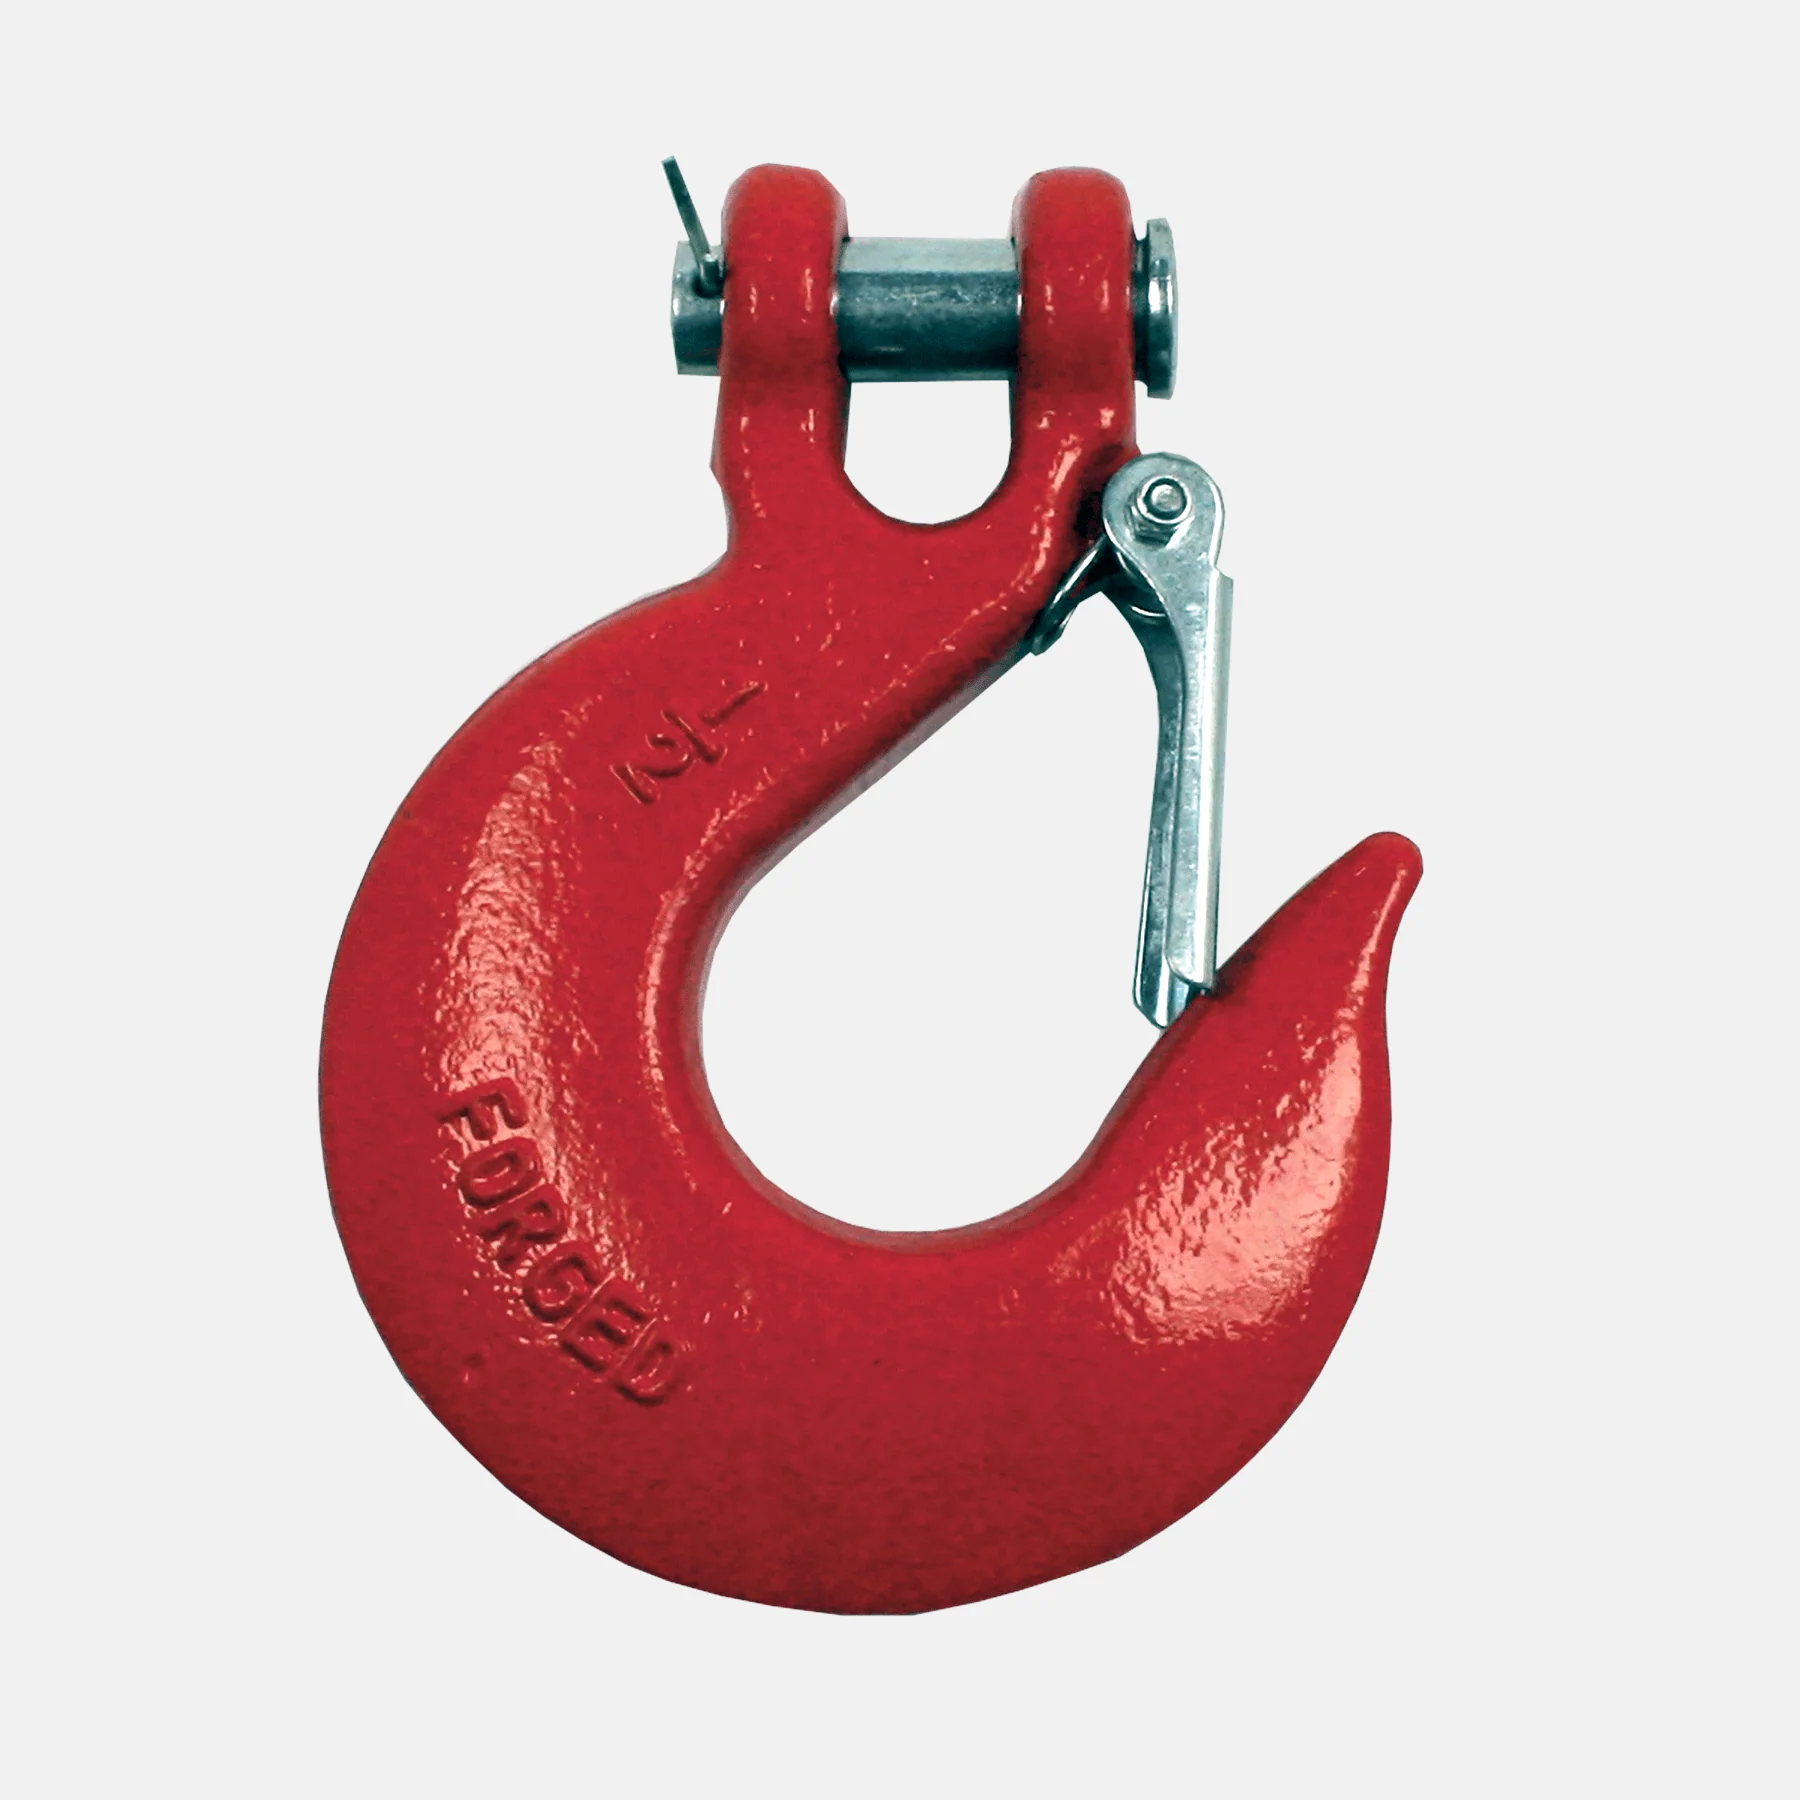
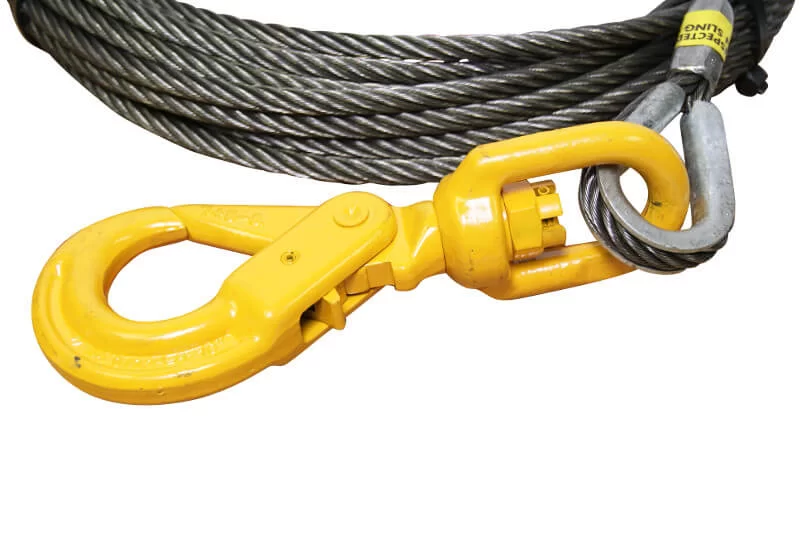
 This is the workhorse. It mounts with a clevis pin and usually comes with a spring-loaded safety latch. Most truck, Jeep, trailer, and ATV winches ship with some flavor of clevis hook. You get good strength, decent price, and broad compatibility with shackles, tabs, and recovery points.
 - Swivel hook –
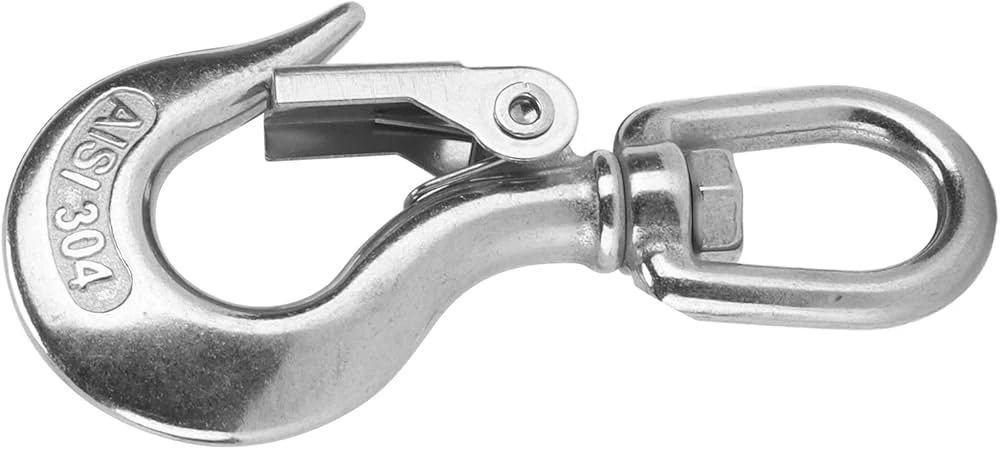
 This has a rotating swivel between the hook and the line. The swivel lets the hook orient itself to the load, which helps reduce line twist and side loading. You see these a lot in industrial lifting, tow trucks, and serious recovery rigs that deal with weird angles all day.
 - Soft shackle alternative –
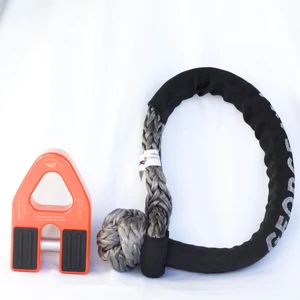
 Instead of metal hanging off the fairlead, the winch rope terminates at a thimble eye or a closed winch link like a Factor 55 FlatLink, and you connect with a synthetic soft shackle. This setup is very popular on modern overland rigs and rock crawlers running synthetic rope who want to cut down on flying metal risk.
Winch Hook Type Comparison Table
Here’s a quick comparison. Don’t treat this like gospel, but it gives you a realistic range for what each type is usually built for.| Type | Typical WLL Range (lbs) | Angle / Rotation | Latch Features | Best Use Case |
|---|---|---|---|---|
| J-hook | 2,000 – 8,000 | Limited; not designed for side loads | Usually no latch | Light-duty, quick connects, non-critical pulls |
| Clevis hook | 4,000 – 20,000+ | Limited angle; must keep near straight-line | Spring latch; some have heavy-duty bolt-type latch | General off-road, trailer, and utility winching |
| Swivel hook | 4,000 – 30,000+ | Up to 360° rotation at the swivel joint | Usually spring latch; some heavy industrial positive-latch | Heavy recovery, industrial lifting, reducing line twist |
| Soft shackle setup | 9,000 – 40,000+ (depending on rope diameter) | Flexible; conforms to anchor points | No metal latch; closed loop when set | Synthetic rope winches, safe off-road recovery, lightweight kits |
Winch Hook WLL & Rating Guide (Capacity Chart)
Understanding Hook Ratings & WLL
Every proper hook has a breaking strength that’s several times higher than the WLL. That margin is the design factor. Marketing loves to shout about breaking strength. The number that matters for you is the WLL.- WLL (Working Load Limit): The load you’re supposed to work under day in, day out. Planning your pulls above this is asking to lose hardware.
- Design factor: The ratio between breaking strength and WLL. A 4:1 factor means a hook that breaks at 32,000 lbs will have an 8,000 lb WLL.
- ASME B30.10 compliance: Tells you the hook has been designed and rated under a real hook standard that covers geometry, material, and inspection criteria, not just marketing copy.
Sample Hook WLL Chart by Size & Type
Every brand is a little different, so always read the markings on the actual hook. This example just shows where most decent hardware tends to land.| Hook Type | Size (approx.) | Typical WLL (lbs) | Common ASME Grade |
|---|---|---|---|
| Clevis hook | 5/16″ | 4,700 – 5,400 | Grade 30 / 43 |
| Clevis hook | 3/8″ | 6,600 – 7,800 | Grade 43 / 70 |
| Swivel hook | 3/8″ body | 6,600 – 10,000+ | Grade 80+ (lifting style) |
| Soft shackle | 3/8″–7/16″ rope | 15,000 – 40,000+ | Varies by manufacturer |
Hook Throat Width & Sizing
The hook throat width is the gap between the hook tip and the body. It looks simple, but it controls what you can and can’t safely connect to.- Size the throat so it fits your main hardware, like a 3/4″ shackle pin or your bumper’s recovery tabs, How to Make a Winch Work Without a Remote having to force it.
- If the throat is too narrow, you’ll be tempted to grind or pry things, which ruins ratings and creates stress risers in the steel.
- If it’s too wide, the connection can slide around, land on the latch, or rotate into a side-load you didn’t plan on.
- Do not grind, heat, or reshape the throat to “make it fit.” Once you do that, whatever WLL was stamped on the hook no longer applies.
Latch Safety Mechanisms
The hook latch mechanism is there to keep things from bouncing out when tension drops. It’s not a structural part meant to carry load. If you’re loading the latch, something is wrong with your rigging.- Latch type: Most use a simple pivot bolt or pin with a spring that returns the latch automatically.
- Engagement force: The latch should snap shut on its own but still open easily by hand. If you have to fight it, it’s bent or corroded.
- Safety against vibration: A decent latch will stay shut through vibration, brush, and general trail abuse without popping open on its own.
- Cycle life: On quality hooks, that latch can be opened and closed thousands of times without getting sloppy or warped. Cheap latches loosen fast and stop lining up.
Load Angle Effects on WLL
Hooks are built for a straight-line pull loading the center of the hook bowl. The further you push the load toward the side or tip, the less you can safely pull before things start to bend.- Let the load sit deep in the hook bowl, nowhere near the latch or the point of the hook.
- Use a working habit of keeping the line within roughly 30° of straight. Beyond that, your actual safe capacity drops quickly.
- Reposition the rig, add a snatch block, or change anchor points rather than “making it work” with a bad angle.
Hook vs Soft Shackle: Should You Ditch the Hook?
Soft shackles have exploded in popularity over the last decade. A metal hook is simple and familiar, but it brings weight and the risk of flying hardware if something fails. A soft shackle is easier on gear and people, but it’s unforgiving if you drag it across sharp steel or let it cook on a hot exhaust.Traditional Hook Advantages
- Simple to use: You can glance at a hook and instantly tell if it’s clipped where it should be. There’s not much mystery in how it closes.
- Fast to connect: With a decent spring latch, it takes seconds to grab a shackle or recovery tab and get tension on the line, which matters when you’re winching in mud, rain, or snow.
- Durable in abrasion: Steel will shrug off the rough edges and beat-up recovery points you see on older rigs and rusty trailers. A little gouging on the hook body generally doesn’t kill it immediately.
- Works with steel cable or synthetic: As long as the eye is the right size and finish for your termination, a clevis hook doesn’t really care what’s behind it.
Soft Shackle Advantages
- Weight & safety: A soft shackle weighs almost nothing compared to a hook. If a line breaks under load, there’s far less mass flying through the air toward someone’s windshield or ribcage.
- Flexibility: Soft shackles can wrap around axles, sliders, odd-shaped recovery points, and trees where a rigid hook just won’t sit correctly.
- No metal-on-metal clank: They’re quieter, and they won’t chew up your powder-coated bumper or your buddy’s fancy recovery point.
- Great with closed links: Systems built around a Factor 55 FlatLink or similar closed winch link are designed with soft shackles in mind, giving you a fully closed, clean connection.
Cost, Durability & Install Complexity
- Cost difference: A quality soft shackle usually runs in the same ballpark as a decent clevis hook. It’s cheaper than jumping straight into a premium closed winch link plus soft shackle combo, but still an upgrade over bargain-bin hardware.
- Durability: In straight pulls with smooth gear, soft shackles can last a long time and handle many recovery cycles. They don’t like exposed threads, sharp edges, or prolonged exposure to UV and mud without cleaning.
- Installation: Switching to a soft shackle-based system is dead simple if you already have a thimble eye or closed link on the rope. No swaging, no special press. You just feed the loop and set the knot properly.
When You Should Consider Ditching the Hook
You might want a soft shackle alternative instead of a metal hook if any of this sounds like you:- You run synthetic rope and your main concern is keeping spectators, kids, and spotters as safe as you can during recoveries.
- You’re often wrapping around trees, sliders, and random anchor points where a hook never sits quite right or always ends up side-loaded.
- You’ve already upgraded to a closed link like a Factor 55 FlatLink and want a fully hookless system that keeps everything closed and tidy.
How to Safely Attach a Hook to Winch Cable
 The way you terminate the line is just as important as the hook you choose. With steel cable you’re almost always dealing with a swaged end loop and thimble. With synthetic rope you’re working with a thimble eye and a pin-friendly hook or closed link. Get the termination right, or the hook won’t be the part that fails first. If you want more detail on crimps, ferrules, and terminations, take a look at our guide on hook attachment to cable where we break those down step by step.
Steel Cable (Swaged End Loop Method)
On steel cable, the standard setup is a loop of cable around a thimble, locked in place with a swaged ferrule. The hook then rides on that thimble. It’s a proven system, but only if it’s swaged correctly.- Prepare the cable end:
- Unspool enough cable so you can work comfortably without fighting spring tension.
- Run a glove over the last several feet of cable. You’re feeling for broken strands, flat spots, or kinks.
- If you find damage, cut back to clean cable using proper cable cutters or a cut-off wheel, not side cutters that crush the strands.
- Install thimble and ferrule:
- Slide the correct-size ferrule crimp onto the cable before you form the loop.
- Set a steel thimble that matches both the cable size and the hook eye size where you want the loop to end.
- Wrap the cable around the thimble and feed the tail back through the ferrule so you get a snug loop around the thimble.
- Swage the ferrule:
- Use a swaging machine or hand swager that is rated for your cable diameter and ferrule type.
- Follow the manufacturer’s crimp pattern. Usually that means multiple compressions spaced along the ferrule, not just one big squeeze in the middle.
- A correctly swaged termination often keeps 90–100% of the cable’s strength. A sloppy crimp does not.
- Attach the hook:
- Slip the hook’s eye or clevis jaw over the thimble so the thimble protects the cable from rubbing steel-on-steel.
- Install the clevis pin, then secure it with the correct cotter pin safety or threaded nut and retainer.
- Make sure the hook can pivot freely on the thimble. If it binds, you have the wrong size hardware.
- Verify termination:
- Check the cable termination method visually for gaps, crooked crimps, or cracks in the ferrule.
- Look for loose or sticking cable strands at the exit of the ferrule. Those are early signs of a bad swage.
Synthetic Rope (Thimble Eye & Clevis Pin)
Synthetic rope needs a gentler touch. Crushing, sharp bends, and heat are what kill it. That’s why most setups use a spliced thimble eye and a hook or closed link that attaches with a smooth pin.- Inspect the rope:
- Look over the last several feet for fuzzy, abraded fibers, glazing from heat, or weird discoloration.
- If the rope looks cooked or heavily worn near the end, cut it back and re-splice according to the rope manufacturer’s instructions.
- Form or verify the eye splice:
- Most winch ropes show up with a pre-spliced thimble eye. Confirm it’s tight and well dressed around the thimble.
- If you’re making your own splice, follow the recommended bury length, often 40–72 rope diameters. Short splices don’t hold rated strength.
- Attach the hook or link:
- Line up the thimble eye in the rope with the clevis hook or a Factor 55 style link.
- Slide the pin through the thimble and the hook/link body, making sure you’re not pinching fibers.
- Lock the pin in with whatever retention system it uses, whether that’s a snap ring, bolt, or lock nut.
- Protect the rope:
- Deburr and smooth any sharp edges on the hook eye or link. Synthetic does not like sharp corners or burrs.
- Use a rubber boot or hook sleeve to cover the thimble and splice area when the line is stowed so dirt, UV, and rocks don’t chew it up.
How to Replace a Winch Cable Hook
 Swapping a winch hook isn’t hard, but it does need attention to detail. You’re going to remove the old hookup, pick a replacement that actually matches your line and winch rating, put it on using the right termination, then verify under a light test pull that everything stays where it belongs.
Removing the Old Hook
The hook removal cable end process changes slightly depending on how the hook is mounted now. Don’t rush this part, especially on steel cable that still has tension memory in it.- Clevis pin hook:
- Unspool enough line so the hook is on the ground or at least not hanging under tension, and chock the vehicle if needed.
- Pull the cotter pin or retaining clip from the clevis pin using pliers.
- Support the hook with one hand and tap the clevis pin out with a punch or small hammer so it doesn’t drop unexpectedly.
- Inspect the thimble eye or rope/cable loop for wear, flat spots, or cracks in the thimble.
- Swaged or permanently crimped hook:
- Unspool the cable until the hook rests fully relaxed. Tie off or clamp the standing part so it can’t recoil.
- Cut the hook away behind the swage using the right cutting tools so you don’t fray the remaining cable.
- If you want to keep as much cable length as possible, a rigging or crane shop can unswage and rework the ferrule, but that’s specialized work.
- Synthetic rope with soft shackle or closed link:
- Open the soft shackle or pull the pin on the closed link so there is zero tension on the parts.
- Slide the hook or link off the thimble eye and inspect the rope and thimble for wear.
Fitting the New Hook
Here’s how to make sure the replacement is a real upgrade and not a step backward.- Measure the cable or rope:
- Measure the line diameter with calipers or a good ruler, not by eyeballing it.
- Use a hook sizing chart to pick a hook with the right eye size and clevis width for that diameter and thimble size.
- Select the hook type:
- For trail and general off-road use, a quality clevis hook or a closed link plus soft shackle covers almost everything.
- For tow trucks, work trucks, or cranes, a swivel hook that meets ASME B30.10 usually makes more sense.
- Confirm the WLL is at least your winch rating, and for heavy use stick with Grade 43 or higher hardware.
- Choose termination method:
- Steel cable: Use a swage/ferrule loop around a thimble, then mount the hook on the thimble.
- Synthetic rope: Use a properly spliced thimble eye plus clevis pin or a closed winch link rated for winching loads.
- Your cable termination method should hold 80–100% of the line’s strength and be something you or a shop can execute correctly.
- Attach and secure:
- Install the hook onto the thimble or rope eye without forcing anything into a bind.
- Use the supplied pin or shackle, seat it fully, then lock it with its cotter pin, snap ring, or nut and retainer.
- Check that the hook can line up with the direction of pull without twisting the eye or thimble.
- Perform a load test:
- Hook to a solid anchor and slowly spool the winch in while the vehicle is on level ground or a gentle incline.
- Listen and watch for any shifting of the thimble, ferrule, or splice. If anything rotates, creaks, or pulls out of line, stop and inspect.
- After the test, look closely at the crimp or splice for new gaps or deformation.
Hook Safety Rules: Latch, Throat Angle & Load Direction
Most hook failures I see aren’t because the hook was too weak. They come from bad rigging. Wrong angle, load on the latch, junk anchor points. A few simple habits with latch use, throat angle, and load direction go a long way toward keeping your hardware in one piece.Latch Use & Verification
- Before you pull, watch the latch and make sure the latch safety is fully clicked shut, not hanging half open or stuck on paint.
- Keep the actual pull seated in the hook bowl. If the latch is what’s keeping the gear in place, your rigging is wrong.
- If the latch is bent, cracked, slow to move, or doesn’t line up with the hook tip, treat that as a sign the hook has been abused. Replace the latch kit or the hook itself.
Hook Throat Angle & Side Loading
- Align the winch line with the spine of the hook so the load comes straight into the hook bowl.
- Side loading or tipping the hook so the load is at the point or throat can drop your actual safe capacity way under the printed winch hook WLL.
- If the hardware you’re clipped into is forcing the load up against the hook throat width or latch instead of the bowl, you need a different rigging setup or anchor point.
Correct Load Direction
- Use snatch blocks, tree straps, and repositioned anchor points so the hook isn’t twisted, pried, or loaded on the wrong axis.
- Hook only to rated recovery eyes, frame-mounted points, or gear that’s clearly rated for recovery. Bumpers made of thin sheet metal aren’t recovery points, no matter what the holes look like.
- Never hook the tip of the hook back into the winch line itself. That chews up cable or rope and misloads the hook on its weakest region.
Common Catastrophic Failure Modes
Here’s how things usually go bad when people ignore the basics:- Hook opening/bending: Overload or nasty side loads slowly pry the hook open. It might not fail the first time, but once it’s stretched, the next serious pull can send everything flying.
- Latch failure: A weak or damaged latch lets the connection slip out under tension. When that happens mid-pull, the line whips back hard.
- Cable termination failure: A bad swage, crimp, or splice lets go before the hook sees full load. You’ll end up with a hook attached to a thimble and not much else.
Winch Hook Storage: Preventing Corrosion & Accidental Deployment
How you store the hook matters more than people think. A rusty latch, a hook banging into the fairlead, or a loose line that bounces free on the highway can all come back to bite you. Spend a minute every trip putting it away correctly.Protecting Against Corrosion
- Slip a rubber boot or hook sleeve over the hook and thimble to shield them from road spray, salt, and gravel.
- After salty winter roads or beach trips, rinse the hook, thimble, and fairlead thoroughly, then let them dry before you snug the line back up.
- Use a light corrosion inhibitor or oil film on steel hooks in coastal or high-salt regions so rust doesn’t eat into the latch pivot or hook throat.
Preventing Accidental Deployment
- Use a dedicated hook storage stopper or bumper mount to keep the hook seated away from sharp fairlead edges.
- Keep a little tension on the winch line when stowed. Not so much that you pre-load the hook, just enough that it can’t bounce around.
- Verify the latch is closed and orient the hook so it isn’t hanging where it can grab brush, straps, or a parking barrier.
Storage Environment & Inspection
- If you pull your winch gear off the vehicle, store it somewhere dry and shaded to protect synthetic lines, soft shackles, and rubber boots from UV and moisture.
- Limit big temperature swings if you can. Warm days and cold nights trap condensation on steel parts and speed up corrosion.
- Every few months, or after any big recovery, inspect the hook, latch, pin, and termination for cracks, heavy rust scale, and bends. Catching damage early is cheaper than replacing broken winch line and bodywork.
Best Winch Hooks 2026
The “best winch hook” for 2026 really depends on whether you want to keep a classic clevis, move up to a swivel style, or ditch the hook entirely and go closed-link. These picks stand out because they’re proven under real use, not just because they photograph well on social media.Factor 55 FlatLink (Closed System, Soft Shackle-friendly)
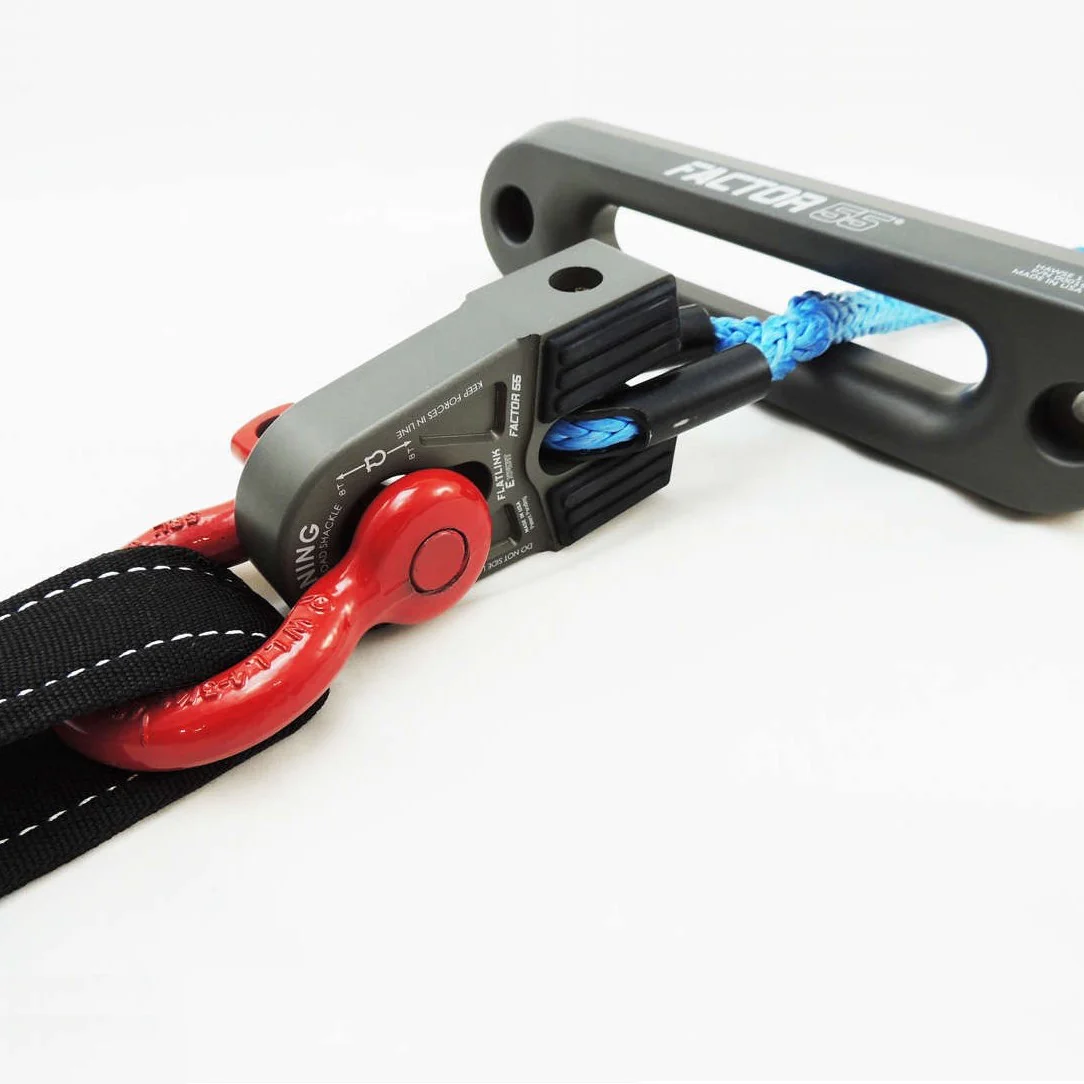 The Factor 55 FlatLink isn’t a hook at all. It replaces the open hook with a shackle-style closed mount. It’s become almost standard equipment on serious synthetic rope builds.
- Type: Closed winch link (hook replacement)
- Compatibility: Works with standard bow shackles and high-quality soft shackles.
- Capacity: Common models are in the 16,000–24,000+ lb range, which easily covers most 8k–12k winches.
- Benefits: Fully enclosed connection, CNC billet construction, strong finish for corrosion resistance, and a flat face that rests nicely against your fairlead when paired with a stopper.
- Best for: Modern off-road rigs running synthetic rope that want a clean, fully “hookless” system for safer, more controlled rigging.
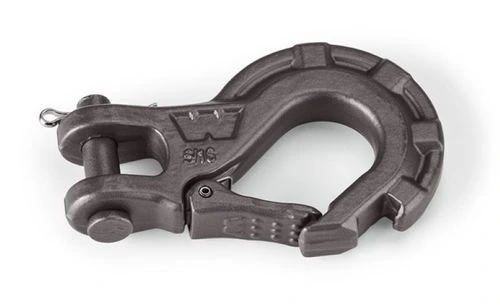
Warn Hook (OEM-Style Clevis Hook)
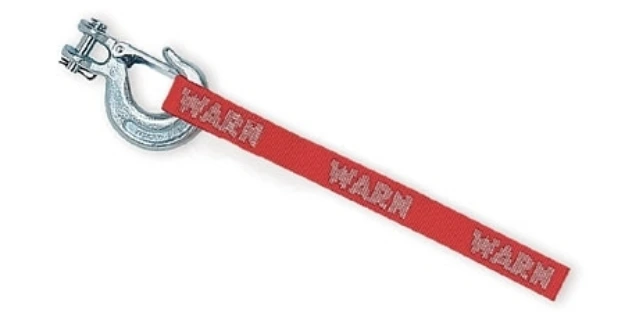 Warn hooks are what many factory and dealer-installed winches ship with, and they’re a solid baseline for most trucks and SUVs.
- Type: Clevis hook with a spring-loaded safety latch.
- Capacity: Typically matched to the winch, often in the 8,000–12,000+ lb WLL range on common models.
- Corrosion resistance: Usually plated or powder-coated to handle rain, mud, and moderate salt exposure.
- Advantages: Easy direct replacement for many Warn winches, proven in real-world recovery, and you can get latch kits and pins without buying a whole new hook.
- Best for: Everyday off-roaders and work trucks that want a straightforward, reliable hook that “just works” with their Warn winch.
Crosby Hook (Heavy-Duty Industrial & Recovery)
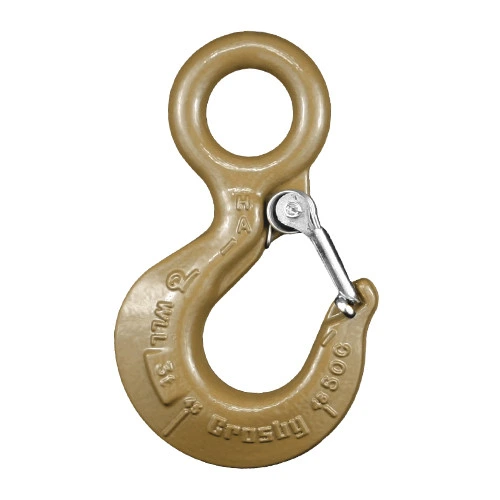 Crosby hooks are what you see on cranes, rigging trucks, and professional recovery gear. Their ratings are conservative, and they’re built with ASME standards in mind.
- Type: Available as clevis and swivel hook options, often in Grade 80 or higher lifting-rated versions.
- Capacity: Very wide range, with common off-road and tow applications running in the 8,000–20,000+ lb WLL bracket.
- Standards: Designed and marked for ASME B30.10 applications, which gives you clear guidance on use and inspection.
- Advantages: Robust forging, clear permanent markings, and long-term reliability for serious, daily-use winching and lifting.
- Best for: Heavy recovery rigs, tow operators, and anyone who wants industrial-grade rigging on the front of their truck instead of generic off-brand hardware.
Expert Tips When Choosing a Hook in 2026
- Match WLL and ASME grade to both your winch rating and how you use snatch blocks. A double-line pull can effectively double the load on the hook.
- Check that the hook’s eye shape and finish are friendly to synthetic rope thimbles if you’re not on steel. Sharp inner edges and synthetic rope don’t mix.
- Look for brands that sell latch kits, pins, and small parts. That way, a bent latch doesn’t mean throwing out an otherwise good hook.
FAQ: Winch Hooks, Safety & Soft Shackles
Here are straight answers to the winch hook questions that come up in the shop and on the trail all the time.How Do I Size a Winch Hook Correctly?
Match the hook’s WLL to at least your winch’s maximum line pull, then confirm the eye or clevis dimensions match your cable or rope diameter and thimble size. Use a detailed hook sizing chart and double-check the markings on the hook body before you hit “buy.”How Can I Tell If My Hook Latch is Safe to Use?
Flip the latch open and let it go. It should snap fully closed on its own and line up with the hook tip without rubbing or binding. If it’s cracked, bent, loose at the pivot, or doesn’t fully close, swap in a new latch kit or replace the hook before your next real recovery.How Often Should I Replace My Winch Hook?
There’s no fixed timeline. Replace it any time you see stretching, bending, deep pitting rust, cracks, or latch damage. Tow operators and commercial rigs might replace hooks proactively every few years. Weekend wheelers can run them longer as long as inspections stay clean.Are Soft Shackles Really Safer Than Hooks?
In many situations, yes. Soft shackles don’t carry the same kinetic energy a lump of steel does if something lets go, and they’re incredibly versatile. But they only stay safer if you protect them from sharp edges, abrasive surfaces, and heat. Used with a proper thimble or closed link, they’re an excellent and often safer alternative on synthetic rope systems.What’s the Best Way to Store My Winch Hook?
Set the hook into a proper hook storage mount or stopper, put a bit of tension on the line, and cover the hook with a rubber boot or sleeve. Rinse off mud and salt, let it dry, then stow it. Give it a quick rust and damage check every so often.Can I Use the Same Hook for Steel Cable and Synthetic Rope?
Often you can, but the attachment method is different. Steel usually needs a swaged or ferruled termination. Synthetic relies on a thimble eye and pin. Make sure the hook eye radius and finish won’t cut synthetic fibers, and don’t use hardware with rough or sharp interiors on rope.What is ASME B30.10 and Why Does It Matter?
ASME B30.10 is a hook standard used in the lifting and rigging world. It covers hook design, material, load ratings, and inspection rules. Hooks designed around that standard give you a predictable safety margin and clear criteria for when it’s time to retire them.Is a Swivel Hook Better Than a Clevis Hook?
Choosing a swivel hook vs clevis hook is all about use case. Swivel hooks help the load align naturally and reduce twist, which is great in industrial and heavy recovery work. They cost more and are often overkill for basic trail use. For most off-roaders, a stout clevis hook with a good latch is plenty and leaves more budget for other recovery gear.Can I Attach a Hook Directly to a Tow Strap?
You can, but it’s usually smarter to hook into a rated shackle or recovery point and then connect your strap there. That keeps the hook correctly oriented and reduces weird angles on the strap loop. For a full breakdown, see our guide on hook attachment to synthetic strap and proper strap selection.Final Summary & Next Steps
The hook or hookless soft shackle setup you run is a core part of your recovery system, not an afterthought. Get an ASME-compliant hook with enough WLL, size it correctly from your line diameter and a proper chart, pair it with a solid termination, and treat latch use, load angle, and storage as non-negotiable habits. Next steps:- Look over your current winch line, hook, and termination. Check for damage, rust, bent parts, or mismatched sizing.
- Decide if you’re sticking with a traditional clevis or swivel hook or moving to a soft shackle + closed link hookless setup.
- Head over to /winch/accessories/hooks/ for specific product picks, setup examples, and deeper guides on each style.
Part of the Winch Accessories guide. Explore more guides in this cluster for How to Install a Winch on Your Jeep coverage.
🔧 How I Rate My Winch Hook Every Trip
Start-of-season ritual: I remove the winch hook and measure the throat opening with a caliper, compare to factory spec, check latch spring with a gram scale (needs 3–5 lb to compress). If throat has grown by more than 1/16″ or latch spring dropped below 3 lb, the hook is retired.
Replaced two hooks this way over the last 6 years. Never had a hook failure in service. The 10 minutes of inspection each spring is the cheapest safety investment I make.
