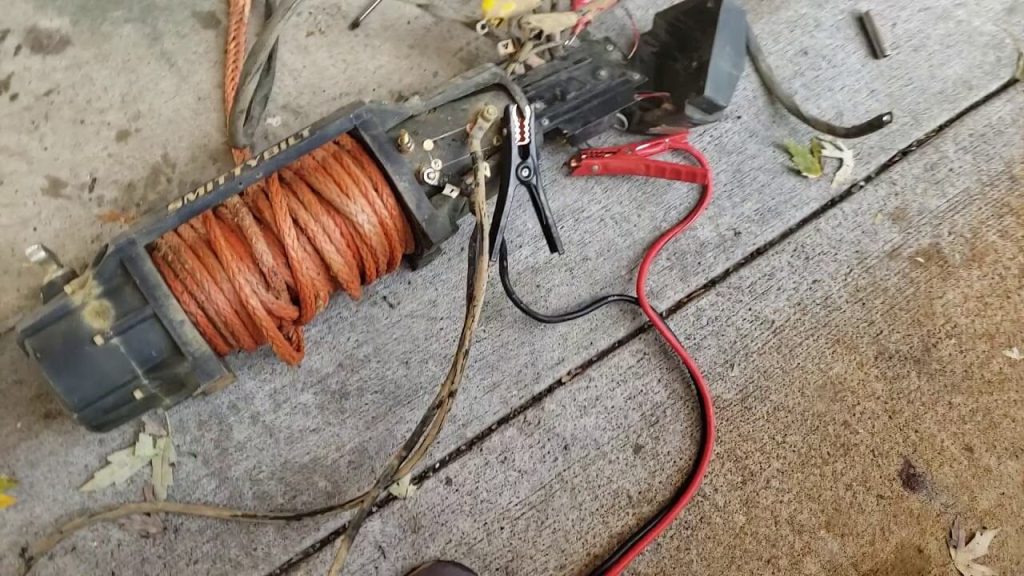
The process of clocking a winch motor. Clocking isn’t about time; it’s about adjusting the motor’s position for optimal performance and accessibility.
This article is your go-to guide for understanding and executing this vital task.
What is Clocking in Winch Motors?
Clocking in winch motors is all about adjusting the orientation of the motor in relation to the winch drum.
Why do this?
It’s mainly for ease of access and efficient cable management. Imagine trying to operate a winch with the motor positioned awkwardly, making it hard to reach the controls or causing the cable to wind unevenly.
That’s what clocking aims to fix.
Tools and Materials Needed
To clock your winch motor, you’ll need some basic tools: a wrench set, screwdrivers, and possibly a torque wrench. Safety gloves and goggles are also recommended to protect yourself during the process. Remember, safety first!
Step-by-Step Guide to Clocking a Winch Motor

- Disconnect Power:
- Why: This is a critical safety measure to prevent any accidental activation of the winch while you’re working on it.
- How: Locate the power source of your winch motor. If it’s electric, disconnect it from its power supply. For hydraulic models, ensure that the hydraulic system is depressurized and disconnected.
- Tip: Tag the power switch or leave a note to ensure that no one inadvertently reconnects it while you’re working.
- Remove Housing:
- Why: The housing protects the internal components of the winch motor. Removing it gives you access to the parts necessary for clocking.
- How: Use the appropriate screwdrivers or wrenches to remove the bolts or screws holding the housing in place. Keep track of all hardware and parts removed.
- Tip: Take pictures or notes of the housing assembly before dismantling. This can be a helpful reference when reassembling.
- Adjust the Motor:
- Why: This is the actual process of clocking. By adjusting the motor’s position, you’re ensuring better cable alignment and access to the motor’s controls.
- How: Locate the bolts or screws that anchor the motor to the winch. Loosen them—but don’t remove them completely. Carefully rotate the motor to the desired position. The exact positioning depends on your specific needs, like the direction of cable entry and exit, or ease of access to motor controls.
- Tip: Some winch models have pre-defined clocking positions with corresponding notches or markings. Use these as a guide if available.
- Secure and Test:
- Why: After adjusting, it’s crucial to secure the motor to prevent it from moving during operation. Testing ensures everything works as intended.
- How: Tighten the bolts or screws you previously loosened. Make sure they’re snug but not overly tight, as this could damage the motor or its mount. Once secured, reconnect the power source. Perform a test run by operating the winch under a light load to check for proper function and motor alignment.
- Tip: Listen for any unusual noises during the test run. If something sounds off, stop immediately, disconnect power, and recheck your adjustments.
Common Challenges and Troubleshooting
- Stiff Bolts:
- Challenge: Over time, bolts that secure the winch motor can become stiff or rusted, making them hard to loosen.
- Solution: Apply a penetrating oil to the bolts. This oil seeps into tiny crevices and loosens the rust or grime binding the bolts. Let the oil sit for a few minutes before attempting to loosen the bolts again.
- Tip: If the bolt is still stuck, try gently tapping the head of the bolt with a hammer to break the rust seal. Then, attempt to loosen it again with a wrench.
- Misalignment Issues:
- Challenge: Proper alignment of the winch motor is crucial for its efficient operation. Misalignment can lead to uneven cable wear and operational difficulties.
- Solution: After adjusting the motor’s position, ensure it sits flush against the mounting surface. Check that the motor is not tilted or skewed, as this can affect how the cable winds on the drum.
- Tip: Use a level to check the motor’s position. Adjust as necessary until the motor is perfectly horizontal or in the desired orientation.
Conclusion
Properly clocking your winch motor is essential for its efficiency and your convenience. With this guide, you’re well-equipped to adjust your winch motor like a pro. Remember, regular maintenance, including clocking, is key to keeping your winch motor in top shape.

