Regular testing of your winch is not just a matter of performance; it’s a critical safety practice.
In this article, we’ll be focusing on how to test your motors thoroughly to ensure they’re ready when you need them most.
Pre-Testing Preparations
Safety First

Before we embark on the testing journey, safety is paramount. Always wear protective gloves and eye gear.
Ensure that your winch is anchored to a stable point that can handle the load. Remember, the forces involved in winching are immense, and safety should never be compromised.
Gather Tools

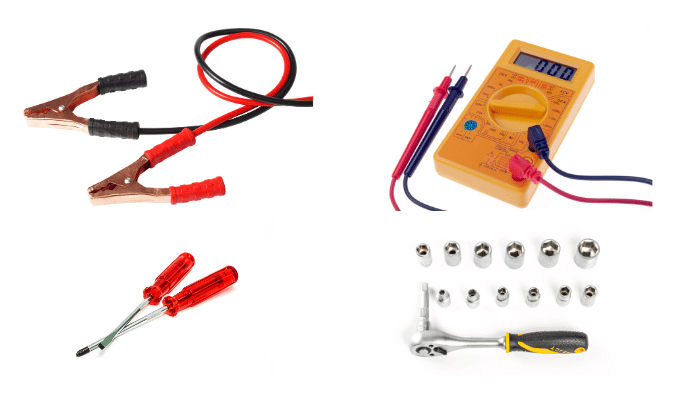
You’ll need a few tools for this task: jumper cables, a reliable multimeter, various screwdrivers, and a socket wrench.
These tools will help you test the electrical and mechanical aspects of the winch effectively.
Inspect the Winch
A visual inspection can reveal a lot. Look for signs of damage, corrosion, or loose connections that could affect performance.
Don’t forget to examine the wire rope. Fraying or cuts can be dangerous and should be addressed immediately.
How Does a Winch Motor Work
Before testing a winch motor, its essential to know how it works. A winch motor is a key component of a winch, which is a device used for pulling or lifting heavy objects. Here’s a simple explanation of how it works:
- Electric or Hydraulic Power: The winch motor can be powered either by electricity or hydraulics. An electric winch motor uses electricity from a battery or power source, while a hydraulic winch motor gets power from a hydraulic system, usually connected to a vehicle’s power steering pump.
- Turning Motion into Pulling Power: The motor generates rotational force, known as torque. This force turns a drum or spool around which a cable or rope is wound.
- Control Mechanism: The winch is operated using a control mechanism, which can be a switch, a remote control, or a lever. When you activate the control, it sends a signal to the motor to start turning.
- Winding the Cable: As the motor turns the drum, the cable winds around the drum. If the cable is attached to a heavy object, this winding action pulls the object towards the winch. The power of the motor determines how much weight it can pull.
- Gear System: Most winches have a gear system that increases the pulling power. The gears slow down the speed at which the drum turns, but they increase the force, allowing the winch to pull heavier objects.
- Braking System: There’s also a braking system in the winch. This prevents the drum from turning when the motor is not running, holding the heavy object in place.
- Releasing the Cable: When you need to release the cable, the motor either turns in the opposite direction or disengages from the drum, allowing the cable to unwind.
Basic Winch Functionality Test
Testing the basic functionality of a winch is a critical step in ensuring its reliability and safety. This process involves three key stages:
- Connecting the winch
- Operating the controls
- Checking the line speed.
Let’s delve into each of these stages in detail.
Connect the Winch
The first step is to establish a connection between the winch and a power source. This power source could be a dedicated winch battery or a suitable charger.
The connection is typically made using jumper cables, which are ideal due to their thick gauge and durability and are capable of handling the high current demands of a winch.
Key Considerations:
- Power Source: Ensure that the battery or charger is capable of delivering the necessary voltage and current. A weak or inappropriate power source can lead to inaccurate test results.
- Cable Connection: Check that the jumper cables are securely attached to both the winch and the power source. Poor connections can result in intermittent power and can be dangerous.
- Safety: Always double-check that the area around the winch is clear of obstructions and that the winch cable or rope is neatly spooled. Loose clothing and jewelry should be avoided to prevent any accidents.
Operate the Controls
Once the winch is connected to the power source, the next step is to test its controls. This involves using the remote control or the manual switch to operate the winch.
The goal here is to test the winch’s ability to spool in and spool out the cable or rope, which corresponds to the forward and reverse functions of the winch.
What to Look For:
- Response Time: The winch should respond promptly to the controls. Any delay might indicate an issue with the control mechanism or the electrical system.
- Operation Smoothness: The winch should operate smoothly without any jerking movements. Jerking can be a sign of mechanical issues within the winch or problems with the cable/rope.
- Unusual Noises: Listen for any grinding, clicking, or whining sounds. These noises can be indicative of internal wear or damage, such as worn gears or bearings.
Check the Line Speed
The final step in the basic functionality test is to measure the line speed of the winch. This is done with no load attached to the winch.
Using a stopwatch, time how long it takes for the winch to spool a set length of cable or rope.
This measurement is then compared to the line speed specifications provided by the manufacturer.
Procedure:
- Measurement: Choose a specific length of cable or rope (e.g., 10 feet) and use the stopwatch to time how long the winch takes to spool this length.
- Comparison: Refer to the winch’s manual or manufacturer’s specifications to find the standard line speed. Compare your measured time to this standard.
- Analysis: If your winch is significantly slower than the specified speed, it could be a sign of issues such as a weakening motor, battery problems, or mechanical resistance within the winch.
By thoroughly conducting these tests, you can assess the basic functionality of your winch.
This process not only ensures that the winch operates as expected but also helps in identifying potential issues that might need further investigation or professional attention.
Remember, a well-maintained winch is a reliable partner in your off-roading adventures.
In-Depth Winch Testing
In-depth winch testing is crucial for ensuring that your winch can handle the rigors of real-world use.
This stage involves three specific tests: the Load Test, the Stall Test, and the Solenoid Test. Each test targets different aspects of the winch’s functionality and integrity.
Load Test
The Load Test is designed to simulate the conditions under which the winch would be used in a typical recovery situation. It’s a practical way to assess the winch’s performance under stress.
Procedure:
- Secure Anchoring: First, securely anchor the winch. This could be to a solid, immovable object or a properly anchored vehicle. The anchor point must be stable and strong enough to withstand the forces of the winch.
- Attach a Load: Connect the winch to a heavy object, such as a vehicle. This load should ideally be close to the winch’s maximum capacity to thoroughly test its capabilities.
- Gradual Tension: Slowly apply tension using the winch. This gradual increase allows you to observe how the winch behaves as the load increases.
- Observation: Pay close attention to the winch during this process. Listen for any grinding noises, which could indicate gear issues. Also, feel for excessive heat buildup in the winch motor and housing, as this could signal overexertion or electrical problems.
Stall Test
The Stall Test is a more rigorous assessment, pushing the winch to its limits to ensure it can handle its rated capacity without faltering.
Procedure:
- Maximum Load: Engage the winch under a load that is as close as possible to its maximum rated capacity. This test is about pushing the winch to its operational limit.
- Monitor Amperage: Use a multimeter to measure the amperage draw of the winch during operation. This reading should be compared to the winch’s rated amperage.
- Safety Note: It’s crucial to ensure that the winch does not exceed its rated capacity in terms of amperage draw. Overloading the winch can cause significant damage to the motor and electrical components.
Solenoid Test
The Solenoid Test focuses on the electrical aspect of the winch, particularly the solenoid, which is a key component in the winch’s control system.
Procedure:
- Locate the Solenoid: Find the solenoid in your winch setup. It’s usually a small, box-like component with several wires connected to it.
- Voltage Check: Use a multimeter to check for voltage at the solenoid’s terminals. This test determines whether the solenoid is receiving power from the battery.
- Diagnosis: If there’s voltage at the terminals but the winch isn’t operating, it’s likely that the solenoid is faulty. The solenoid is responsible for directing power to the winch motor, and its failure means the motor won’t run even if there’s power available.
By conducting these in-depth tests, you can gain a comprehensive understanding of your winch’s condition and capabilities.
These tests are essential for ensuring that your winch will perform reliably when you need it most, especially in challenging recovery situations.
Remember, regular testing and maintenance are key to the longevity and effectiveness of your winch.
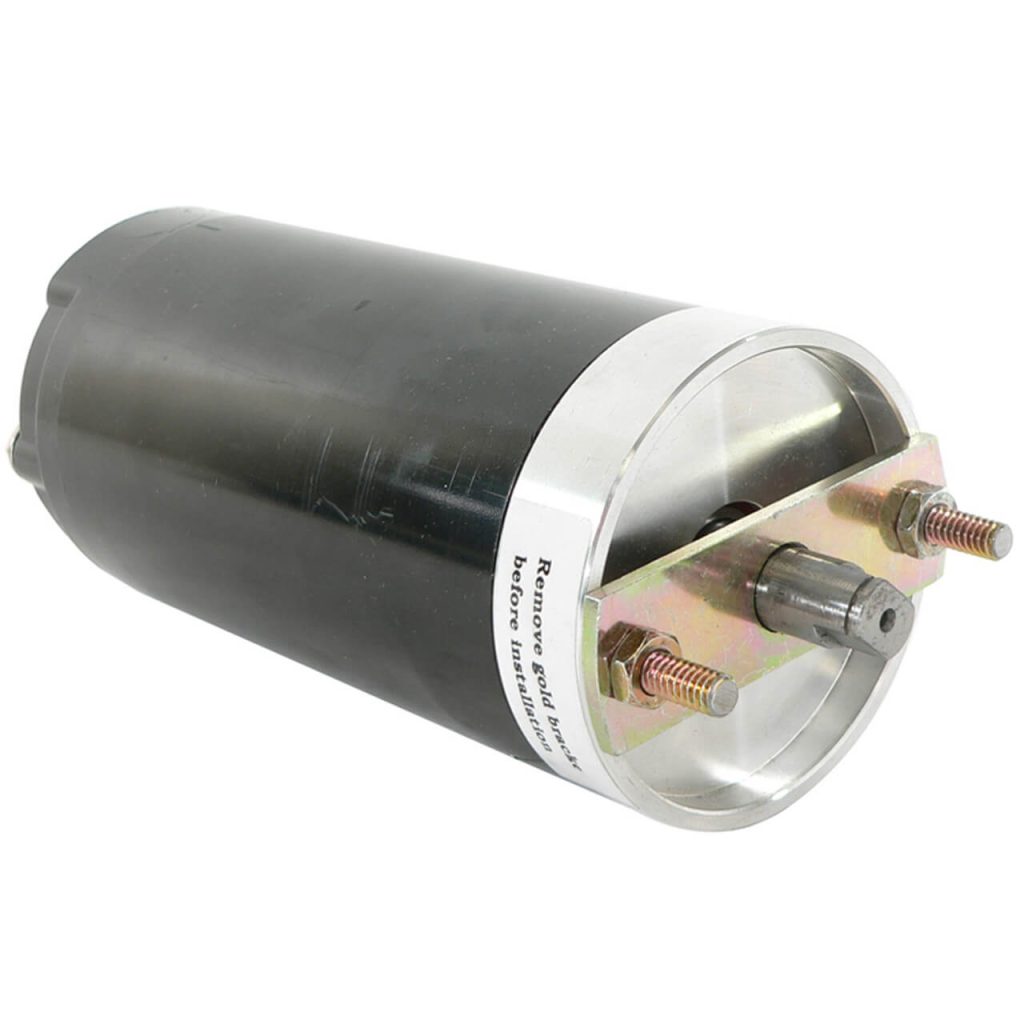
How to Test a 2-Post Winch Motor

- Visually inspect the motor. Look for any cracks, damaged wires, or leaks. Make sure the mounting hardware and connections are tight.
- Check the brushes and commutator. The brushes should be free of debris and make good contact with the commutator. The commutator should be clean and smooth.
- Check the winch brake. Make sure it engages and releases properly.
- Check gear oil level if it’s an enclosed gear case. Top up if low.
- Connect a voltmeter to the motor terminals. Operate the winch controls and observe the voltage. It should show approx 12V when operating normally.
- Use an ammeter in series with the motor to check the load amp draw under no load and under load conditions. Compare to motor specs.
- Look/listen for smooth operation without excessive noise or vibration when operating.
- Operate under load in both directions while observing the operation. Listen for grinding, whining noises that may indicate a problem.
- Check connections for heat during testing that may indicate high resistance.
- Brake winch load after each test operation. The brake should be held firmly without slipping.
Important Tips
- Don’t Overload: Don’t test the winch with a load heavier than its rated capacity.
- Battery Condition: Ensure the battery is in good condition and fully charged.
- Safety Checks: Be cautious of moving parts and electrical connections during testing.
- Manufacturer’s Instructions: Always refer to the winch manufacturer’s guidelines for specific testing procedures.
Following basic checks like these will help evaluate condition and performance of a 2 post winch motor.
Troubleshooting Tips for Winch Issues
When it comes to maintaining a winch, encountering issues like slow operation, overheating, or power failures is not uncommon.
Understanding how to troubleshoot these problems can save you time and ensure your winch is ready for action when needed.
Let’s explore some common winch issues and how to address them.
Slow Operation
A winch operating slower than usual can be frustrating and may indicate several underlying issues.
Possible Causes and Solutions:
- Power Source Issues: A weak or undercharged battery can lead to slow operation. Ensure your battery is fully charged and in good condition.
- Electrical Connections: Corroded or loose connections can impede power flow. Check all electrical connections, cleaning and tightening them as needed.
- Worn Out Motor: Over time, the winch motor can wear out, reducing its efficiency. If the motor shows signs of wear or damage, it may need to be replaced.
- Mechanical Resistance: Check for any obstructions or damage to the winch cable or drum. Ensure that the cable is properly spooled and free of kinks or knots.
Overheating
Overheating is a serious issue that can lead to winch failure.
Possible Causes and Solutions:
- Excessive Use: Continuously running the winch for long periods can cause overheating. Allow the winch to cool down periodically during extended use.
- Friction: Check for any mechanical resistance in the winch drum or cable. Excessive friction can generate heat.
- Electrical Issues: Short circuits or overloading can cause overheating. Use a multimeter to check for electrical faults and ensure the winch is not being overloaded beyond its rated capacity.
Lack of Power
If your winch is not receiving power, it won’t operate at all, which can be a major concern, especially in critical situations.
Possible Causes and Solutions:
- Battery Issues: First, check if the battery is charged and functioning properly. A dead or weak battery is a common culprit.
- Faulty Connections: Inspect all connections from the battery to the winch, including the ground connection. Ensure they are secure and free from corrosion.
- Solenoid Problems: A faulty solenoid can prevent power from reaching the winch motor. Test the solenoid with a multimeter, and if it’s defective, replace it.
- Circuit Breakers or Fuses: Check if any circuit breakers have tripped or fuses have blown. These are safety features that cut power in case of an overload.
Knowing When to Seek Professional Help
While many winch problems can be resolved with some basic knowledge and troubleshooting skills, there are situations where professional assistance is necessary.
If you’re facing complex electrical issues, motor problems, or if you’ve tried troubleshooting without success, it’s time to consult a professional.
Winch specialists have the expertise and tools to diagnose and fix intricate issues that might be beyond the scope of typical DIY motor repairs.
Remember, regular maintenance and prompt attention to any signs of trouble can prevent many common winch problems.
By keeping your winch in good working order, you ensure its reliability and longevity, keeping you prepared for whatever challenges you might face on your off-road adventures.
FAQ
Can you use a winch motor on gocart?
Yes, a winch motor can be used to power a go-cart if properly mounted and connected.
How big of a motor for a hydraulic winch
Typically a 5-10 horsepower electric motor is used to power the hydraulic pump on most common hydraulic winches.
How does a dc winch motor work
A DC winch motor works by electric current flowing through its windings to create a rotating magnetic field which causes the armature to spin and create mechanical force to turn the winch drum.
What kind of gearing do winch motors use?
Winch motors typically use planetary or spur gear reduction systems to provide the high levels of torque needed for winch applications.
How Many RPM is Winch Motor
The RPM (revolutions per minute) of a winch motor can vary widely depending on the type and model of the winch. Commonly, winch motors can have RPMs ranging from around 1,500 to 6,000 RPM, but this can differ based on the winch’s size, purpose, and design.
Some heavy-duty winches may have lower RPMs for more torque and power, while lighter-duty winches might have higher RPMs. It’s best to check the specifications of the specific winch model you’re interested in for the most accurate information.
Conclusion
Regular testing is vital for a reliable winch. By following these steps and prioritizing safety, you can ensure your off-road adventures are filled with confidence and not stuck in mud-filled despair.
Remember, a well-maintained winch is your partner in adventure, so treat it with care and respect. Now go forth and conquer those trails!

