Before You Start: Why Installing a Winch on Your ATV Matters
Installing a winch on your ATV can transform your off-roading experience. Whether you’re exploring remote trails or helping recover a stuck vehicle, a winch offers safety and convenience. This step-by-step guide will walk you through the entire installation process with expert-backed tips to make the job easier—even if you’re a beginner.
Quick Answer
How to Install a Winch on an ATV
- Disconnect the battery for safety.
- Mount the winch plate securely to the frame.
- Attach the winch to the plate and align the roller fairlead.
- Route and connect electrical wiring carefully.
- Install the handlebar remote and test the winch.
Ensure all bolts are tightened, wires are secured, and the winch operates smoothly before finalizing the installation.
Before Installation
Before diving into the installation, it’s crucial to prepare. Essential tools include a wrench set, torque wrench, electrical tape, and dielectric grease to secure connections and prevent corrosion.
Gather all the necessary tools specified in your winch’s manual. Identifying the best mounting location is also key; it should be a spot on your ATV/UTV frame that offers stability and is compatible with your winch type. And remember, safety first! Always disconnect your ATV’s battery before starting the installation to prevent any electrical mishaps.
Step-by-Step Installation Guide
1. Preparation: Prep the Front of Your Machine
Before you start, you’ll need to clear the area where the winch will be installed. Clear mud and debris from the mounting area to ensure a secure winch installation. Proper cleaning helps avoid long-term damage to your ATV.
This might mean removing the front bumper, grille, or any other parts that could obstruct the installation of the winch plate.
This step is essential to ensure that the winch plate can be mounted securely and properly, providing a stable foundation for the winch. It’s also a good time to clean any mud or debris from the mounting area to ensure a clean installation.
2. Mounting the Winch Plate: Mount the Winch Plate to Your Machine
The winch plate is the base on which your winch will sit.
Once you’ve prepped the front of your ATV, align the winch plate with the predetermined mounting points on your ATV’s frame. Use the provided bolts to secure the plate in place.
It’s crucial to make sure the plate is aligned correctly and fastened securely to avoid any movement or vibration when the winch is in use.
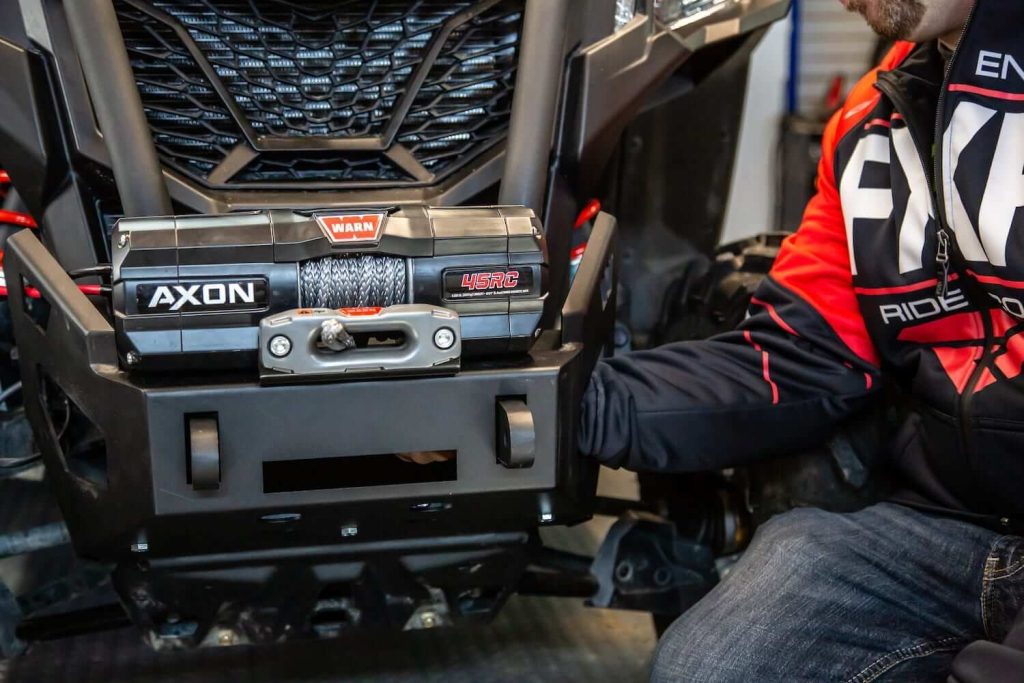
3. Installing the Winch: Mount the Winch onto the Winch Plate
Now, position the winch onto the mounted winch plate, aligning the mounting holes of the winch with those on the plate. Secure the winch to the plate using the hardware provided.
This step is crucial to ensure that the winch is mounted firmly and without any movement, as a securely mounted winch will operate more efficiently and safely.
4. Setting Up the Roller Fairlead and Cable: Attach the Rollers and Winch Cable Hook
The roller fairlead guides the winch cable in and out of the winch, minimizing wear and tear on the cable.
Attach the roller fairlead to the front of the winch plate, ensuring it is positioned correctly to guide the cable straight in and out.
Then, thread the winch cable through the fairlead and attach the hook to the end of the cable.
This setup is vital for the smooth operation of the winch and the longevity of the winch cable.
5. Electrical Wiring:
Run the Electrical Wiring, Including the Handlebar Remote Switch
Begin routing the electrical wiring from the winch towards the ATV’s battery, making sure to route the wires away from any hot spots or moving parts that could cause damage.
Route wires carefully using locking ties to prevent tangling or exposure to heat. This ensures durability and prevents electrical failures during off-road use.
Install the handlebar remote switch by routing its cable to the handlebars, securing it in an easily accessible position. This allows you to operate the winch safely while riding.
Connect the Power Cables from the Solenoid to the Winch
The solenoid is a crucial component that controls the power flow from the battery to the winch. Connect the solenoid’s power cables to the corresponding terminals on the winch, following the manufacturer’s instructions carefully to ensure proper connection.
Hook Up the Power to the Winch from the Battery
Finally, connect the solenoid to the ATV’s battery. Attach the positive and negative wires to the corresponding terminals on the battery, ensuring a secure and correct connection. This step is critical for providing the winch with the necessary power to operate.
6. Finalizing the Installation:
Test the Winch to Make Sure It Works Properly
Before putting everything back together, test the winch to ensure it operates correctly. Use the remote control to extend and retract the cable, checking for smooth operation without any hitches or issues. This test is crucial to ensure that everything is set up correctly and the winch is ready for use.
Mount the Solenoid in a Secure Spot and Zip Tie the Wires
Find a secure and protected location for the solenoid, where it is accessible for maintenance but shielded from the elements and potential damage. Once the solenoid is in place, use zip ties to secure any loose wires, ensuring they are neatly organized and away from any parts that could cause wear or damage. This not only keeps your setup tidy but also prevents any operational hazards.
Additional Tips:
Protect Your Winch’s Electrical Connections
After you’ve completed the installation and tested the winch to confirm it works properly, it’s essential to protect the electrical connections.
Exposure to the elements, such as water, mud, and dirt, can lead to corrosion and moisture buildup, which might compromise the functionality of your winch.
Applying dielectric grease to the electrical connections acts as a protective barrier, preventing corrosion and ensuring a secure, moisture-resistant seal.
This simple step can significantly extend the life of your winch by maintaining the integrity of its electrical connections.
How to Protect Your Winch: After installation, apply dielectric grease to all electrical connections to safeguard against moisture, dirt, and corrosion. Regularly inspect the winch cable for fraying or wear.
Cable Management
Proper cable management is a critical yet often overlooked aspect of winch installation. Poorly routed cables can get caught in moving parts, wear out more quickly, or even pose a safety hazard while riding.
To avoid these issues, take the time to securely fasten and route the cables away from high-heat areas and moving components.
Use zip ties or clips to secure the cables to the ATV’s frame, ensuring they are tight enough to hold the cables in place but not so tight as to damage them.
Proper cable management not only prevents operational hazards but also maintains the aesthetic appeal of your ATV, keeping it looking neat and organized.
Regular Inspection
The initial installation of your winch is just the beginning. The vibration from regular ATV operation can loosen bolts and electrical connections over time, potentially leading to operational failures or safety hazards.
To prevent these issues, it’s important to conduct regular inspections of your winch, particularly after the first few uses. Check all bolts and connections to ensure they are still tight and secure.
If you find any loose components, tighten them immediately. Additionally, inspect the winch cable for signs of wear or damage and replace it if necessary.
Regular maintenance checks will help you catch and address potential problems early, ensuring your winch remains reliable and ready to use whenever you need it.
Also check out the general guide on how to install a winch.
FAQs
What tools do I need to install a winch on an ATV?
A wrench set, torque wrench, dielectric grease, electrical tape, and locking ties are essential for a secure installation.
How do I maintain my ATV winch after installation?
Inspect the winch cable regularly, apply dielectric grease to connections, and clean the winch to prevent dirt buildup.
Can I install a winch on any ATV model?
Yes, most winches are compatible with a variety of ATV models. However, always check the manufacturer’s specifications and ensure you have the correct mounting plate for your ATV.
What is a winch solenoid, and why is it important?
A winch solenoid acts as a relay to transfer power from the battery to the winch. It ensures safe and efficient operation during heavy pulls.
Do I need professional help to install a winch on my ATV?
Not necessarily. With the right tools and step-by-step guidance, most ATV owners can install a winch themselves. However, if you’re unsure, professional installation is recommended.
How do I troubleshoot common winch issues?
Common issues like a stuck cable or power failure can be resolved by checking the wiring connections, inspecting the solenoid, or lubricating the cable. Always consult the winch manual for specific troubleshooting steps.
Conclusion
Installing a winch on your ATV/UTV is a straightforward process that brings numerous benefits, especially for off-road enthusiasts. Installing a winch on your ATV enhances your off-road independence and safety, ensuring you’re prepared for any terrain challenges.
Following the proper installation steps ensures your winch is ready to perform when needed. Remember, a winch not only offers utility but also enhances your off-road experience by providing the safety and independence to tackle challenging terrains with confidence.
Take care of your winch, and it will take care of you on your off-road adventures. Enjoy the newfound freedom and peace of mind your ATV/UTV winch provides.
