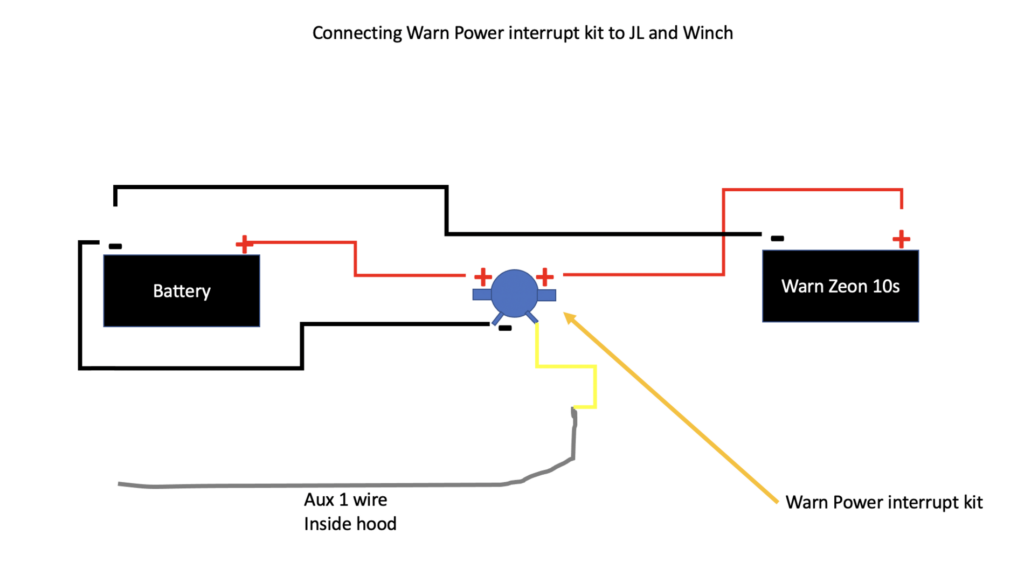
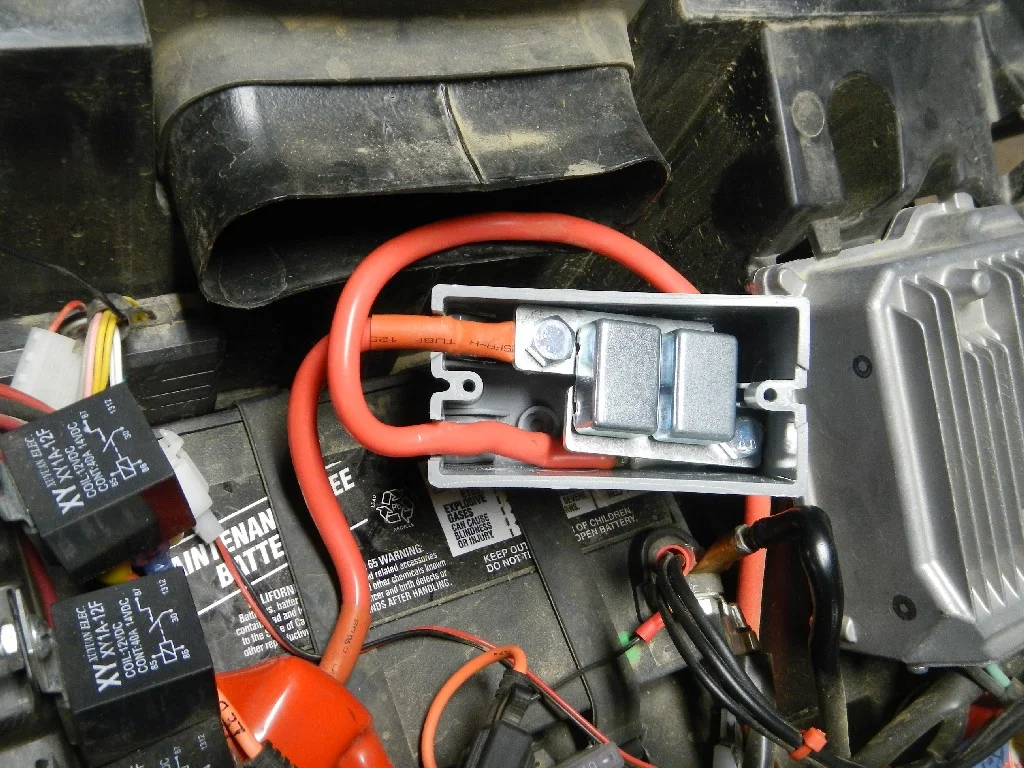
Wiring a 12V winch without a solenoid is easier than it sounds. Whether you’re out on the trail or handling a quick repair, this no-solenoid method can get your winch running with just a few simple connections.
In this guide, you’ll learn a step-by-step method that includes which terminals to jumper, how to reverse polarity, and safety tips like using a 250-amp circuit breaker. This is a reliable backup plan when your solenoid fails—ideal for DIY off-roaders.
Quick Summary: How to Wire a Winch Without a Solenoid
- Step 1: Jumper terminal A to F1.
- Step 2: Connect the battery positive to F2.
- Step 3: Ground the motor case.
- Step 4: To reverse the winch, swap F1 and F2.
- Safety Tip: Always install a 250-amp circuit breaker.
Preparing for the Wiring Process
Before you begin wiring your winch to the battery, make sure you have the following tools and materials on hand:
- Winch wiring kit (includes appropriate gauge wires, connectors, and a circuit breaker)
- Wire strippers
- Crimping tool
- Electrical tape
- Heat shrink tubing (optional)
Safety should be your top priority when working with electrical components. Follow these precautions:
- Disconnect the negative (-) terminal of the battery to prevent short circuits.
- Wear insulated gloves to protect your hands.
- Work in a well-ventilated area and keep flammable materials away.
- Locate the winch motor terminals (usually marked positive (+) and negative (-)) and the battery terminals.
Also check out: Good Winch Solenoid
Step-by-Step Instructions to Wire a Winch Without a Solenoid

Measure and Cut the Wiring
Cut the Wire: Measure the distance from the winch to the battery to determine the necessary wire length.
Cut the wire accordingly using wire cutters. It’s better to have a little extra length to ensure you can route the wire properly.
Strip the Wire Ends: Use a wire stripper to remove about half an inch of insulation from both ends of the wire. This exposes the metal core, which will make a good electrical connection.
Be careful not to nick the wire strands as this can weaken the connection.
Connect Battery Positive to F2 Terminal
Attach to the Winch Motor: Take one end of the wire and attach it to the positive terminal on the winch motor.
The positive terminal is usually marked with a “+” sign or red color.
Secure the Connection: Use a suitable connector, such as a ring terminal, to ensure a secure fit. Place the ring terminal over the positive terminal bolt, then tighten it with a wrench.
Make sure the connection is tight to avoid any electrical resistance or arcing.
Safely Route the Wire from Winch to Battery
Avoid Sharp Edges and Moving Parts: Carefully route the wire from the winch motor to the battery.
Avoid running the wire over sharp edges or through areas with moving parts, as this can damage the wire over time.
Look for a path that offers protection and keeps the wire out of harm’s way.
Secure the Wire: Use zip ties or wire clips to secure the wire along its path. This prevents the wire from moving around, which could lead to wear and tear.
Secure the wire every few inches to keep it firmly in place.
Secure Connections to the Battery Terminals
Attach to the Battery: Once the wire is routed to the battery, attach the other end to the battery’s positive terminal.
The positive terminal is marked with a “+” sign and often has a red cover or color.
Secure the Connection: Use a ring terminal on the wire end and place it over the battery terminal bolt. Tighten the connection with a wrench to ensure it is secure.
A loose connection can cause poor performance and potential safety hazards.
Connect Ground to Winch Motor Case
Prepare and Connect: Repeat the same process for the negative terminal. Use another piece of wire, cut to length, and strip the ends.
Attach one end to the negative terminal on the winch motor, which is usually marked with a “-” sign or black color.
Route and Secure: Route the wire along the same path as the positive wire, avoiding sharp edges and moving parts.
Secure it with zip ties or wire clips.
Attach to the Battery: Finally, connect the other end of the wire to the battery’s negative terminal.
Ensure a tight and secure connection to complete the circuit.
Installing a Circuit Breaker

A circuit breaker is a critical safety component in your winch wiring setup. It acts as a safeguard against electrical overloads, which can occur when the winch draws more current than the wiring can handle.
Without a circuit breaker, excessive current can cause the wires to overheat, potentially leading to damage or even fire hazards.
The circuit breaker interrupts the electrical flow in case of an overload, protecting both your equipment and your vehicle.
Choosing the Right Circuit Breaker
To ensure proper protection, choose a circuit breaker with a rating that matches your winch’s current draw.
The winch manual typically provides the specifications for the required current draw.
For example, if your winch draws X amps under load, you’ll need a circuit breaker rated slightly higher to accommodate this.
It’s crucial to not oversize the breaker too much, as it might not trip when needed.
Installation Steps
Select the Location: Find a suitable place close to the battery along the positive wire.
This location should be easily accessible for maintenance but safe from any potential damage.
Installing it near the battery ensures it protects the entire length of the positive wire.
Cut the Positive Wire:
Identify the section of the positive wire where you will install the circuit breaker.
Use wire cutters to cut the wire at this point. Ensure you have enough slack on both ends to connect to the circuit breaker terminals.
Strip about half an inch of insulation from each cut end of the wire.
Use a wire stripper to expose the metal core without damaging the wire strands.
Install the Circuit Breaker:
Connect the Input Terminal:
Take one end of the stripped positive wire and attach it to the input terminal of the circuit breaker.
The input terminal is usually marked as “IN” or with a “+” sign. Use a ring terminal for a secure connection.
Slide the ring terminal over the circuit breaker’s input bolt and tighten it with a wrench. Ensure the connection is firm and secure.
Connect the Output Terminal:
Attach the other end of the stripped positive wire to the output terminal of the circuit breaker.
The output terminal is typically marked as “OUT” or with a “-” sign.
Use another ring terminal to secure this connection. Place the ring terminal over the output bolt and tighten it with a wrench.
Double-check that both connections are tight and secure.
Secure the Circuit Breaker:
Mount the circuit breaker to a solid surface near the battery using the mounting holes on the breaker.
This helps prevent movement and potential damage to the connections.
Use screws or bolts as appropriate for your vehicle.
Once mounted, double-check all connections to ensure they are tight and free of corrosion.
Loose or corroded connections can lead to poor performance and potential safety issues.
Testing and Troubleshooting
Testing the Winch:
Reconnect the Battery:
Reattach the battery terminals and tighten them securely to ensure a solid connection.
Test the Winch Operation:
Use the winch control to check the winch’s functionality. Test both pulling in and letting out the cable to ensure everything works correctly.
Read more: How to Test and Replace Winch Solenoid
Common Issues and Solutions:
Winch Not Operating:
Check all connections to ensure they are tight and properly attached. Loose connections can prevent the winch from working.
Circuit Breaker Tripping:
Make sure the circuit breaker rating matches the winch’s current requirements. If the breaker trips frequently, it might be rated too low for your winch.
Slow Winch Operation:
Verify that the wire gauge is adequate for the winch’s power draw. If the wire is too thin, it can restrict current flow and slow down the winch.
Safety Reminders:
- Always stand clear of the winch cable during operation.
- Never exceed the winch’s rated capacity.
Is Wiring Without a Solenoid Safe for Regular Use?
While wiring a winch without a solenoid can be a reliable temporary solution, it’s not ideal for everyday use. Solenoids are designed to handle high current loads efficiently and safely, especially during prolonged or repeated winch operations.
Advantages of Using a Solenoid:
- Simple emergency workaround if the solenoid fails
- Easy to set up with minimal components
- It can get you out of a tough spot in remote areas
Disadvantages:
- Manual wiring poses a higher risk of short circuits or overheating
- No built-in fail-safes or remote switching
- Not recommended for heavy-duty or long-duration pulls
Also check: How to Wire a Winch Solenoid
Conclusion
Wiring a winch directly to the battery without a solenoid can be a simpler and more reliable method. Remember to prioritize safety, ensure all connections are secure, and use a circuit breaker for added protection.
I hope this guide has been helpful. Feel free to share your experiences or ask any questions in the comments below!
For winches with reliable built-in wiring options, check our best winches list.

