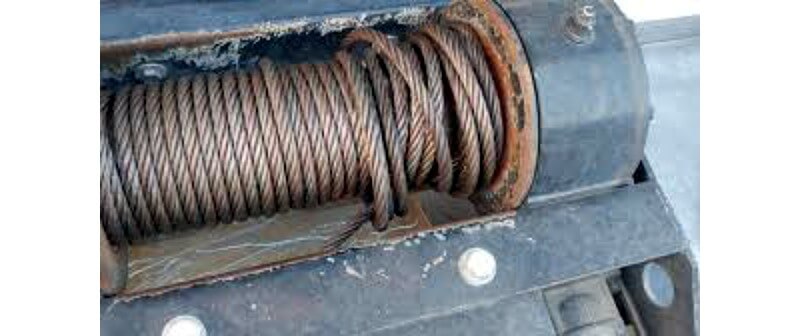
Winch cables are vital for off-roading, towing, and recovery — but if not carefully rewound, they can twist, kink, or jam after repeated use. A tangled winch line isn’t just frustrating — it can cause damage to the drum, increase tension risks, and fail during critical pulls.
In this guide, I’ll walk you through six proven steps to safely untangle your winch cable using tools you likely have on hand. These steps are based on hands-on recovery scenarios and will help you restore your cable’s reliability and performance in no time
Step 1: Disconnect the Cable

The first and most important step when trying to untangle a winch cable is to disconnect it from both ends – where it is attached to the winch, and the other end that is attached to a vehicle, tree, or other object you are trying to pull or secure.
There are a couple key reasons why you need to fully disconnect before attempting to untangle:
- Removing tension on the cable
- When connected at both ends, the cable will be under significant tension or pulling force from the winch motor and/or the object it is attached to
- This tension makes the cable much more rigid and knots/tangles will be pulled extremely tight
- Trying to loosen knots on a cable under tension can lead to dangerous cable snapping, whipping, fraying or even injury
- Allowing you to work with the full length of cable
- With the cable still attached at both ends, you won’t have access to the sections that disappear into the winch or are wrapped around a pull object
- Being able to manipulate and access the entire length of cable makes identifying, accessing and loosening all tangles much easier
- Safety
- A cable that suddenly snaps when under extreme tension can whip across an area with enough force to seriously injure anyone standing nearby
- Loose sections of cable can also easily entangle around limbs or objects and pull tightly under tension
- Fully disconnecting the cable removes any unsafe sudden tension or pulling during the untangling process
Step 2: Locate the Worst Knots and Tangles

After fully disconnecting the winch cable, the next step is to lay out the entire length of cable on the ground if possible.
This allows you to visually scan and identify the areas that are most severely tangled.
Specifically, you want to look for:
- Knots – areas where the cable is literately tied into tight knots
- Kinks – sharp 90 degree or 180 degree bends in the cable over a short distance
- Tight twists and wraps – sections of cable twisted tightly around each other or wrapped over/under other sections
These areas of significant tangling are going to require the most work to untangle. They likely won’t come undone easily by just pulling on the cable. It will take concentrated effort to work on those specific problematic areas.
So it’s important to scan the entire length of disconnected cable first and actually pinpoint the worst knots, kinks and tangles. Mark or make note of where they occur along the cable.
Once you’ve identified them, you can prioritize working on those most tangled sections first, before trying to address areas with less extreme tangling. Go for the “low hanging fruit” after the big knots/kinks.
Safety Note: Winch cables can have extremely sharp and unforgiving steel wires inside. When applying force to stuck knots and kinks, the cable can easily cut into bare hands.
Make sure to put on protective work gloves, or even wrap rags or towels around your hands for extra padding and laceration protection. Hand injuries are common when wrestling with bunched cables!
Step 3: Carefully Straighten the Cable Sections
With the worst knots and tangles identified, now you can begin carefully working on the cable to draw out slack and loosen up the tangled areas.
It’s best to start untangling from one end of the cable, rather than jumping straight into the middle.
Beginning at the end, take straightened sections of cable and gently pull on them to slowly draw out slack from nearby areas. Don’t rush and yank hard, as this can cause new kinks. Apply slow, steady tension.
As slack becomes available from other parts of the cable feeding into the section you are pulling, continue drawing it out down the line. Almost pass the slack from one section of cable hand-over-hand to the next.
The goal is to take out all the loose slack first, making more and more of the cable straight and taught. This makes working on knots easier.
An optional technique many use is to slowly twist straightened cable sections as you pull on them gently. This can help loosen up some knots without much force. Just be sure not to over-twist, as this can cause internal damage to the cable as well.
Patience and gentle control is key at this stage. Rushing will likely worsen tangles and may damage the cable by causing new sharp kinks. Keep tension mild and give knots time to slowly loosen as you draw out slack from the whole length.
Expect the process to take 15-30 minutes. Attempting to rush straight into forcefully yanking on the worst knots may feel faster, but often backfires. Carefully removing slack first sets you up for long-term success unlocking the most tangled sections!
Step 4: Use Lubricants to Loosen the Knots

Once you’ve removed most of the slack from the winch cable by working sections from one end to the other, the next step is to use lubricants to help loosen the most stubborn knots and tangles.
With slack taken out, those stubborn tangled areas will be clearly highlighted now in the mostly straightened cable. Feel along the cable – hard, immobile knots will be obvious.
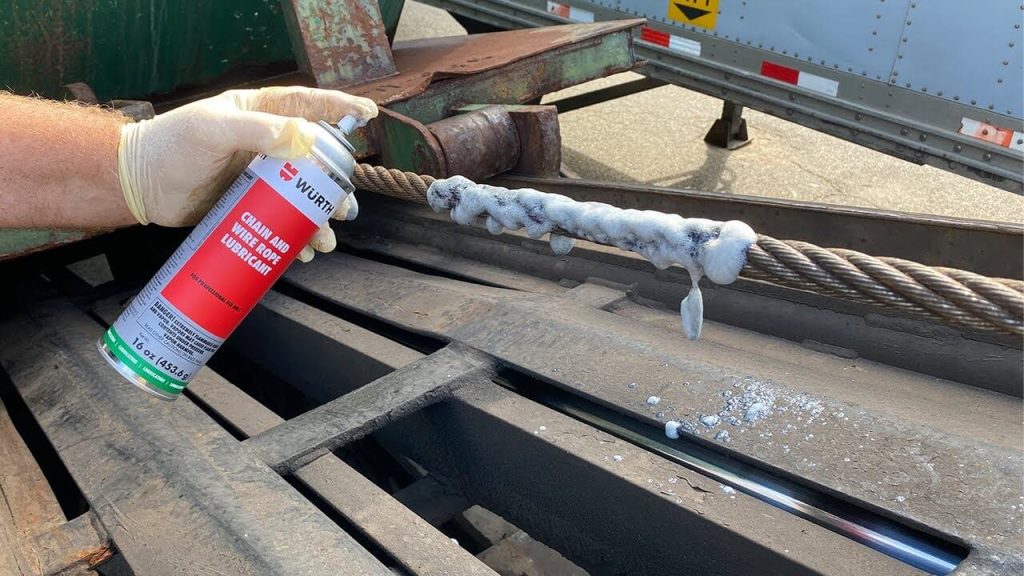
That’s where lubricants like WD-40 come in handy. The lubricant serves a few key purposes:
1. Penetrates into tight spaces
- Works its way by capillary action into nooks/crannies
- Squirts directly or drips down into the middle of dense knots
2. Lubricates cable strands
- Coats the individual inner steel strands
- Reduces friction allowing limited sliding and movement
3. Frees space between strands
- Strands compacted extremely tight can loosen up
- Microscopic extra space allows knots some room to flex
The key is to apply a decent amount directly onto stubborn knots first. Spray or drip it over the top thoroughly and let it soak for 5-10 minutes. This gives time for the lubricant to fully penetrate down into the knot.
Then, go back and hit any still stuck areas a second time before working them slowly by hand. Be patient and let the lubricant do the hard work of loosening before forcefully pulling.
Used properly, lubricants make untangling winch cables much easier and safer by reducing the brute manual force required. Just don’t rush the process – let the lube sit and penetrate fully first.
Step 5: Slowly Work Out the Tightest Knots
With lubricant applied thoroughly to those stubborn areas of tangled cable, the next step is to manually work the remaining knots and kinks out by hand.
The key here is SLOW and STEADY force…
Start on the worst sections first. Tightly grip the cable close to either side of a stuck knot. Then, keeping your wrists locked, slowly and smoothly pull your hands away from each other to apply tension.
Be patient and persistent. With the lubricant penetrating and loosening over the past 5-10 minutes, the knot should slowly start to give and loosen its grip.
Just a few centimeters of progress is a win to start. Celebrate small victories! Rest if needed, reapply lubricant, and try again.
Over several attempts, you should notice the knots steadily loosening more with each bout of sustained tension. Don’t jerk or yank hard – steady force is the key.
Patience pays off greatly at this final stage. It may take 30+ minutes to finally get those last few most stubborn knots freed up. But taking your time prevents making the situation worse.
If after 30 minutes of hard work you’ve made no noticeable progress, it may be time to call in an extra set of hands. Sometimes two people can untangle cables better than one.
In the most extreme cases of life-long winch cable tangling, you may need to replace the cable altogether. If wires inside are broken or fused, untangling may be impossible.
But in most situations, patiently working lubricated knots loose with hand tension does the trick. Just remember slow and steady force wins this race!
Step 6: Properly Recoil the Cable
After finally untangling your winch cable, the last step is just as important – correctly recoiling the now-straight cable for storage and future use.
Taking time to properly recoil the cable helps prevent knots and tangles from forming again over time. Follow these best practices:
1. Secure one end
Choose one end of the cable and secure it with tape or a clamp. This anchor point will stop the cable spooling back on itself.
2. Slowly walk backward, guiding the cable
Grip the free end of the cable. Then slowly walk backward away from the anchored end. Guide the cable so that it spools tightly together, wrap over wrap.
3. Maintain even tension & control slack
Keep a mild tension on the cable as you recoil it straight from your hands. Any loose slack can create future issues.
4. Wrap cable protectors as needed
For extra protection, bind sections of recoiled cable with fabric guards to keep them organized.
Taking time to recoil correctly ensures next use is tangle-free! It also reduces damage from stepping on loose cables.
An even better option if available is using a cable recoil system or winch. These clever mounts automatically gather and store the cable neatly, maintaining proper tension and organization. No manual recoiling is needed!
Proper cable care, winding, and storage goes a long way towards avoiding headaches caused by tangled winch cables in the first place. Following these recoiling best practices will set you up nicely for next time.
Conclusion
Following proper winching techniques, inspecting your equipment regularly, and taking care of your cable help avoid many tangle-causing situations. However, with lots of use, cables inevitably knot up.
Hopefully these untangling tips save you major hassle next time your winch cable gets out of hand! Just remember to work slowly, safely, and with the right tools. With some perseverance, that cable will be back to smooth sailing.

