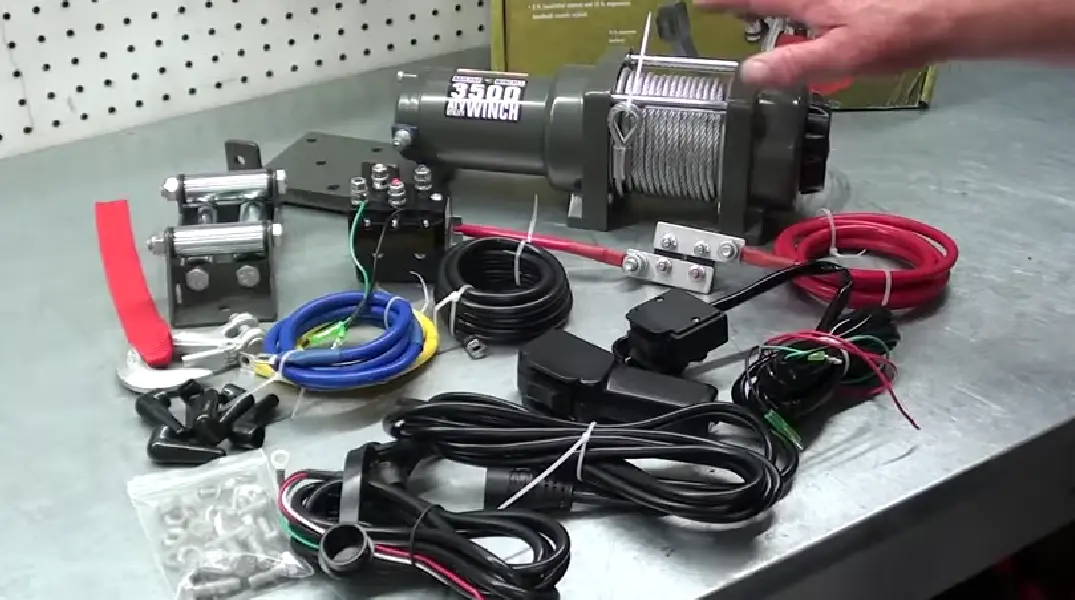
✅ Hand Winch — Worm Gear, Self-Locking
- Hand winch = worm-gear crank-operated. Self-locking; holds load at any position with no pawl click.
- Typical capacity: 1,000–4,000 lb. Slow cycle (1 ft/min) but precise tension control. Ideal for boats, trailers, fence posts.
- Top picks: Fulton XLT (2,500 lb boat), Dutton-Lainson 1500, Bulldog Security (1,000 lb economy).
- Cable vs strap: aircraft cable is more durable and rolls cleanly on drum; webbing is safer (no recoil) and cheaper.
- Not for overhead lifting. Worm-gear winches marketed “for lifting” are industrial-grade; standard trailer hand winches are pulling-only.
Key Takeaways
- Types: Ratchet lever winches are quick and simple but need more muscle. Worm gear winches are slower, smoother, and self-locking. Drill-powered units sit in the middle, giving you powered help for lighter to medium pulls.
- Sizing: Choose a hand winch with a Working Load Limit (WLL) at least 1.5× your maximum load. Then add margin for hills, rough ramps, sticky bunks, and any shock or snatch loads.
- Mounting: Use proper brackets and grade-rated hardware for A-frame, tongue, or through-bolt trailer mounts. Keep the line of pull straight to the load and protect everything from rust and road spray.
- Cable setup: Lock the cable to the drum anchor bolt, then crank in a tight, even first layer under tension before you fill the rest of the drum. This prevents crushing, bird-nesting, and slippage.
- Operation: Always check anchor strength, stand out of the line of fire, keep hands and clothing away from the drum, make sure the ratchet pawl is fully engaged, and avoid any jerky, snatch-style pulls.
- Release: To lower under load, release one click at a time with firm handle control. Use free-spool only when the cable is slack and the load is supported some other way.
- DIY & upgrades: You can build a crank winch, but by the time you buy steel, gears, bearings, and a load brake, you usually spend more than a solid commercial unit. Correct gear ratio, shaft support, and brake design are non‑negotiable.
- Maintenance: Regularly check the cable, drum, pawl, and mounting bolts. Light cleaning and lube go a long way toward preventing seized parts and sudden failures.
What Is a Hand Winch?
 Quick definition: A hand winch is a manual mechanical device that uses a rotating drum, gear set, and handle to pull, lift, or position loads with a cable, rope, or strap. As you turn the handle, the gear ratio multiplies your effort to create mechanical advantage. A ratchet mechanism or load brake locks the drum between strokes so the load stays put instead of rolling back.
Types of Hand Winches (Ratchet, Worm Gear, Drill-Powered)
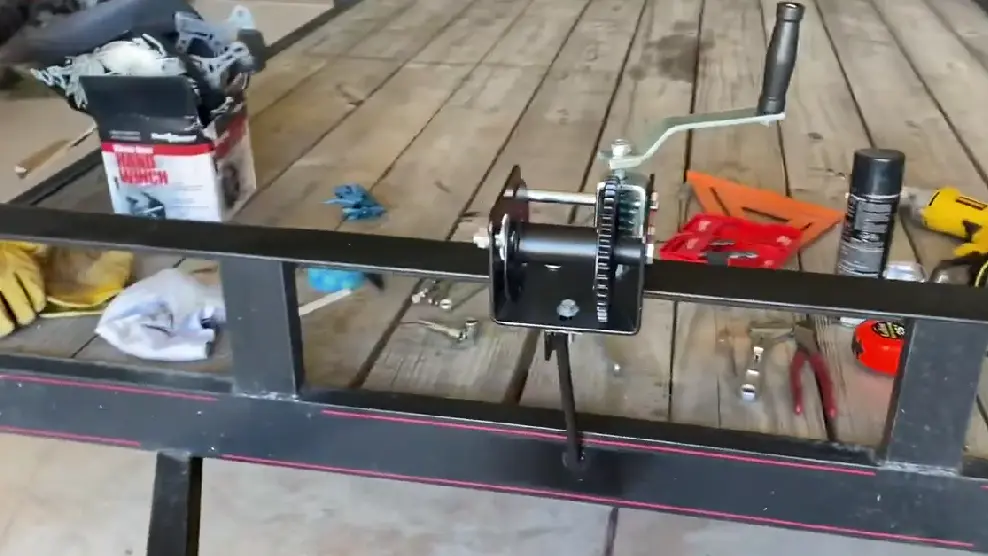
Not all hand winches behave the same. Ratchet lever winches move the load faster but take more force on the handle. Worm gear winches creep along, though with a lot more control and built-in self-locking. Drill-powered winches borrow a cordless drill for power, which makes them handy for smaller jobs where you do not have a full electric winch. Most setups you will actually use fall into three categories. Each has its own sweet spot for capacity, speed, and how it feels in real-world use.Ratchet Lever (Gear Drive) Hand Winch
 A ratchet lever winch uses a simple gear train and a hand winch ratchet that clicks over the gear teeth as you crank. The pawl holds the drum between strokes so the load cannot roll back while you reposition your arm. Typical attributes:
- Pulling capacity: Around 600–3,500 lbs WLL in common models, with some heavier versions reaching above that for big boats and equipment.
- Handle length: Roughly 8–12 inches. Longer handles give better leverage but need more room to swing and can clip fenders or jacks if mounted poorly.
- Gear ratio: Often from 3:1 (quick but heavy on the arm) up to 5:1 or 8:1 (slower but easier on effort). Dual-speed models add a second, higher ratio for tough spots.
- Duty cycle: Intended for short, intermittent pulls. They are not meant for continuous cranking for minutes on end like a powered unit.
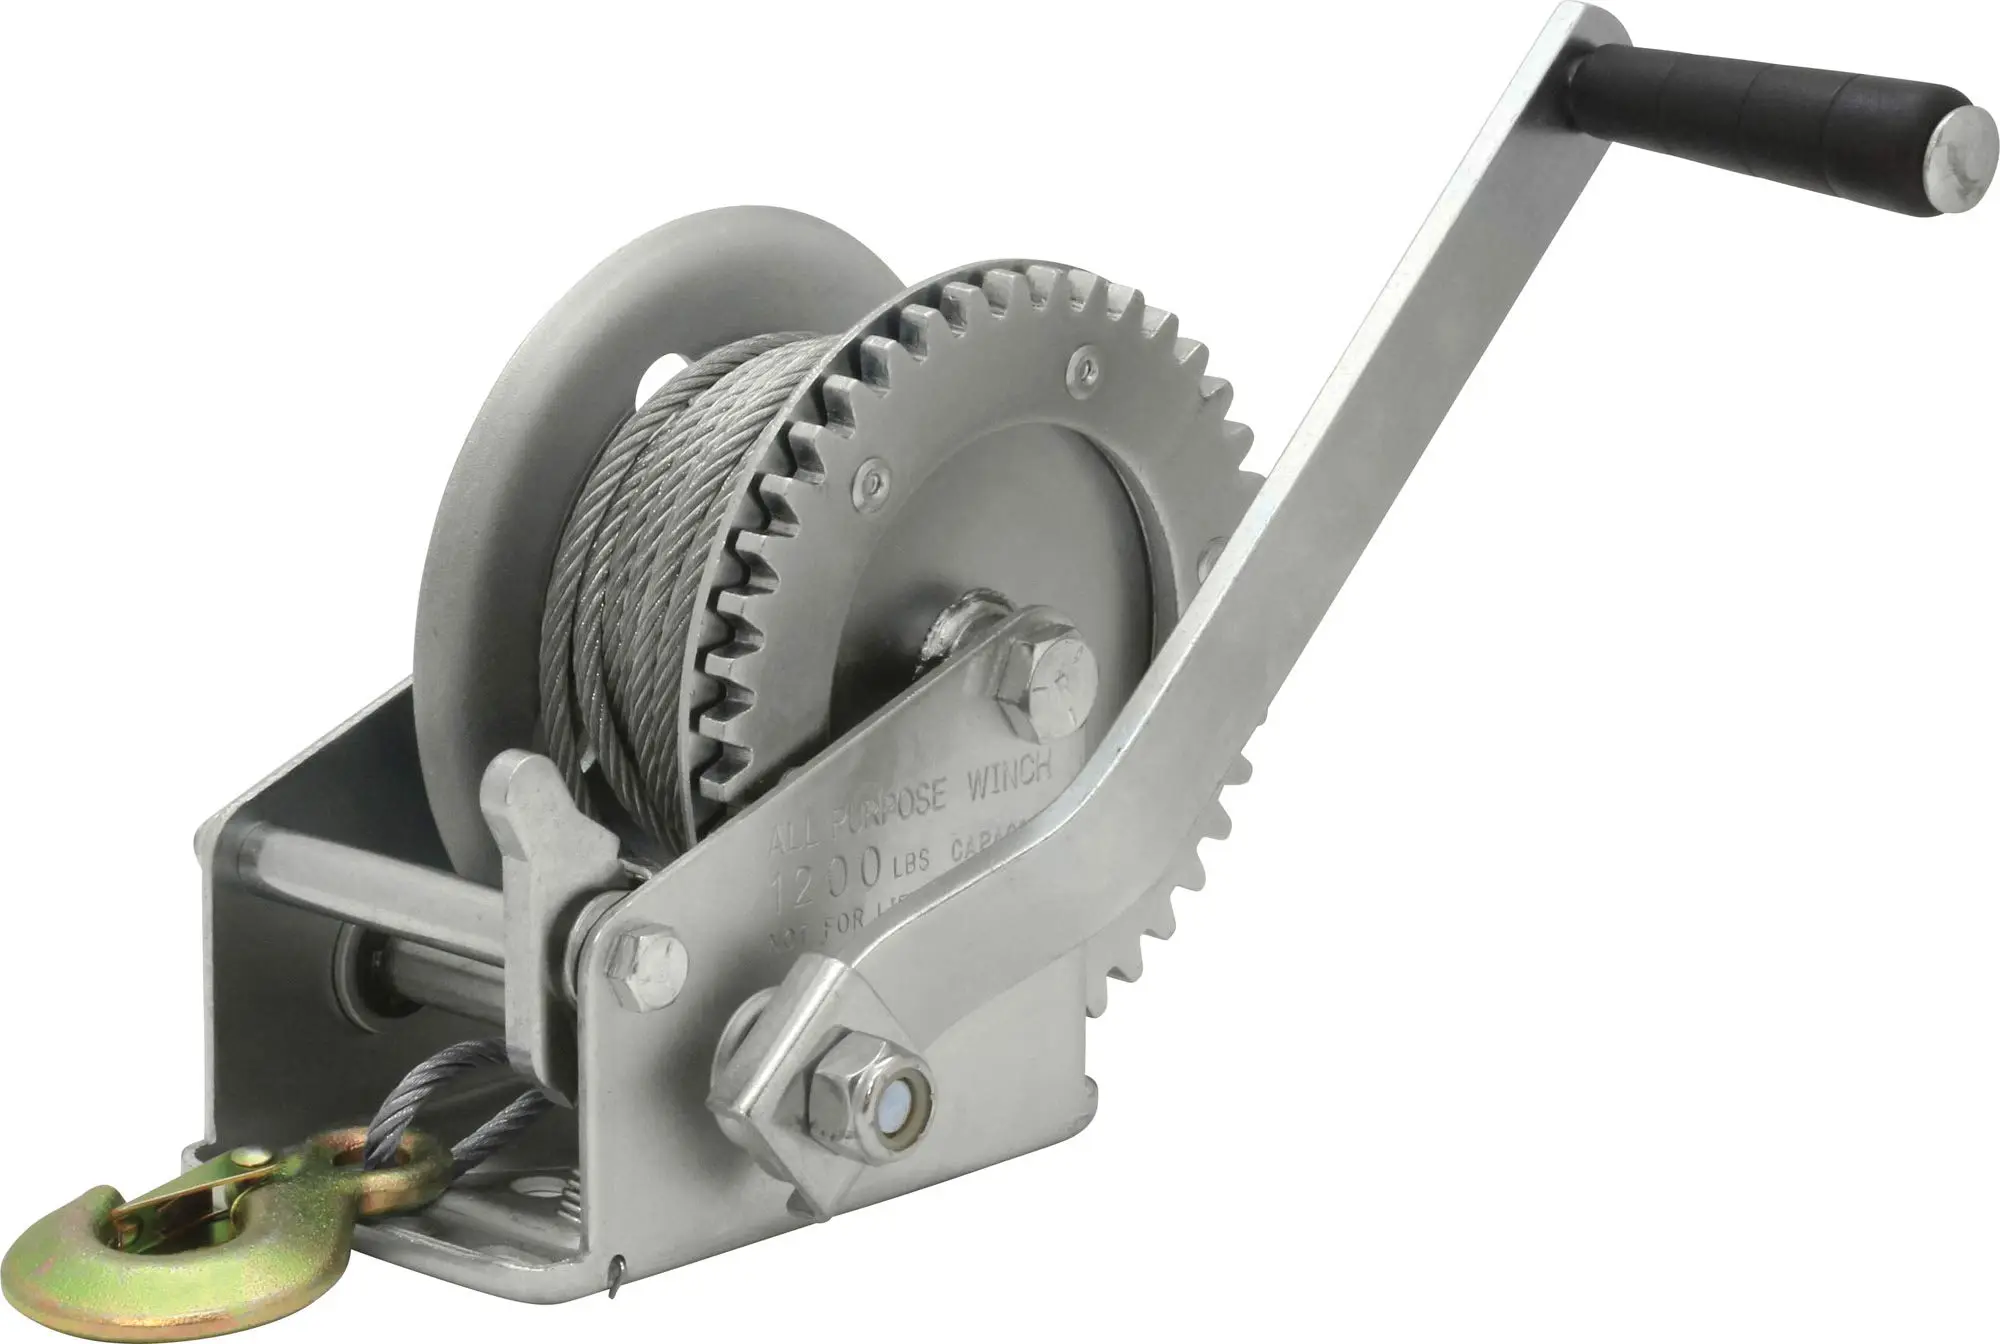
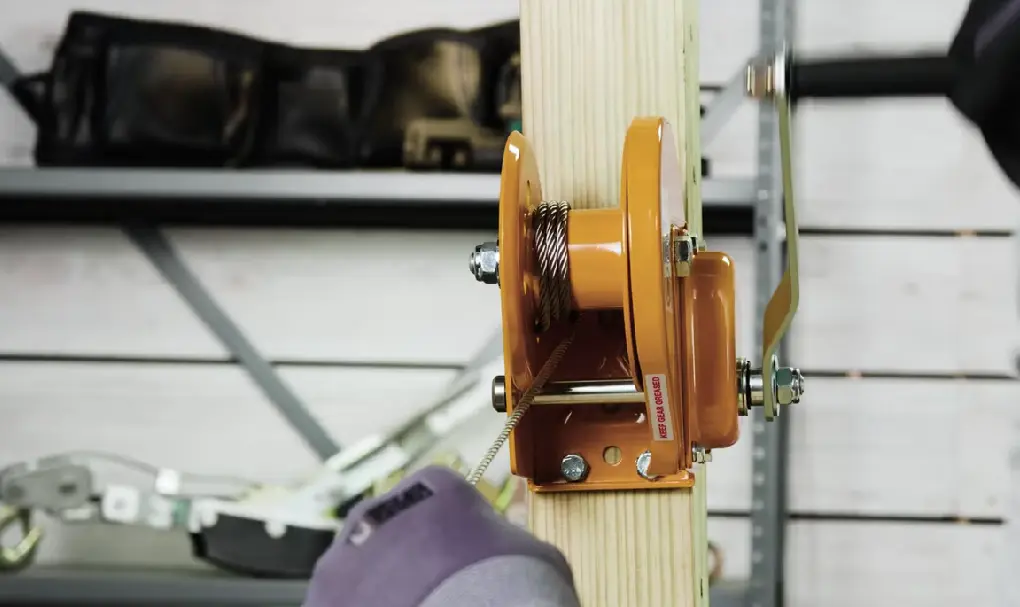
Worm Gear Hand Winch
 A worm gear hand winch is a different animal. The handle turns a screw-shaped worm that drives a larger spur gear on the drum. That gearing creates a big mechanical advantage and, because of the geometry, is usually self-locking. The drum cannot back-drive the handle under load.
- Mechanical advantage: Often equivalent to 20:1 to 40:1 or more, depending on the exact worm and drum sizes.
- Self-locking feature: Under load the drum will not unwind itself, so there is generally no separate ratchet pawl needed.
- Load holding: The system holds the load without the operator keeping tension on the handle. That is a big safety upgrade for certain jobs.
- Speed: Very slow. You trade line speed for precision and control, which is usually what you want for lifting or fine adjustment.
Drill-Powered Hand Winch (Hybrid)
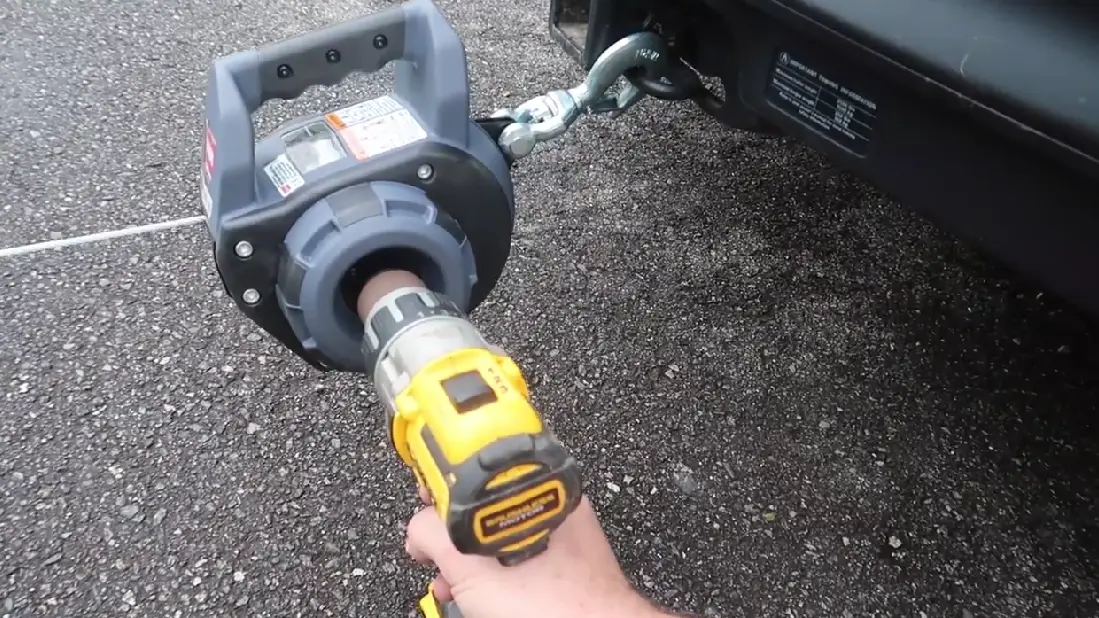 A drill-powered winch is a hybrid design. You still have a compact mechanical winch, but instead of a long handle, you plug in a cordless drill to drive the gear set. The WARN drill winch is the best-known example. You hook your drill to a drive shaft, pull the trigger, and the drill motor does the cranking for you.
- Capacity: Commonly 500–1,000+ lbs WLL, depending on the specific model, line speed, and the torque of the drill you pair it with.
- Use case: Light to medium pulling where you do not have a vehicle-mounted electric winch or household power but you can carry in a drill and a battery or two.
- Pros: Much faster than hand cranking for short pulls, easy to pack in a rig, and light enough to carry around camp or a job site.
- Cons: Only as strong and long-lasting as your drill batteries. Also limited by the drill’s torque rating and heat buildup during long pulls.
Hand Winch vs Come-Along vs Electric Winch
Hand Winch vs Come-Along
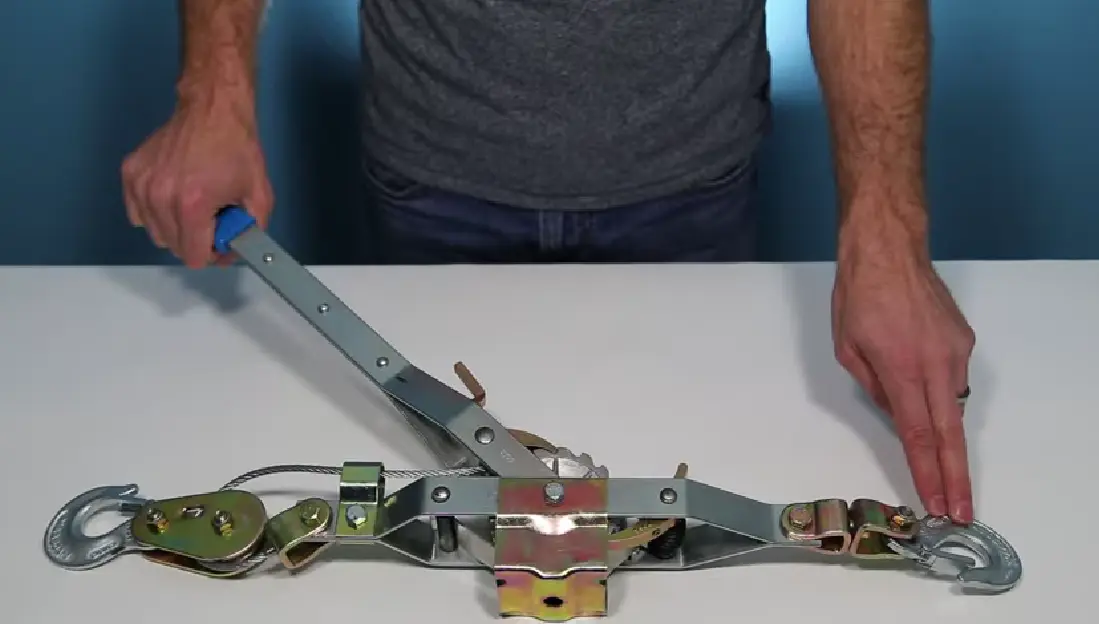 A hand winch is usually fixed-mounted somewhere so the drum can store several wraps of cable or strap. The classic example is a winch welded or bolted onto a trailer tongue. A come-along lives in your kit as a portable ratcheting puller with hooks at each end and a relatively short length of high-strength cable or web strap between them. Hand winch advantages:
- Outstanding for repetitive tasks at the same place, like a trailer hand winch installation that pulls the same boat up the same ramp every weekend.
- Much greater drum capacity so you can run a longer cable or strap for extended pulls.
- Better match for trailers, davits, skids, and fixed structures where you do not want to re-rig every time.
- Truly portable. You can walk it down a fence line, into the woods, or under a vehicle, then move to the next anchor in minutes.
- Easy to rig multi-part pulls with snatch blocks for very high force compared to the tool’s size.
- Excellent fine control over short travel distances, which helps for straightening frames, tensioning fences, or aligning components.
Hand Winch vs Electric Winch
 Manual hand winches live and die by your arm strength and patience. Electric winches swap that out for a motor, usually powered by a vehicle battery or house power. This guide sticks to mechanical hand winches. For powered setups, head over to our electric winch hub.
- Hand winch strengths: Cheap to buy, simple to bolt on, and easy to keep alive for years with basic upkeep. They work whether your battery is dead or not.
- Electric winch strengths: Built for higher duty cycle and bigger loads. They are ideal for frequent, long, or ugly pulls like vehicle recovery, heavy trailers, or skidding logs up a long hill.
What Size Hand Winch Do You Need? (Capacity & Gear Ratio Guide)
Picking the right size hand winch is not just about the number on the box. You start with load weight, then multiply by at least 1.5 to set your WLL target. From there, you look at slope, surface friction, and how often you will actually use it. Then you choose a gear ratio that lands in the sweet spot between how hard you want to crank and how long you are willing to stand there.Understanding WLL and Safety Factor
The Working Load Limit (WLL) is what the manufacturer says the winch can pull or hold day-in, day-out, under normal conditions. That is not the breaking point. It is the safe working rating. For trailers and light recovery, you want at least a 1.5× safety factor over the actual load on level, and more if conditions are poor.- If your boat weighs around 2,000 lbs ready to launch, size the winch to at least 3,000 lbs WLL. If ramps are steep or slimy, going higher is smart.
- If you are pulling a 1,000 lb ATV up a tall, grippy ramp where friction really fights you, aim in the 1,500–2,000 lbs WLL range or more.
Gear Ratio, Handle Leverage & Effort
Your gear ratio and handle length are what your arms feel. They control line speed and how much force you have to put into each stroke.- Low ratio (around 3:1–4:1): More line per crank, but every pull feels heavier. Good for lighter loads or short pulls.
- High ratio (8:1–15:1 on single or dual-speed units): Much easier on the arm, though the hook crawls compared to low-ratio models.
- Longer handle adds handle leverage. That means more mechanical advantage, but the handle travels a larger arc and needs open space.
Capacity Guide by Application
Use this table as a ballpark guide. Real conditions, especially slope and friction, can move you up or down a size, so treat these as starting recommendations, not gospel.| Application | Typical Load | Recommended WLL | Suggested Winch Type |
|---|---|---|---|
| Small boat trailer (up to 14 ft) | 800–1,200 lbs | 1,500–2,000 lbs | Ratchet boat trailer winch |
| Medium boat trailer (16–20 ft) | 1,800–3,000 lbs | 2,500–3,500+ lbs | Heavy ratchet or dual-speed boat trailer winch |
| Utility / equipment trailer | 1,500–4,000 lbs | 2,500–5,000 lbs | Ratchet or worm gear (for precision) |
| ATV / UTV loading | 600–1,200 lbs | 1,500–2,000 lbs | Compact ratchet or drill-powered winch |
| Shop positioning / skidding | Varies (500–3,000 lbs) | 1.5–2× highest expected load | Worm gear hand winch for control |
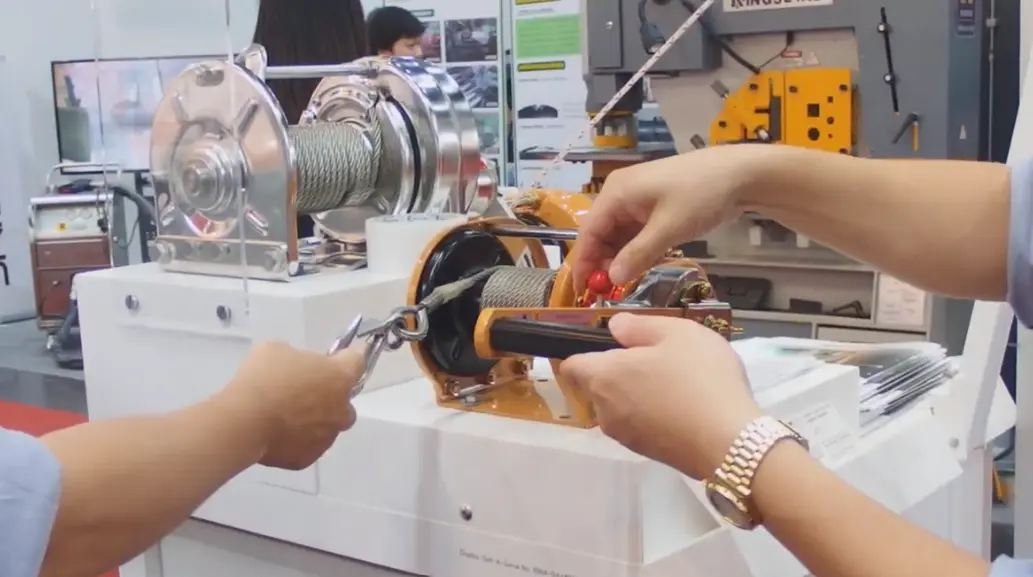
How to Thread and Secure Cable on a Hand Winch
Getting the cable onto the drum the right way is not optional. The anchor at the drum, the direction of wrap, and the tension on that first layer all determine whether the winch acts like a controlled tool or a cable shredder. In real use, a lot of cable failures trace back to sloppy spooling. Follow these steps and you avoid kinks, crushed wraps, and surprise slippage when the line gets tight.Attaching Cable to the Drum Anchor Bolt
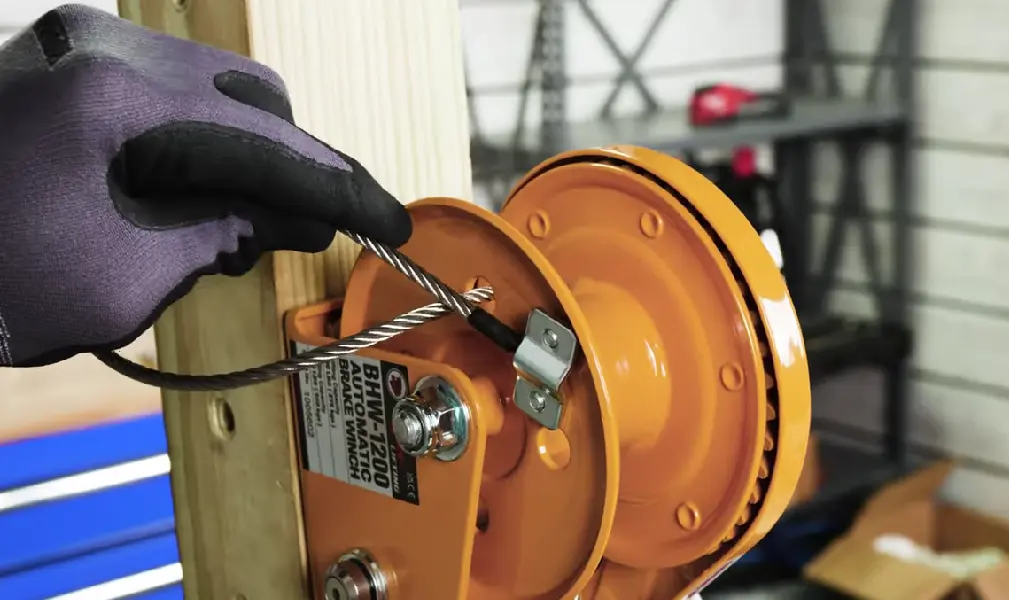
- Inspect the cable drum Before you ever feed in cable, look over the cable drum. You want the anchor hole and its bolt or clamp clean, without sharp burrs, rust ridges, or dents that could bite into the strands.
- Diameter: Typically around 2–4 inches on light and medium winches. Smaller drums bend the cable tighter, which is harder on the wire.
- Cable capacity: Often 20–50+ feet depending on drum width, diameter, and cable diameter.
- Anchor bolt size: Common sizes are 5/16–3/8 inch. Undersized, rusty bolts are a weak link.
- Rotational friction: The drum should turn smoothly with modest resistance. If it grinds or feels gritty, clean and lubricate the bearings or bushings first.
- Insert the cable end Feed the bare cable end through the anchor hole from the correct side. The manual will show the direction. Usually you feed it from the inside of the drum out, so the wraps tighten against the anchor as you load the line.
- Secure the anchor bolt or set screw Tighten the anchor bolt, clamp plate, or set screw until it firmly grips the cable. Use manufacturer torque specs if you have them. You want it snug enough that you cannot pull the line free by hand, without flattening the strands into a pancake.
- Back up with a cable clamp (optional but recommended) On higher-capacity or critical systems, add a small U-bolt cable clamp behind the anchor. That way, if the main anchor ever loosens, the backup clamp still keeps the cable from zipping out.
Correct First-Layer Tension
 The first layer of cable is the foundation for everything that piles on top. If those first wraps are loose or uneven, the upper layers will cut down into them once the load comes on, which can lock the drum or damage the cable.
- Pull several feet off the drum and hook to a solid, fixed anchor that will not move or bend.
- Apply pre-tension by:
- Having a helper lean back on the cable with steady force while you crank, or
- Using a light sacrificial load, such as dragging a 100–200 lb item across the ground, to preload the wraps.
- Crank under constant, moderate tension, using a gloved hand on the standing part of the cable well away from the drum. Your hand’s job is just guiding, not holding tension. Watch that the line lays side by side with no crossovers or empty gaps.
- Fill at least one full layer while under load. After that first tight base layer, you can back off the tension a bit and finish filling the drum normally.
Installing a Hand Winch on a Trailer: Mounting Options
A-Frame Mount
An A-frame trailer mount bolts the winch where the two tongue rails meet, forming that familiar A shape. Done right, it creates a stiff, triangulated base that spreads loads instead of focusing them in a thin plate.- Height: Usually in the 18–30 inch range, so the winch strap comes off roughly level with the boat’s bow eye or the load’s tie point.
- Bolt pattern: Most aftermarket brackets use 3 or 4 mounting holes on a roughly 3–4 inch grid, but always double-check the pattern on your winch.
- Load distribution: Mounts contact both tongue rails, which helps prevent twisting the tongue under hard pulls.
- Corrosion material: Galvanized steel or heavy powder coat are common. Anything bare or lightly painted will rust quickly in real-world trailer use.
- Mock up alignment with the boat or load sitting on the trailer. The winch line should run cleanly to the bow eye or hook with minimal vertical or horizontal angle.
- Use grade-rated bolts like Grade 5 or 8, along with flat washers and locking nuts. Hardware store mystery bolts are not what you want here.
- Add backing plates under any thin tongue rail or bracket section so the bolts do not crush or elongate the metal over time.
- Seal holes with primer and paint or sealant. Use galvanized or stainless hardware where practical. This cuts down on rust creeping from every drilled hole.
Tongue Mount
A tongue mount uses a flat bracket or welded plate on top of the trailer tongue. The winch bolts directly to that surface. Key considerations:- Make sure the plate is thick enough, typically around 1/4 inch or reinforced with gussets. A thin plate will flex and crack over time.
- Position the winch so the line of pull matches the centerline of the boat or load. Twisting pulls are hard on both the winch and the tongue.
- Spin the handle by hand through a full sweep and check for interference with the jack, coupler, spare tire, propane tanks, or anything else on the tongue.
Through-Bolt Setup
On custom builds or non-trailer applications, a through-bolt setup is common. You bolt the winch through a vertical or angled plate that is part of the frame or support structure.- Drill accurate bolt holes that match the winch base pattern. Sloppy, over-sized holes lead to shifting and egged-out mounting points.
- Use large-diameter washers or full backing plates to spread load over a wider area, especially on thinner plate or boxed sections.
- Tighten to spec using a torque wrench where possible, then re-torque after the first few trips. Vibration will settle things in.
- For some trailers, a thin rubber or neoprene pad between winch and plate helps with vibration isolation and keeps water from pooling under the base.
Attaching a Hand Winch to Anchor Points: Tree, Post, Frame
Out in the field, you often do not have a neat mounting plate waiting for you. You have trees, posts, rocks, or frames. The trick is turning those into reliable anchors using rated straps, chains, and proper connectors. Guessing at anchor strength or using hardware with no markings is a good way to break things.Tree Saver Strap Method
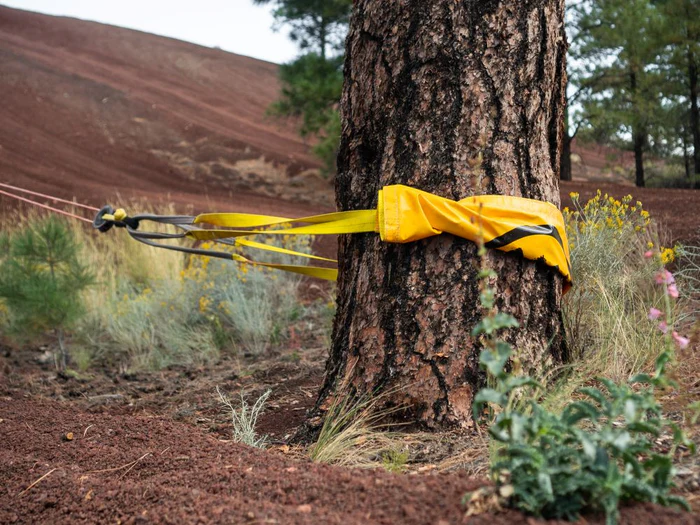 A tree saver strap is a wide, low-stretch strap designed to spread the load across the bark and cambium layer instead of cutting into the tree like a cable or chain.
- Choose a healthy tree with solid bark and a trunk diameter that looks like it belongs in front of the load, not behind it. Avoid dead, hollow, or heavily cracked trees.
- Wrap the strap low, usually near bumper height or just above, to keep the pull as horizontal as possible. High wraps add leverage that can topple or bend a tree.
- Connect strap ends using a rated shackle, soft shackle, or hook with a WLL that meets or exceeds your winch’s WLL.
- Attach the hand winch using its mounting hook, a short chain, or a bumper or hitch bracket tied into the same shackle. Check that the winch lines up with your intended direction of pull.
Chain & Hook Method
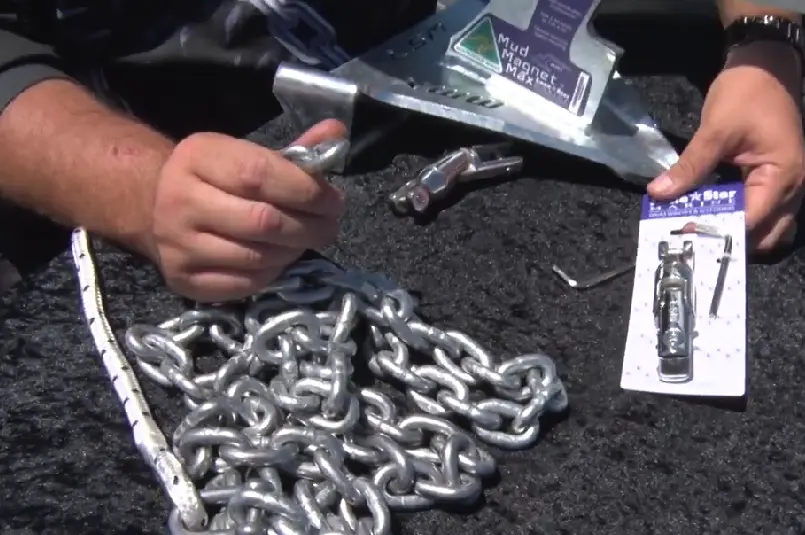
- Select a rated chain such as Grade 70 transport chain or better, with a WLL that matches or exceeds the pull you expect. Stay away from light “decorative” or hardware chain.
- Wrap the chain tightly around the anchor and hook back onto itself to form a choker. Check the hook is seated correctly and that the chain cannot jump off under load.
- Attach the winch base to that chain using a bracket or built-in hook, and confirm that the winch will not twist sideways when tension comes on.
DIY Hand Crank Winch: Materials, Build Steps & Gear Ratio
Building a DIY hand crank winch is a tempting project if you have a welder and a pile of steel. It can work well, but only if you treat it like real lifting and pulling equipment, not a farm science experiment. Frame strength, drum design, gear ratio, and a reliable load brake all have to be right or the setup becomes dangerous fast. Warning: Home-built winches put full responsibility on you. If you are not solid on structural design, welding, and mechanics, a commercial winch with a proper rating label is usually safer and cheaper by the time you are done.Materials & Components
- Structural steel for the frame, such as angle iron, channel, or thick plate sized to handle your intended WLL without flexing.
- Cable drum tubing, usually thick-wall pipe or machined tube, sized for the cable diameter and length you want.
- Side plates and a shaft for the drum, with the shaft large enough not to twist under load.
- Bearings or bushings chosen for shaft diameter and load. Cheap undersized bushings are a common failure point.
- A gear set, either spur gears or a worm gear, that hits your target gear ratio and has published ratings or at least substantial tooth size.
- A handle with a solid grip, often in the 8–14 inch length range depending on the effort you want.
- A load brake assembly or a ratchet wheel and ratchet pawl that can actually hold your WLL without slipping.
- Grade 5 or Grade 8 bolts and locknuts to assemble the frame and for final mounting.
Cable Drum Design
The drum sees every bit of your load, multiplied by dynamic factors like shock and impact. If it is too thin or too small, it will deform, crack, or crush cable under hard use.- Diameter: Bigger drums are kinder to cable because the bend radius is larger. The tradeoff is that you need more torque at the handle for the same pull.
- Cable capacity: Make the drum wide enough for the cable length you truly need, plus a few extra wraps that stay on the drum as a safety margin.
- Anchor bolt size: Use sizes similar to or larger than commercial drums handling the same WLL. If they use 3/8 inch, do not step down to 1/4 inch.
- Rotational friction: Proper bearings or bronze bushings help keep friction reasonable so the winch cranks smoothly instead of fighting you.
Gear Drive & Mechanical Advantage
Your gear train is what turns human effort into real pull. You want a total mechanical advantage that lets you stay around 30–40 lbs of handle force during normal, repetitive work. You can push harder for short bursts, but if you design for 80 lbs every stroke, nobody will want to use the thing.- Example: For a 2,000 lb horizontal pull, many builders aim for a combined mechanical advantage of 40–60:1. That is your gear ratio multiplied by handle leverage, divided by drum radius.
- For self-locking and fine control, a worm gear hand winch style drive is often better. The worm gear resists back-driving and keeps the load from chasing the handle.
Load Brake Assembly
The load brake assembly or ratchet is what stands between you and a runaway handle. Treat it like a safety system, not an afterthought.- Holding force: It must hold at least 100% of the winch’s intended WLL with room to spare. Do not size it at the edge.
- Engagement method: Most setups use a pawl and spring on a ratchet wheel, or a friction disk arrangement tightened by a nut or lever.
- Adjustment: Design in some way to adjust spring pressure or friction as parts wear, so you do not have to re-engineer the brake every year.
- Wear replacement: Plan ahead so you can swap pawls, springs, or pads when they are worn, without cutting the winch apart.
How to Use a Hand Winch Safely (Step-by-Step)
Using a hand winch safely is mostly about discipline. Check your gear, rig a solid anchor, keep people out of the danger zone, and never let the handle move without your hand controlling it. Shortcuts here tend to bite fast.- Inspect the winch and rigging Look over the cable or strap for kinks, flat spots, broken wires, cuts, or stiff, rusty sections. Spin the drum and watch the ratchet pawl engage each tooth. Grab the winch and wiggle it to feel for loose mounting bolts or cracked brackets.
- Verify anchor strength Whether it is a trailer tongue, tree, post, or steel frame, make sure it is solid and rated (or obviously strong) for at least the WLL of your winch. Stay away from corroded steel, rotted posts, or lightweight utility poles.
- Attach the hook Clip the winch hook to a known tow point, bow eye, recovery point, or lifting lug. Avoid thin sheet metal, random holes, or unknown clevises. If your hook has a safety latch, use it.
- Engage the ratchet mechanism Set the ratchet pawl or load brake into the “pull” or “lock” setting as the winch manufacturer describes. Give the handle a short test pull and watch that it holds on the gear teeth.
- Crank with steady force Stand off to one side of the line of pull, not directly in line with the cable. Apply smooth, consistent strokes on the handle, and always let it come back under your control. Do not let it free-spin.
- Avoid snatch loads Do not jerk hard on the handle or let slack build up then snap tight. That kind of snatch load can spike forces well beyond the winch’s WLL and cause failure of cable, hooks, or mounts.
- Monitor helpers and bystanders Make sure anyone nearby is outside the potential recoil path of the cable and hook. Talk through what you are doing so nobody steps over the line or leans into the system mid-pull.
- Secure the load Once the load is where it needs to be, such as a boat fully against the bow stop, add safety chains, wheel chocks, or tie-down straps. Only then think about taking tension off the winch line or unhooking.
How to Release a Hand Winch Under Tension and When Free
Letting a hand winch back down is where many people get hurt. Under tension, you release slowly while the handle is firmly under your control. When the line is slack and the load is supported, then free-spool is your friend. Mixing those two ideas up is how you end up with a spinning handle and an uncontrolled load.Releasing with Load On
Controlled release is just a slow, deliberate reverse pull. You are bleeding off tension while the handle and pawl stay engaged as much as possible.- Keep one hand firmly on the handle before you touch any release lever or pawl. If your grip is not set, do not move the lock.
- Disengage the ratchet pawl only enough to let the drum move. Resist that movement with the handle so the drum turns slowly.
- Let the handle move slowly, preferably one tooth at a time. Many operators will let the drum move a bit, re-engage the pawl, then repeat to step the load down in controlled increments.
- Never let the handle go until you are sure the load is supported by something else or the pawl is locked back into the holding position.
Free-Spool Method
Many gear drive hand winches have a free-spool handle or neutral setting that lets you pull cable out by hand with almost no resistance. That feature is handy, but it is only meant for slack lines.- Ensure the cable is slack and the load is fully supported by something other than the winch. There should be no visible tension on the line.
- Move the selector to the free-spool or neutral position exactly as the manufacturer describes. Do not force levers or cams.
- Pull cable by hand, keeping fingers, gloves, and clothing clear of drum edges and any fairleads. Guide the line so it does not kink or snag.
- Re-engage the ratchet or brake as soon as you have the amount of cable you want out, so the winch is ready for the next pull without surprises.
Common Mistakes with Hand Winches (and How to Fix Them)
- Undersizing the winch: Bolting a 1,500 lb winch to a setup with a 1,500 lb boat, then adding a steep ramp and wet bunks, leaves no safety margin at all. Fix: Step up to at least 2,250 lbs WLL and preferably higher, sticking to that 1.5× rule or better.
- Improper cable winding: Crossed, loose, or bunched wraps dig into each other under load, can jam the drum, or cause sudden slips. Fix: Unspool and re-spool the line under moderate tension, laying wraps neatly side by side as described in the threading section.
- Relying only on the winch to secure the load: Trailers that count on the winch alone to hold a boat or vehicle are one broken pawl away from a runaway load. Fix: Always back up with safety chains, tie-down straps, or chocks so the winch is only part of the restraint system.
- Releasing under load with one hand off the handle: Letting go or just “helping” the handle with a fingertip is how it rips out of your hand and spins dangerously. Fix: Keep a full, firm grip on the handle any time the pawl is not fully engaged, and use small, controlled ratchet steps while lowering.
- Using random hooks/eyebolts: Hardware with no WLL markings is often cheap mild steel not meant for real loads. Fix: Use lifting-rated or tie-down-rated hooks, eyebolts, and shackles with clear WLL stamps and traceable specs.
- Ignoring corrosion: Rust on drums, pawls, and cables eats away strength long before parts actually break in your hand. Fix: Clean and lube on a schedule. Replace any cable or part with deep pitting, heavy scale, or flaking rust, especially near terminations.
FAQ
Below are answers to common questions people have about hand winch sizing, safe use, and long-term care.How do I know what capacity hand winch I need?
Start with your heaviest realistic load, including gear and fluids, not just the dry weight off a spec sheet. Multiply that by at least 1.5× that weight in WLL. If you are dealing with steep ramps, soft ground, or frequent use, increase that margin. A hand winch WLL chart is helpful to sanity-check your choice, but if you are stuck between two sizes, pick the larger winch.Can I use a hand winch for vertical lifting?
Only if the winch is built and rated for lifting. Some worm gear hand winches are designed and labeled for limited vertical lifting. Many trailer-style ratchet winches are not designed for overhead loads at all. Read the manufacturer’s documentation. If it does not clearly say the winch is lifting-rated, use a purpose-built hoist or lift instead.How often should I inspect or maintain my hand winch?
Give the winch a quick inspection before each use. Look at the cable or strap, mounting bolts, and pawl engagement. For trailers that see regular duty, plan a deeper look and a lubrication session every few months. That usually includes greasing bearings and gears, inspecting for cracks or bent parts, and removing any built-up rust or packed-in dirt on the drum.What kind of cable or strap is best for a hand winch?
Steel cable handles abrasion, heat, and tight bends better, though it can kink and the broken wires are sharp. Synthetic straps are more user-friendly and less likely to whip dangerously if they break, but they do not love abrasion, sharp edges, or high temperatures. Use what your drum is designed to run, and swap it out as soon as you find serious wear, cuts, or kinks.Can I mount a hand winch on any trailer?
You can mount a hand winch on most trailers if the tongue or frame is strong enough and you reinforce thin sections. Use backer plates for light steel, align the line of pull with the load, and stick to rated hardware. For detailed steps, check our trailer hand winch installation guide.Is it legal to attach my winch to any tree or post?
That depends on where you are. On public land, there are often rules against using trees or structures as anchors without permission, especially if it risks damage. On private land, you still need the owner’s OK and a sound, solid anchor. In both cases, always use tree saver straps and rated rigging so you protect the tree and control the load.How do I store my hand winch to extend its life?
Keep it as dry and clean as you reasonably can. On trailers, a cover helps a lot. Rinse off salt and road grime after trips, then give moving parts a light shot of lubricant. Every so often, unspool and re-spool the cable to inspect the full length and break up any hidden corrosion or moisture trapped under wraps. Portable winches last longest stored indoors.What is the difference between a hand winch and a come-along for safety?
Hand winches are usually fixed and set up with longer cable, so once mounted correctly they are pretty stable for repeated pulls. Come-alongs are portable, often used close to your body and face, and tend to run at higher tensions over short distances. That can increase your exposure if anything fails. Either tool is safe if used correctly, but you want to understand the risks of each. Our guide here breaks it down in more detail: hand winch vs come-along.When should I choose a worm gear winch instead of a ratchet winch?
Go with a worm gear winch when you need slow movement, precise position control, and a self-locking system that holds as soon as you let go of the handle. That is ideal for machinery positioning, work platforms, and controlled lifting jobs. A ratchet winch is better if you care more about faster operation and you are mostly pulling along a surface, such as loading a boat or an ATV onto a trailer.Can I upgrade from a hand winch to an electric winch on the same trailer?
In many cases, yes. A lot of trailers that start with a hand winch later get upgraded to electric. Just remember that powered winches often need stronger mounts, heavier wiring, and more attention to safety and battery capacity. This hand winch guide does not cover all of that. For those details, head over to our electric winch resource at /winch/motor/.Final Summary & Next Steps
A properly chosen and installed hand winch is one of those tools that just keeps working year after year as long as you respect its limits. Match the winch type and WLL to your load, mount it on real structure, thread and tension the cable correctly, and stay disciplined when pulling or releasing under tension. Do that and you dramatically cut the odds of gear failure or injury. If you are ready to dial in a complete setup, these guides fill in the rest of the details:- hand winch WLL and trailer-specific sizing
- hand winch vs come-along for picking the right tool
- winch cable threading and cable accessory options
- hand winch release method and safe handling practices
🔧 My Trailer Fulton — Service Log
A Fulton 2,500 lb XLT worm-gear hand winch has lived on my boat trailer since 2013. Logged service: bench-tested annual brake-hold at 1,000 lb for 60 min — zero drift every year. Strap replaced once at year 8 ($18 OEM replacement). Gear oil changed every 3 years (Lucas 80W-90 GL-5). After 12 years and hundreds of boat launches, the gear case still shows no moisture intrusion, brake still self-holds perfectly. Worm gear hand winches are essentially immortal if you keep moisture out.
