Replacing your winch cable with a strap is one of the smartest upgrades you can make for safer, more efficient off-roading or utility work. Unlike steel cables, winch straps are lighter, easier to handle, and far less dangerous if they break under load. This step-by-step guide will show you exactly how to remove your old winch cable and safely install a heavy-duty strap. Whether you’re upgrading for safety, maintenance, or better control, we’ve got you covered with expert tips, essential tools, and clear safety instructions.
However, to reap these benefits, proper installation is crucial. Swapping a cable for a strap isn’t enough; you must install the strap properly to enhance performance and prioritize safety.
Before replacing, ensure your winch drum is compatible with webbing straps and can accommodate the strap width and load requirements.
Quick Answer
Quick Steps to Replace a Winch Cable with a Strap:
- Uninstall the old cable using cutters or grinders.
- Inspect and clean the winch drum and fairlead for debris or sharp edges.
- Secure the new strap with a bolt, clamp, or knot depending on your winch model.
- Test the installation under load to ensure proper functioning.
Tools and Materials Needed
Before we dive into the nitty-gritty, let’s ensure you have everything needed for a smooth installation process. You’ll need:
- Good Winch Strap: Opt for synthetic rope or a nylon strap, depending on your preference and winching requirements. Choose a winch strap with a working load capacity that exceeds your winching requirements. Common materials include nylon for flexibility and dyneema for higher strength.
- Protective Gloves: Always protect your hands. Gloves can prevent injuries from frayed wires or sharp edges. Wear gloves and safety goggles to avoid injuries from frayed cables or sharp edges during the process.
- Cable Cutters or Angle Grinder: Essential for removing the old cable.
- Winch Hook or Thimble: This will secure the end of your new strap.
- Lighter or Heat Gun: If you’re opting for synthetic rope, this is for sealing the ends to prevent fraying.
Preparation
Safety first! Engage the winch brake and disconnect the power to ensure there are no accidental activations during the installation process.
Extend the cable fully to access the entire length and inspect the winch drum and fairlead for damage.
Any nicks or sharp edges can damage your new strap, so addressing these issues now is critical.
Removing the Old Cable

How to Check Winch Compatibility for a Strap
Ensure the winch drum is at least 2 inches wide to accommodate the strap. For older winches, modifications like drilling a bolt hole may be necessary. Confirm the drum’s design matches the strap’s requirements to avoid installation issues.
Step 1: Safety Gear On
Before you start, it’s essential to gear up with protective gloves. Old winch cables can have sharp frays or burrs that can easily cut skin.
Gloves will protect your hands from injuries and ensure a safer working environment.
Safety goggles are also recommended to protect your eyes from any small particles that may fly off while cutting the cable.
Step 2: Cutting the Cable Near the Drum
Using cable cutters or an angle grinder, you’ll need to cut the old winch cable. If you’re using cable cutters, ensure they are strong enough to cut through the cable’s material, usually steel.
When removing the old cable, check for sharp edges on the winch drum and fairlead, as these can damage the new strap. Smooth out any rough surfaces with sandpaper or a file if necessary.
For thicker or more stubborn cables, an angle grinder might be necessary. This tool can quickly cut through the cable, but it requires a steady hand and safety precautions due to sparks and the potential for the tool to kick back.
Position yourself in a stable stance and cut the cable as close to the drum as possible.
This minimizes waste and ensures you have a clean area to start installing the new strap. If using an angle grinder, ensure the cutting area is clear of flammable materials due to the sparks produced.
Step 3: Removing the Old Cable
Once cut, you’ll need to remove the old cable from the drum and fairlead. You might need to unwind any remaining cable that is wrapped around the drum.
Be mindful of any tension still in the cable as you remove it to avoid sudden releases that could cause injury.
Pull the cable through the fairlead, ensuring it doesn’t catch on anything as it’s removed. This might take a bit of maneuvering, especially if the cable is damaged or frayed.
Step 4: Cleaning the Drum and Fairlead
After the old cable is removed, inspect and clean the drum and fairlead thoroughly. Use a brush to remove any debris, rust, or dirt from the drum.
Ensure the surface is smooth to prevent wear and tear on the new strap. The fairlead, through which the strap feeds, must also be free of burrs or sharp edges that could damage the new strap.
If necessary, lightly sand any rough areas on the drum or fairlead to create a smooth path for the winch strap.
Installing the New Winch Strap

Feeding the Strap Through the Fairlead
The process begins by feeding your new winch strap through the fairlead. This is the guide on the front of your winch that helps direct the strap from the drum to wherever you’re pulling.
Make sure the fairlead is clean and free of any obstructions or sharp edges that could damage your new strap. Slowly feed the end of the strap through, ensuring it moves smoothly without any snags.
Securing the Strap to the Drum
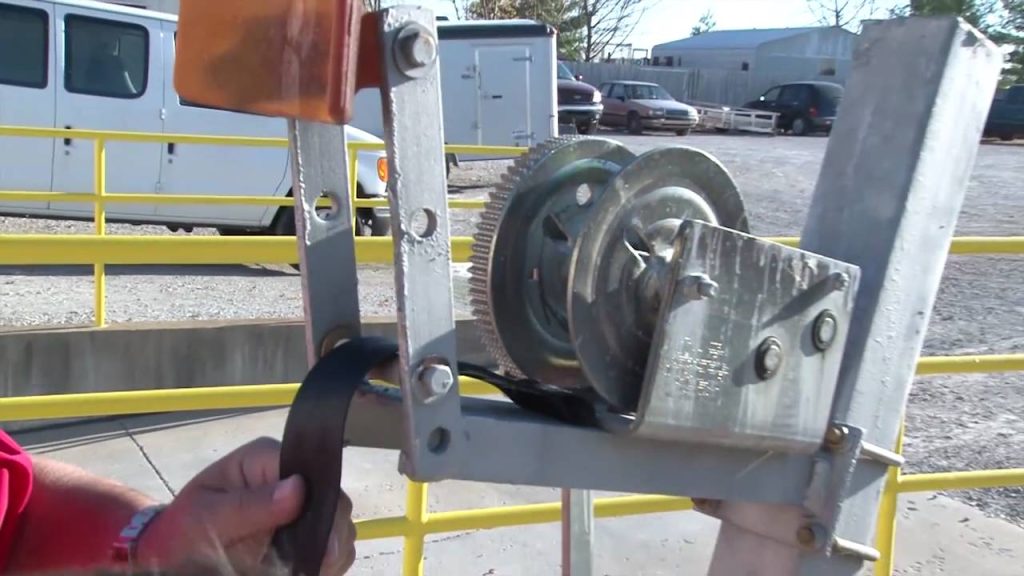
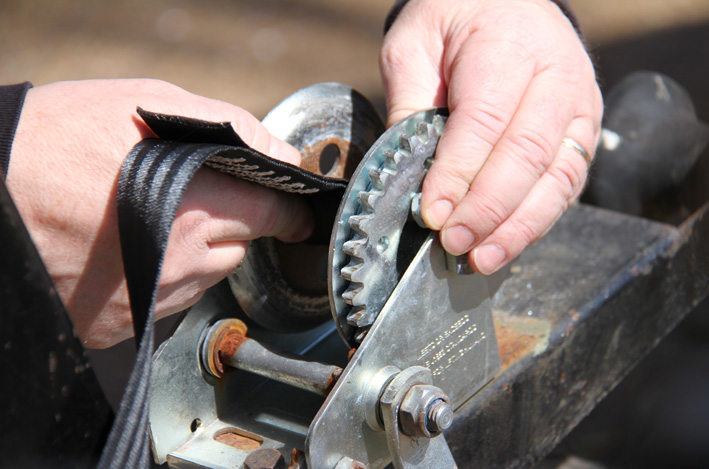
Securing the strap to the drum is a critical step that ensures the strap is firmly attached and won’t slip when under load. When attaching the strap, secure it using the winch’s bolt mechanism or a knot, depending on the model.
Dyneema ropes may require splicing techniques, which involve weaving the rope back into itself for a secure and professional finish.
The method to secure the strap varies by winch model, but there are a few common techniques:
- Tying a Knot: Some winch drums have a small hole through which you can tie the end of the strap, creating a secure base. This is more common with synthetic ropes where a simple knot can be sufficient to hold the strap in place.
- Using a Clamp or Set Screw: Many winches are designed with a clamp or a set screw on the drum for securing the strap. This method is straightforward and involves placing the end of the strap under the clamp or set screw and tightening it down. Ensure it’s tight enough to hold the strap securely, but be careful not to damage the strap by over-tightening.
Attaching the Winch Hook or Thimble
Once the strap is secured to the drum, the next step is to attach the winch hook or thimble to the free end. This attachment is crucial as it’s the point of connection between your strap and whatever you’re pulling or lifting.
- Using a Splice for Synthetic Rope: To splice, weave the rope end into itself, creating a loop for the winch hook or thimble. This method is strong and creates a neat, professional-looking finish. It requires some skill and knowledge of rope splicing techniques.
- Using a Knot or Bolt for a Nylon Strap: For nylon straps, you might use a simpler method like tying a knot or using a bolt through a loop in the strap to secure the hook or thimble. Ensure the knot is tight and secure, or if using a bolt, that it’s properly tightened and won’t loosen under load.
Winding the Strap onto the Drum
With the strap attached to the drum on one end and the winch hook or thimble on the other, you’re ready to wind the strap onto the drum.
It’s important to apply slight tension to the strap as you wind it to prevent any loose loops that could tangle or snag. Start by slowly operating the winch, guiding the strap evenly across the drum.
It helps to have someone guide the strap while another person operates the winch controls, ensuring the strap lays flat and even across the drum.
This step requires patience and attention to detail. Properly wound straps are less likely to wear prematurely, ensuring your winch operates smoothly and efficiently.
What Strap Material Should You Choose?
Nylon straps are ideal for general winching, offering flexibility and ease of handling. For heavy-duty applications, dyneema ropes are the better choice due to their high breaking strength, lightweight nature, and resistance to abrasion. Select a material based on your winching needs and the weight of the load.
Testing and Adjusting
Testing and adjusting your new winch strap is a crucial phase to ensure its optimal performance and your safety during use.
Reconnect the Power and Disengage the Winch Brake
The initial step is to re-establish the power supply to your winch.
This action is preparatory, setting the stage for testing. With the power back on, you must disengage the winch brake.
The winch brake typically controls the spooling and unspooling of the strap, allowing it to freely move in and out. Disengaging it is necessary to test the winding and unwinding mechanism under controlled conditions.
Operate the Winch to Wind the Strap In and Out
Now, it’s time to operate the winch. Your objective here is to carefully observe how the strap winds onto the drum. Use the winch controls to slowly wind the strap back onto the drum, paying close attention to its alignment.
You want the strap to lay flat and evenly across the drum, without any overlaps or gaps that could compromise its strength under load.
After winding, extend the strap out again, watching how it unspools. This process checks for smooth operation in both directions.
It’s crucial to ensure the strap feeds through the fairlead correctly, without catching or snagging.
Check for Proper Spooling and Adjust If Necessary
Proper spooling is essential for the longevity and effectiveness of your winch strap. Improper spooling can lead to wear and tear, reducing the strap’s lifespan and potentially causing it to fail under load.
If you notice any uneven spooling, overlaps, or gaps, you’ll need to adjust how the strap is wound onto the drum.
This might involve manually guiding the strap as it winds or adjusting the tension to ensure it lays flat.
Test the Winch Under Load to Ensure Proper Functioning
The final step in this process is to test the winch under load. This test is crucial because it simulates the real-world conditions under which you’ll be using the winch.
Attach the winch hook or thimble to a secure point and carefully use the winch to apply tension to the strap. Watch for any signs of slippage on the drum or issues with the strap feeding through the fairlead.
This load test should be conducted gradually, increasing the load to your winch’s operational limits to ensure the strap holds securely and performs as expected. Always follow safety procedures during this test to prevent accidents in case of a failure.
FAQs
Why should I replace a winch cable with a strap?
Replacing a winch cable with a strap improves safety, as straps are less likely to snap back dangerously. They are also easier to handle, more flexible, and resistant to corrosion, making them a better option for most winching tasks.
How do I know if my winch drum is compatible with a strap?
Check the width and design of the winch drum. It should be at least 2 inches wide and have provisions, like a bolt or clamp mechanism, to secure a strap. Older winches may require modifications such as drilling a bolt hole for proper compatibility.
What tools do I need to replace a winch cable with a strap?
You will need cable cutters or an angle grinder to remove the old cable, protective gloves, safety goggles, a bolt or clamp for securing the strap, and optionally, a lighter or heat gun for sealing synthetic rope ends.
How do I attach a strap to the winch drum?
Thread the strap through the fairlead and attach it to the drum using a bolt, clamp, or a secure knot. For synthetic ropes like dyneema, splicing techniques may be required to ensure a strong and durable attachment.
What safety precautions should I take when replacing a winch cable?
Always wear gloves and safety goggles to protect against frayed cables and sharp edges. Disconnect the power to the winch before starting, and ensure the brake is engaged to prevent accidental movement during the process.
How often should I replace my winch strap?
Replace your winch strap if you notice signs of wear such as fraying, tears, or fading. Regular inspections before use are recommended, and replacement may be needed every few years depending on usage and exposure to elements.
Can I use a winch strap on all winches?
Not all winches are designed for straps. Ensure your winch is compatible with webbing straps by checking the drum’s design and size. If the winch is designed for steel cables, modifications might be required.
What is the load capacity of a winch strap?
The load capacity depends on the material and width of the strap. Nylon straps typically handle light to moderate loads, while dyneema ropes can handle heavier loads, often exceeding 10,000 pounds in breaking strength.
Conclusion
Switching to a winch strap enhances the safety and performance of your winching operations. It also contributes to the longevity of your winch.
Remember, though, that the key to these benefits lies in proper installation and regular maintenance.
By following these steps, you can enjoy a safer, more efficient winching experience. Regular care ensures that your equipment remains reliable, ready for whatever task you have at hand.

