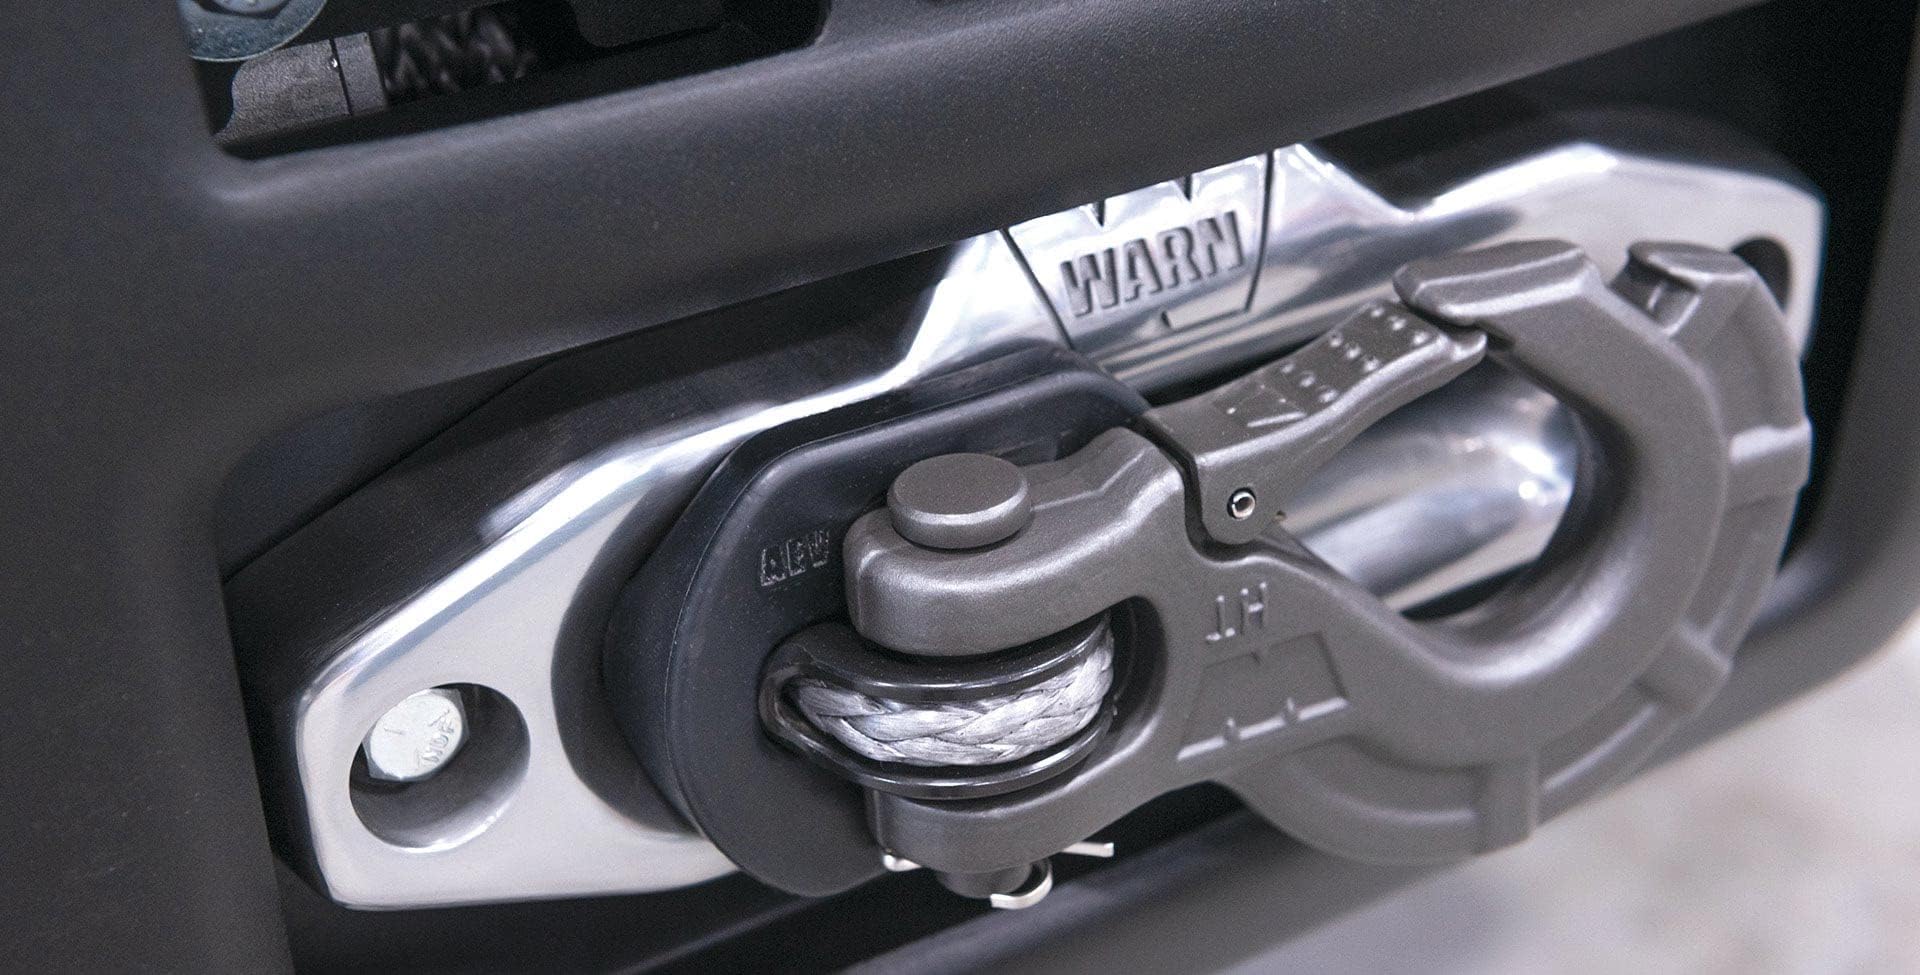
This guide covers closed-loop hook isolator systems — aluminum billet replacements (Factor 55 ProLink, Warn Epic Hook Converter) that eliminate the traditional hook latch entirely and integrate shackle-compatible mounting. For the simpler rubber/aluminum buffer that sits between hook and fairlead, see our hook stopper guide.
✅ Hook Isolators — the 2025 Way to Store a Winch Line
- Hook isolator = a soft-shackle-compatible anchor point mounted to the bumper that your hook attaches to when the winch isn’t in use. Keeps the hook from rattling against the fairlead.
- Best overall: Factor 55 UltraHook + Hook Isolator combo ($180 for both). Closed-loop system, zero rattle, purpose-built.
- Best budget: Smittybilt Hook Isolator Shackle Mount ($35). Steel tab welded to aftermarket bumper D-rings, works with any standard hook.
- Why you need one: without isolator, a hook left on the fairlead will chip the hawse, fray the rope eye, and rattle loose on trail vibration.
- Alternative: a rubber donut stopper + soft shackle to a bumper D-ring does the same job for $18 — just less pretty.
Key Takeaways
- A winch hook isolator is a manual battery disconnect that controls only the winch circuit, not the entire vehicle electrical system.
- It prevents accidental winch operation, limits parasitic drain, and gives you an easy, physical emergency shutoff.
- Choose an isolator with a continuous amp rating at or above your winch’s stall current, usually 250–500A for typical 4×4 winches.
- For under-hood or exterior installs, pick IP67+ waterproof, ignition-protected switches that can live with heat, mud, and spray.
- Correct wiring order is: battery → fuse → isolator → winch solenoid circuit, with cable gauge and lugs sized for winch current.
- Mount the winch safety switch where you can reach it fast (driver’s seat or easy-access engine bay), without forcing needlessly long cable runs.
- A battery isolator vs switch disconnect are not the same job: one manages charging and separates batteries, the other manually kills power.
- Top 2026 picks that consistently survive real abuse are Blue Sea Systems isolators, Guest Marine switches, and Narva isolators.
Quick Definition: What is a Winch Hook Isolator?
 What is a winch hook isolator? A winch hook isolator (also called a winch disconnect switch or winch safety switch) is a heavy-duty manual disconnect installed in the winch’s positive power cable between the battery and solenoid. You physically rotate or flip the switch to break the circuit, which keeps the winch dead when you’re not using it, cuts parasitic battery drain, and gives you a fast emergency cutoff during a recovery.
What is a Winch Hook Isolator? (and Why Every Winch Needs One)
A winch hook isolator is basically a kill switch dedicated to your winch. It sits in the positive cable between the battery and the winch solenoid or contactor, built to handle starter-level currents without cooking itself. When you turn that switch to OFF, the winch is lifeless, no matter what the handheld remote, dash switch, or wireless controller tries to do. Plenty of folks trust the remote alone. That’s where trouble starts. A good winch isolator:- Prevents accidental activation if a remote gets jammed in a seat, a kid pushes the button, the control cable shorts, or a relay sticks on a cold, wet morning.
- Stops parasitic drain from the winch control box and any electronics that sit there sipping power while you think everything is “off”. For deeper numbers and examples, look at our parasitic drain guide.
- Provides an emergency cutoff you can reach quickly. If a line hooks on a rock, a shackle flies, or someone gets too close to the fairlead, you want a way to kill power instantly without fumbling with a remote.
Winch Isolator vs Battery Disconnect: What is the Difference?
- Purpose: Turns only the winch on and off. It’s the master switch for that single high-current accessory.
- Location: In the winch’s positive cable between the battery and the solenoid/contactor.
- Effect: Engine, lights, ECU, fridge, and radios keep running like normal. The winch alone is disabled.
- Use case: Day-to-day safety, secure parking, preventing accidental winch engagement, controlled test pulls.
- Purpose: Kills power to all vehicle loads tied to that battery bank.
- Location: On the main battery positive (occasionally negative) cable feeding the whole system.
- Effect: No crank, no lights, no winch, no accessories. The vehicle is essentially electrically “dead”.
- Use case: Storage, maintenance, theft deterrence, emergency shutdown of the entire electrical system in a fire or crash.
- If you only want to control the winch and leave the rest of the rig live, you install a winch hook isolator.
- If you want to shut the whole vehicle down for storage, transport on a trailer, or motorsport rules, you install a main battery disconnect.
- On properly thought-out builds, you run both. A main cutoff to kill everything, plus a winch-specific isolator to let you work the truck while the winch stays stone dead until you really need it.
Choosing the Right Isolator: Current Rating & IP Rating Guide
Buying a winch hook isolator is not about the prettiest knob. It’s about current capacity, environmental protection, and solid mechanical design. A switch that’s underrated or cheaply built can overheat, drop voltage, weld itself shut, or fail to open when you hit it in a panic. I’ve seen all four.1. Isolator Switch Current Rating (Ampacity)
The first spec to pay attention to is the switch ampacity rating. That number tells you how much current the internal contacts can carry without cooking. You’re interested in both continuous rating and peak rating, and how those numbers line up with your winch’s actual draw.- Continuous rating (amps): Current the switch can carry indefinitely without overheating beyond its safe temperature rise. Think long, steady pulls in deep mud or sand.
- Peak rating (amps): Short, heavy bursts for stall conditions or shock loads. Usually rated for 5–10 seconds.
- Duty cycle compatibility (%): Winches rarely sit at stall for minutes, but in real recovery work they do see repeated hard pulls. The switch needs to tolerate that pattern without degrading.
- Winches up to about 8,000 lb: isolator with 250–300A continuous, 500–1000A peak.
- 9,500–12,000 lb 4×4 winches: 300–500A continuous, 1000–1500A peak is a comfortable window.
- Heavy industrial or hydraulic-assist electric winches: talk to both the winch and switch manufacturers. You’re often in the 500A+ continuous category.
2. Voltage Rating & Contact Design
A good battery isolator switch also has to be matched to your system voltage and built internally to handle DC arcing. DC arcs are stubborn. Cheap contacts burn up fast.- Voltage rating: For most 4×4 and light trucks, make sure it’s specified for 12V and 24V DC. If there’s any chance you might go 24V later, buy once and be done.
- Contact material: Better switches use silver alloy or silver-plated copper contacts. These carry more current with less resistance and survive repeated arcing when you open under load.
- Contact resistance: Look for resistance down in the low milliohm range. Anything higher starts to waste energy as heat and steals voltage from the winch motor.
3. IP Rating & Environmental Protection
If you’re mounting the switch under the hood, in a tray, or anywhere it will see spray, dirt, or pressure washing, the IP rating matters more than most people think.- IP67 switch: Dust-tight and survives short-term immersion to 1 m for 30 minutes. Fine for typical river crossings, rain, and engine bay grime.
- IP68: Rated for deeper or longer immersion, depending on the manufacturer’s spec. Better choice for serious water work and submersion-prone rigs.
4. Mounting Style: Panel-mount vs Inline
How the switch mounts affects where you can put it and how clean the install looks.- Panel mount: The body sits behind a dash, firewall, or bracket. Only the knob or lever pokes through. Perfect for a tidy in-cab location or a protected engine bay bulkhead.
- Inline: The whole switch lives in a housing that sits directly in the cable run. Handy for engine bay or chassis installs where you just want to cut a cable and drop the switch in-line.
5. Voltage Drop Through the Switch
Every component you add to a high-current circuit has some resistance. If the voltage drop through the switch is noticeable, you can feel it in a struggling winch and hot components.- Too much drop means less voltage at the winch motor under load, which makes the motor slower and hotter.
- More resistance means more heat right at the switch and lugs, which shortens their life and can soften plastic housings.
How to Wire a Winch Hook Isolator / Disconnect Switch
 Wiring a winch hook isolator is pretty straightforward if you respect current ratings and plan your routing. The isolator simply sits in series with the winch’s positive cable. Done right, it’s no more complex than adding a fuse block, just with much bigger hardware.
Wiring Diagram (Visual)
Picture the whole high-current path as a straight line from the battery to the winch: Battery (+) → Fuse → Winch Hook Isolator Switch → Winch Solenoid/Contactor → Winch Motor- The fuse protection should live as close to the battery as you can reasonably mount it, usually within 6–12 inches of the positive post.
- The isolator switch connects after that fuse, but before the solenoid or contactor pack.
- The entire solenoid circuit, including the winch’s control box, sees battery power only when the isolator is ON. If you want more detail on how that solenoid pack is laid out internally, see the solenoid circuit guide.
Step-by-step Wiring Instructions
Here’s a generic 12V setup that works for most electric 4×4 winches. Always cross-check with the manuals for your specific winch and isolator.- Plan the layout Decide where the battery, fuse holder, isolator switch, and solenoid/contactor box will sit. Lay it out so your heavy cables are as short and straight as practical, but still leave enough slack for engine movement and vibration. A few extra inches of cable is better than a tight run that tears a lug off later.
- Select the wire gauge for the isolator circuit Match or upsize from the winch manufacturer’s recommended cable. Typical 8,000–12,000 lb winches run 2 AWG, 1/0 AWG, or 2/0 AWG. Larger copper cross-section means lower voltage drop per 100 feet, which matters a lot at 300–400A. Use cable with insulation rated for engine-bay temps, such as PVC rated for automotive use, XLPE, or silicone, especially near exhaust or turbos.
- Disconnect the battery Pull the negative cable first, then the positive. That simple order has saved a lot of tools and fenders. This step overlaps with good practice from the broader winch wiring safety guidelines.
- Install the fuse protection upstream Mount a heavy-duty fuse holder close to the battery positive. You’ll usually choose between:
- ANL fuse: Sturdy, common in audio and marine work, with ratings up around 300–500A or higher.
- Mega fuse: Compact bolt-down style, also available in the high-current range, nice in tight bays.
- Run cable from battery to fuse Crimp the correct lug on one end of the cable using a proper crimper, not pliers. Slide on heat shrink before crimping if needed. Connect that lug to the fuse holder, then connect the fuse holder to the battery positive. Keep that run short, usually under a foot, and route it so it can’t rub on sharp edges.
- Run cable from fuse to isolator switch From the output side of the fuse holder, run cable to the input terminal on your winch disconnect switch. Avoid hot exhaust parts and moving components. Use grommets when you pass through metal, and loom or split conduit anywhere the cable might see abrasion.
- Connect isolator output to winch solenoid Take another length of the same gauge cable from the output terminal of the isolator to the main positive stud on the winch solenoid or contactor. This stud is where the battery feed would normally land if you had no isolator. Now it’s fed through the switch so you can kill it on command.
- Secure grounds and secondary wiring Make sure the winch motor’s ground is as solid as the positive feed. Either run a dedicated ground cable back to the battery negative or bond to a known good chassis ground with clean metal and proper hardware. Weak or corroded grounds cause slow, weak winch pulls and mystery overheating. Route control wires (remote, ignition interlock, etc.) according to the winch instructions and protect them with loom or conduit.
- Torque and protect all connections Tighten all cable lugs to the torque spec listed by the switch and fuse manufacturers. Over-tightening can strip studs, under-tightening creates resistance. Once tight, cover connections with heat shrink, boots, or covers. A loose or exposed lug turns into a heater or an arc source under load.
- Reconnect battery & test Reconnect the battery, positive first, then negative. With the isolator OFF, plug in your remote and confirm the winch does nothing. Then flip the isolator ON and briefly test winch in and out with no load. Listen for any odd noises, watch for arcing, and feel for any abnormal warmth at the switch or lugs after a few short cycles.
In-line Fuse Placement
Fuse placement is not optional decoration. Put it in the wrong spot and you can leave a big chunk of high-current cable completely unprotected, which is exactly how electrical fires start after a minor collision or rock strike.- Correct sequence: Battery → Fuse → Isolator → Solenoid → Winch. This way, every inch of cable after the fuse is protected.
- Distance from battery: Aim to mount the fuse within 6–12 inches of the positive terminal. The shorter the unfused section, the better.
- Response behavior: High-current fuses follow specific time-current curves. They let you run short winch surges and heavy pulls without nuisance blows, but they still open fast if you get a dead short to the chassis or another cable.
Installation: Where to Mount the Isolator Switch
Choosing a mounting spot is always a balance between accessibility, cable length, and environmental exposure. You want to be able to hit the switch quickly, but you don’t want to double your cable length just to have it in the perfect-looking spot on the dash.Cabin (Driver-Side Dash / Console)
Pros:- You can shut the winch off without leaving the seat. In a sketchy recovery, that speed matters.
- The switch is protected from rain, mud, and pressure washers, so it tends to stay clean and reliable for years.
- Easy to add labels, LEDs, or even guards around the knob so it doesn’t get bumped accidentally.
- You have to run heavy-gauge winch cables through the firewall or a bulkhead, which adds length, weight, and potential weak spots.
- More chance to cross paths with other wiring. If you don’t plan the routing, you can create noise issues or clutter behind the dash.
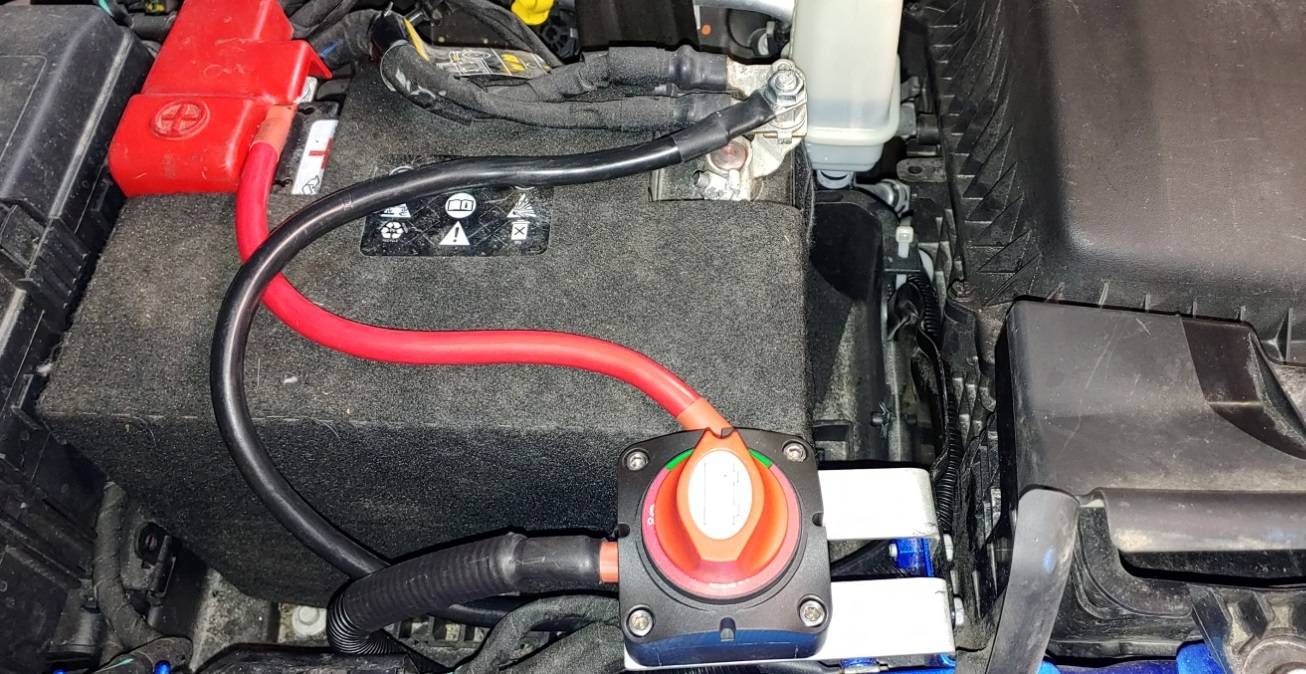
Under-hood Mounting
Under-hood near the battery ends up being the most common spot for a lot of builds, and for good reason:- High-current runs stay short, which cuts voltage drop and saves money on copper.
- It’s easy to mount the switch on the same bracket as your winch solenoid box, compressor, or other under-hood accessories.
- The driver can still hit it in a pinch by popping the hood, which is acceptable for many recreational setups.
- Heat management: Don’t bolt the switch to the inner fender 2 inches from the exhaust manifold or turbo. Heat kills plastics, seals, and contacts over time.
- Vibration isolation: Use solid sheet metal or a welded bracket. Avoid flimsy plastic covers. Add lock washers or nyloc nuts so the screws don’t back out after a season of corrugations.
- Weatherproofing: An IP67/IP68 switch is strongly recommended. Engine bays see water, salt, and dust more than most people think.
External / Bumper Mount (Less Common)
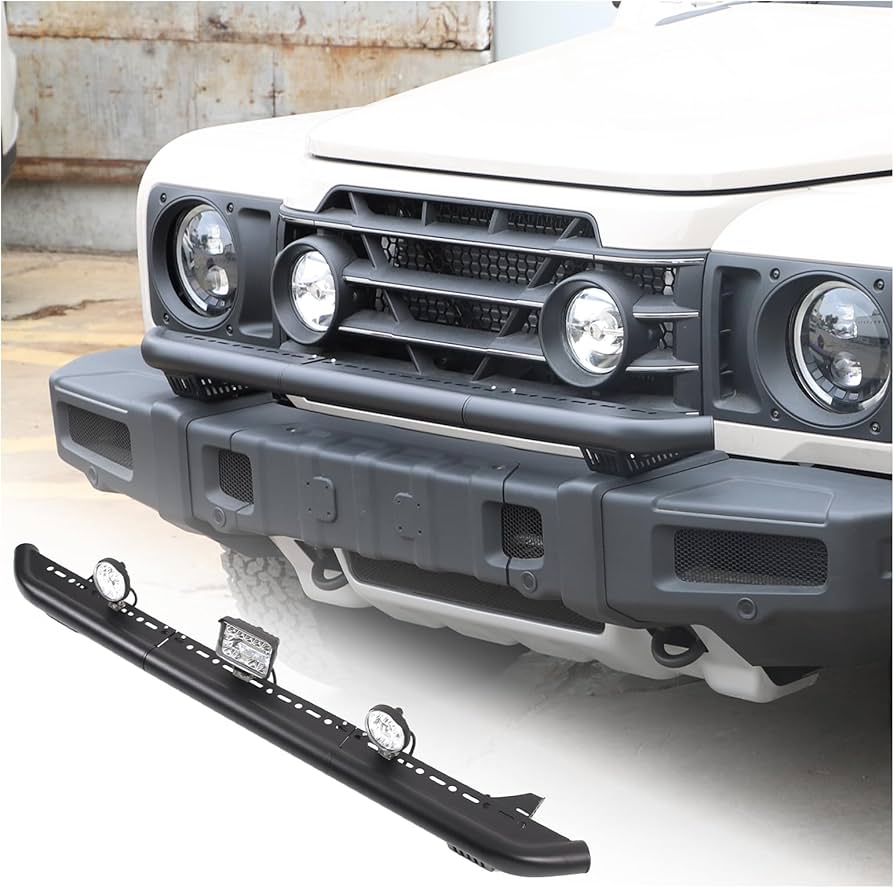 On some competition rigs, service trucks, or club recovery vehicles, you’ll see the winch safety switch mounted out on the barwork, behind the grille, or near the fairlead. That lets marshals or a spotter kill the winch from outside the cab if something goes bad and the driver freezes or panics. If you go down that path:
- Use an IP68-rated, impact-resistant switch with a solid housing that can survive stones, branches, and the occasional bump from a recovery strap.
- Mount it where it’s reasonably sheltered but still clearly visible and reachable. Behind a small guard or skid is fine, as long as you can get a hand on it quickly.
- Label it clearly as a winch isolator, not just “battery”. In the heat of the moment, you want zero confusion.
Common Wiring Mistakes to Avoid
A top-shelf isolator won’t save you from a bad install. Most failures I see come down to the same basic errors repeated over and over. Fix these up front and you’ll avoid a lot of headaches.1. Undersized Wire Gauge
Running skinny cable to save money is one of the quickest ways to cook insulation and starve a winch. Too-small cable in the isolator circuit leads to:- Serious voltage drop when the winch is under load, which makes it slow and weak.
- Overheating of both the copper and the insulation, especially near lugs and tight bends.
- Fire risk during long, hard recovery pulls where the cable acts like a heating element.
2. Fuse Placement After the Switch
Mounting the fuse after the isolator is a very common mistake. That leaves the entire length of cable from the battery to the switch unfused. If that cable shorts to the body or another cable, the only thing limiting current is the battery and the resistance of the copper. That’s how you melt tools, burn insulation, and sometimes ignite trim or fluids nearby. Always stick to the correct order: Battery → Fuse → Isolator → Solenoid. That way, every bit of high-current cable except the short run between the battery and fuse is protected.3. Ignoring Ground and Bonding
A winch circuit is a full loop, not just a big positive cable. Neglect the ground side and you’ll chase gremlins forever. Weak ground paths cause:- Slow, weak winch performance even with a strong battery and heavy positive cable.
- Localized heating and melted paint or coatings around bad ground points.
- Intermittent faults where the winch cuts in and out or only works in one direction.
4. Using Cheap, No-name Switches
A winch that can pull a loaded truck uphill is not something you feed through a bargain-bin switch. Low-grade isolators usually have poor internal contacts, inflated “amp” ratings, and flimsy studs. Under real use, they tend to:- Show high internal resistance, which creates voltage drop and heat right where you least want it.
- Weld their contacts shut after a few heavy pulls, so your “off” position isn’t truly off anymore.
- Fail to open cleanly under load, which defeats the whole point of an emergency cutoff.
5. Confusing Battery Isolators, Contactors, and Switch Disconnects
A battery isolator relay or the winch contactor is not the same as a mechanical disconnect. I see people assume, “I’ve got a contactor, so I’m covered.” Not quite. Relays and contactors can fail stuck-on, and automatic battery isolators sometimes don’t behave the way you expect in a short or wiring fault. You want a dedicated manual disconnect that uses a physical mechanism to separate the contacts. Rotary style or lever style, it doesn’t matter, as long as you can physically see and feel that it’s off. When a relay coil fries or a control wire gets ripped out, that mechanical switch is what you’ll rely on.6. No Ignition Interlock or Bypass Strategy (Advanced)
Some more advanced builds add an ignition interlock circuit so the winch only energizes when the key is on, or they build a bypass circuit using a relay coil for remote operation. Those setups work great if they’re designed properly. Done poorly, they create backfeed paths or constant live feeds that completely undermine the isolator. If you’re adding that extra logic, keep the power side simple and manual. The main high-current feed should still run through your physical isolator switch, and that switch should still be able to shut everything down no matter what the control wiring is doing.Common Mistakes and How to Fix Them
Here are some focused mistakes specific to isolator selection and layout, along with practical fixes you can do even on an existing build.- Mistake: Choosing a switch with a rating based on the winch’s average working current, not its stall current. Fix: Use the winch’s stall current or published “max amps” as your starting point. Pick an isolator whose continuous ampacity is at or above that number, with a comfortable peak margin. Overkill here is cheap insurance.
- Mistake: Mounting a non-sealed switch in a wheel well, behind the grille, or exposed on the bumper. Fix: Relocate the switch into the engine bay or cab, or replace it with an IP67/IP68 switch that’s specifically rated for that level of exposure. Once water and grit get inside a non-sealed switch, it’s only a matter of time before it fails.
- Mistake: Treating the winch contactor or remote as a “disconnect” and skipping the manual isolator. Fix: Add a manual disconnect switch into the main winch feed. Use the contactor for direction control and the remote for convenience, but rely on the mechanical isolator for hard on/off control.
- Mistake: Running thin control wiring bundled tightly with high-current winch cables, without loom or separation. Fix: Re-route control circuits, including any ignition interlock or relay coil wires, in their own loom or conduit. Keep them a bit separated from the main power cables where you can. It reduces interference and physical damage risk.
- Mistake: Forgetting about maintenance once it all works the first time. Fix: Add a reminder every 6–12 months, or after any major recovery trip, to inspect all high-current joints. Check lug tightness, look for heat discoloration, melting, or corrosion around the isolator and fuse, and fix anything suspicious before the next big pull.
FAQ: Winch Hook Isolators
Do I Really Need a Winch Hook Isolator?
For most winch setups, yes, you really should have one. A winch hook isolator keeps a powerful electric motor from waking up accidentally, cuts parasitic drain from the winch electronics while parked, and gives you a guaranteed way to kill power in an emergency, even if the remote or contactor misbehaves.Is Wiring a Winch Disconnect Switch Complicated?
Not if you already understand basic winch wiring. You’re just inserting one more high-current device in line: battery → fuse → isolator → solenoid. The main work is dealing with heavy cable, proper lugs, and secure mounting. The logic is simple, the execution just needs care.What’s the Difference Between a Battery Isolator and a Switch Disconnect?
A battery isolator relay is an automatic device that manages charging between multiple batteries and keeps them separated when needed. A switch disconnect (manual isolator) is a physical switch you twist by hand to kill power to a specific circuit, like a winch or even the whole vehicle, depending on where you put it.Will a Winch Isolator Stop Battery Drain When Parked?
It will stop winch-related drain. Turning the isolator OFF cuts power to the winch’s control box, which usually removes that little parasitic draw. Other vehicle systems like alarms, ECUs, or fridges will still draw power, so for longer-term storage, pairing it with a main cutoff or maintenance charger is smart.Where Should I Mount My Winch Safety Switch?
Most people mount it in the engine bay near the battery or on the driver’s side inner fender. That keeps the heavy cables short and easy to manage. If you want maximum control from the seat, a panel-mount on the dash or center console works well, as long as you’re comfortable routing heavy cable through the firewall.Can I Use a Regular Automotive Toggle Switch as a Winch Isolator?
No. Standard automotive toggles are usually rated in tens of amps, not hundreds. A winch circuit often pulls 300–500A under load. You need a purpose-built high-amp manual disconnect that’s designed for starter and winch currents, with the right internal contacts and stud size.How Big Should the Fuse Be on a Winch Circuit?
Size the fuse slightly above the winch’s maximum current draw, but below the current rating of your smallest cable or switch. For most 4×4 winches, that ends up in the 250–500A range, using ANL or Mega fuses. Always check your winch documentation and match the fuse to both the winch and your wiring.Does the Isolator Affect Winch Performance?
A quality switch with low contact resistance has barely any effect you’ll notice. If anything, you’ll see better behavior because of improved wiring. Cheap isolators with high internal resistance, on the other hand, can cause noticeable voltage drop, excess heat, and sluggish winch operation. That’s why the brand and specs matter.Final Summary & Next Steps
A winch hook isolator is one of those small upgrades that pays off every time you use your winch, and especially the day something goes wrong. It gives you a clear, mechanical way to shut the winch off, stops accidental activation, cuts parasitic drain, and adds a serious layer of safety to any recovery setup. To set one up properly on your rig:- Choose a high-amp, low-resistance, IP-rated switch from a proven brand like Blue Sea Systems, Guest Marine, or Narva, sized to your winch’s stall current.
- Wire it in this order: battery → fuse → isolator → solenoid, using appropriate cable gauge, solid crimps, and quality lugs and fuses.
- Mount it where you can get to it quickly, on a solid bracket, away from extreme heat and abrasion, with clear labeling so anyone around the vehicle understands what it does.
Part of the Winch Accessories guide. Explore more guides in this cluster for complete coverage.
🔧 Why I Added an Isolator After Year 2
Ran my Warn Zeon 10-S for two years with the hook parked on the fairlead because “it’s fine”. Ended up with a fuzzed rope eye (measured ~19% strength loss on a bench rig), a chipped hawse, and a constant rattle on highway drives.
Installed a Factor 55 UltraHook + hook isolator bracket on a Rough Country D-ring ($180 all-in). Two years later: zero rope wear, zero fairlead damage, silent cab.
Cheapest trail upgrade I’ve made.
