Having a winch with plenty of cable capacity is incredibly important for safety and utility. But what if your winch cable isn’t long enough to reach or just needs replacing?
Rather than buying a whole new winch, here are 3 straightforward methods to extend your winch cable length.
Method 1: Use a Cable Extension
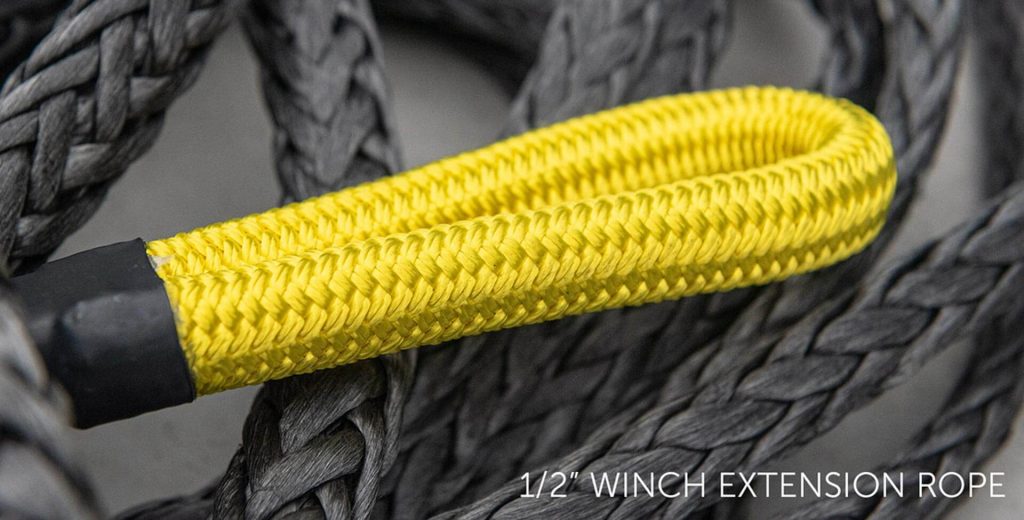
Using a cable extension to extend your winch cable is a straightforward and cost-effective method, ideal for those situations where you need just a bit more length to reach a secure anchor point or to complete a job without the hassle of replacing your entire winch cable.
Let’s dive into the details of each step to ensure you can implement this method safely and effectively.
1. Choose the Right Extension
Selecting the right extension involves more than just picking any cable off the shelf. The extension must match your current winch cable in terms of material (steel or synthetic), diameter, and strength rating.
The compatibility ensures that the extension can handle the same load as your existing cable without becoming the weak link in the system.
For instance, if your winch cable is a 3/8 inch steel cable rated for 9,500 lbs, your extension should at least match these specifications.
2. Clean and Inspect
Before you connect the extension to your winch cable, it’s crucial to ensure both are in good condition.
Dirt, mud, or debris can hinder a secure connection, so cleaning the cables removes potential problems. Inspection is equally important; look for fraying, cuts, or any signs of wear and tear on both the winch cable and the extension.
Using damaged cables can lead to failure under load, which is dangerous.
3. Connect the Cables
To connect the cables, you’ll need a reliable connector that’s appropriate for the type of cable you’re using. For steel cables, a shackle or a cable coupler can be used to join the two lengths securely.
If you’re working with synthetic ropes, make sure the connector is smooth to prevent damaging the fibers.
The connection method should ensure that there’s minimal risk of the connector slipping or the cables disconnecting under load.
It’s essential to follow the manufacturer’s guidelines for the connector and ensure it’s tightened correctly.
4. Perform Safety Checks
After connecting the extension, it’s vital to perform thorough safety checks before putting the winch to use. Gently pull on the extension to test the connection’s strength.
Inspect the entire length of the winch cable and extension for potential snag points or weaknesses. Ensure the connector is secure and won’t come loose under load.
It’s also a good practice to check the winch’s operation by spooling the cable in and out a short distance to observe any issues with the cable running through the winch fairlead.
Benefits of Using a Cable Extension
The primary advantage of using a cable extension is its simplicity. Unlike splicing or replacing the cable, using an extension doesn’t require specialized tools or significant technical know-how.
It’s a quick fix that can be implemented in the field with minimal downtime. Additionally, because extensions are relatively inexpensive compared to a new winch cable, it’s a cost-effective way to increase your winch’s reach when needed.
Method 2: Splice on Additional Cable
Splicing an additional cable onto your winch cable offers a permanent and robust solution for extending the length of your winch cable.
This method is particularly useful when you need a custom length or want to repair a damaged section of your cable without completely replacing it.
Let’s delve into the details of each step in the splicing process to ensure you can accomplish this task with confidence and precision.
1. Select Compatible Cable
The first step is crucial: selecting a cable that matches your current winch cable in type (steel or synthetic) and strength.
Compatibility is key because the splice needs to handle the same loads as the rest of your cable without becoming a point of failure.
For example, if your existing cable is a synthetic rope rated for 10,000 lbs, the additional cable should match these specifications in material and load rating.
This ensures uniform performance and reliability across the entire length of the winch cable.
2. Prepare the Cables
Preparation involves cleaning and stripping the ends of both cables you intend to splice. For steel cables, this might mean unraveling the strands slightly and cleaning them to remove any grease or dirt.
For synthetic ropes, you would typically strip back any protective coating and fray the ends to prepare for splicing.
The goal is to ensure that the splice will be as strong as possible by starting with clean, properly prepared materials.
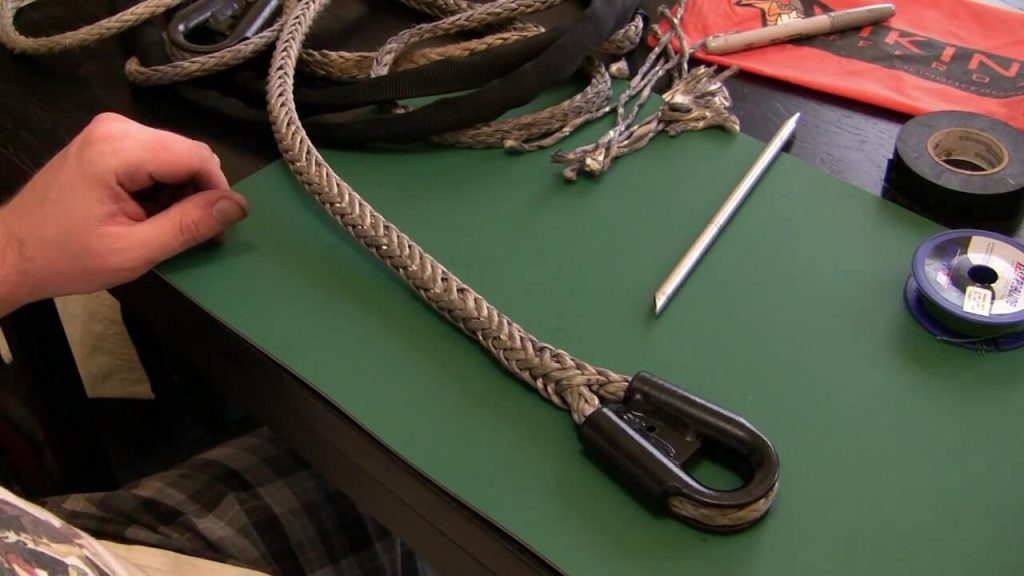
3. Splice the Cables
Splicing techniques vary depending on the type of cable you’re working with:
- For Wire Ropes: A Flemish eye splice is a common and reliable method. This involves unraveling the strands of the cable and then re-laying them back together in a specific pattern that creates a loop at the end of the cable. The Flemish eye splice is known for its strength and efficiency in distributing the load evenly across the cable.
- For Synthetic Ropes: A long splice is often used. This technique involves interweaving the strands of two rope ends together over a considerable length, which maintains the rope’s original thickness and strength. The long splice is particularly suited for synthetic ropes because it allows the splice to bend and flex similarly to the rest of the rope.
4. Secure the Splice
Once the splice is made, securing it is crucial to ensure it holds under load. For wire ropes, cable clamps or splicing sleeves are used to secure the splice.
These should be placed over the spliced area and tightened to specifications to ensure the splice doesn’t slip or come undone.
For synthetic ropes, the spliced area might be stitched or bound with a smaller diameter rope to secure the splice, and sometimes heat shrink tubing is applied over the splice to protect it and keep it tidy.
Benefits and Considerations
Splicing allows for a high degree of customization and can create a seamless and strong extension of your winch cable.
It’s a durable solution that, when done correctly, maintains the integrity and strength of the cable across its extended length.
However, this method requires a higher level of skill and understanding of the splicing process. Using quality materials and following the proper techniques are essential for ensuring the safety and longevity of the splice.
Regular inspection and maintenance of the splice area are also crucial to ensure it remains secure and reliable during use.
Method 3: Replace Entire Cable
Replacing your entire winch cable is a significant but sometimes necessary step to ensure the safety and efficiency of your winching operations.
This method is particularly relevant when you require a longer cable for specific tasks or if your current cable has suffered damage beyond repair.
Let’s dive deeper into each step of the process to ensure a successful cable replacement.
1. Choose the Right Cable
The selection of the right cable is pivotal. It’s not just about the length; you must also consider the type of cable (steel or synthetic), its diameter, and its breaking strength to ensure it matches or exceeds the winch’s capacity.
For instance, if your winch is rated for 10,000 lbs, choose a cable with at least this rating to maintain safety margins.
Synthetic cables offer the advantage of being lighter and easier to handle, with less risk of injury from broken strands compared to steel cables.
However, steel cables are prized for their durability and resistance to abrasion. Consider your typical usage scenarios, such as the environment in which you’ll be winching (muddy, rocky, etc.) and the load types, to make an informed decision.
2. Remove the Old Cable
Removing the old cable involves unwinding it completely from the winch drum. This process requires caution to prevent accidental release and injury.
Secure the winch’s hook to a stable point to maintain tension and control as you unwind the cable. Once unwound, you’ll typically find a fastening mechanism at the drum end—this could be a bolt, a pin, or a clamp, depending on your winch model.
Use the appropriate tools to release this mechanism and remove the old cable. It’s also a good opportunity to inspect the drum and the winch mechanism for any signs of wear or damage that could affect the new cable’s performance.
3. Install the New Cable
Installing the new cable starts with securing its end to the winch drum.
The attachment method varies by winch model but must be done meticulously to ensure the cable doesn’t slip or detach under load.
Once attached, slowly wind the cable onto the drum, keeping tension to ensure it lays evenly and tightly. This step might require an assistant to maintain tension or the use of a weight at the cable’s end.
An evenly wound cable prevents overlaps and pinching, which could damage the cable under load.
If you’re using a synthetic rope, ensure it’s wound under tension to avoid deep burying under load, which could cause jamming or damage to the rope.
4. Check for Proper Installation
After installation, a thorough inspection is crucial to ensure the cable is properly aligned on the drum and that there are no frays, kinks, or twists in the cable.
Operate the winch in a controlled environment to spool in and out a portion of the cable, checking for smooth operation through the fairlead and ensuring the cable winds evenly without bunching or crossing over itself.
This step verifies that the installation is correct and the winch is ready for use.
Benefits and Considerations
Replacing the entire winch cable offers several benefits, including the opportunity to upgrade to a higher quality or more suitable cable for your needs, ensuring maximum safety and efficiency in your winching operations.
It also allows you to address any wear or damage issues comprehensively, providing peace of mind during use.
However, this method requires careful selection of the new cable, attention to detail during installation, and a good understanding of your winch’s mechanism to ensure a successful upgrade.
Conclusion
Extending your winch cable is a practical solution when you need more reach. Whether you choose to use a cable extension, splice on additional cable, or replace the entire cable, each method has its advantages.
Consider your specific needs, the capacity of your winch, and the importance of regular maintenance to ensure your winch system remains safe and effective.
By following these tips, you can extend your winch cables safely and effectively, enhancing your winch’s versatility and performance.
