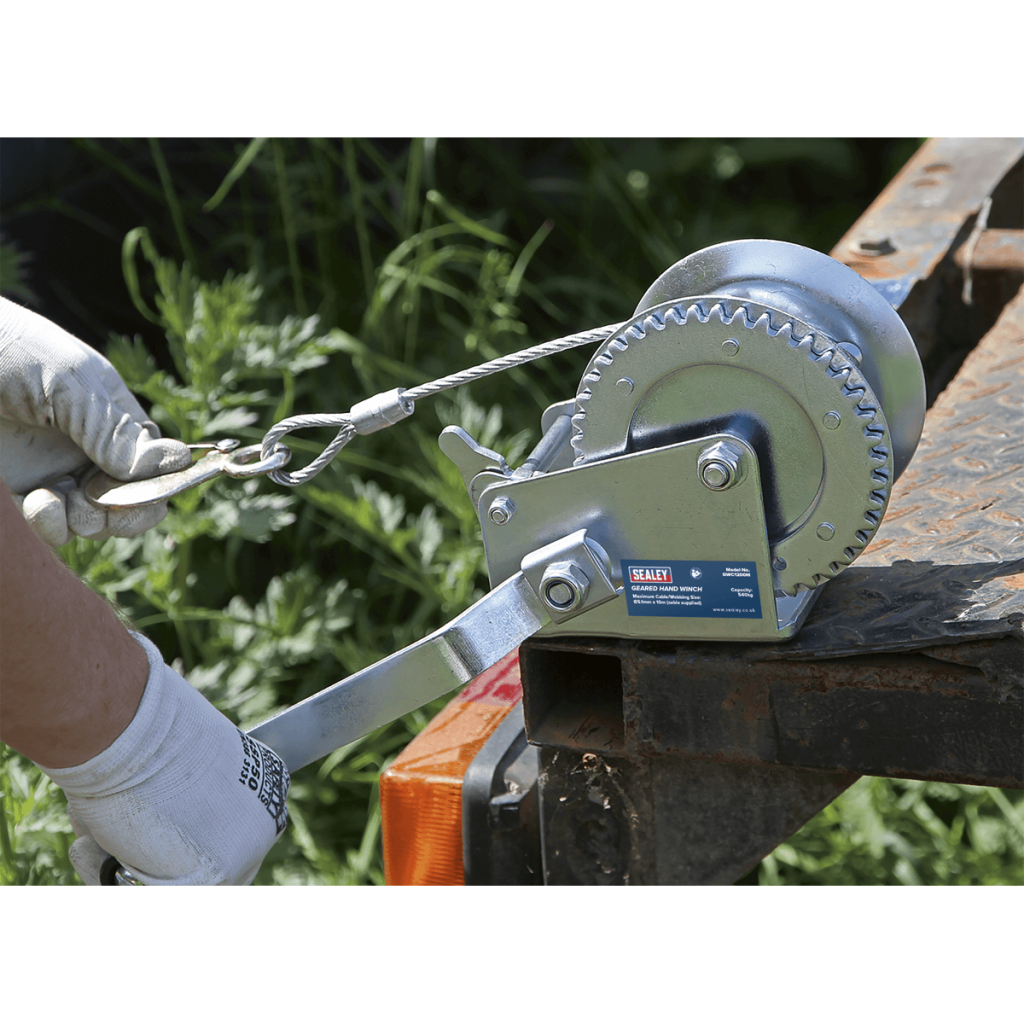
To attach a cable to a hand winch safely, inspect the cable for frays or kinks, clean the winch drum, and align the cable correctly through the drum anchor. Use gloves and proper tools to ensure safety. This guide provides each step with expert tips to prevent accidents and extend winch life.
Preparing the Cable and Winch

Choosing the Right Cable Type and Size
Selecting the appropriate cable for your winch is not just about picking any cable off the shelf.
It’s about understanding the demands of the task at hand and ensuring the cable you choose can meet those demands safely and effectively. Here’s what to consider:
- Material: Steel cables and synthetic ropes are the two primary materials used in winching. Steel cables are revered for their durability and high tensile strength, making them ideal for heavy-duty lifting and towing. They’re resistant to abrasion and can handle high temperatures without melting. On the flip side, they can be dangerous if they snap, as the recoiling cable can cause injuries or damage. Synthetic ropes, meanwhile, are lighter and safer, as they store less kinetic energy and are less likely to cause harm if they break. They’re also easier to handle and float on water, but they’re more susceptible to UV damage, chemicals, and abrasion.
- Size and Length: The diameter and length of your cable should be compatible with your winch’s specifications. A cable that’s too thick might not fit on the drum, while one that’s too thin could break under load. The length should be enough to cover your needs but not so much that it overcrowds the drum and affects performance. Always refer to your winch’s manual for the recommended size and length.
Inspecting the Cable for Damage or Wear
A thorough inspection of the cable before installation can prevent accidents and equipment damage. Here’s what to look for:
- Fraying: Strands of the cable that are loose or sticking out are a sign of fraying. This weakens the cable’s structure and significantly reduces its load-bearing capacity.
- Kinks: Sharp bends or twists in the cable that don’t straighten out can weaken the cable’s structure and create potential breaking points.
- Wear and Tear: Look for signs of abrasion, corrosion, or any other damage that could compromise the integrity of the cable. Steel cables may rust over time, while synthetic ropes may show signs of UV damage or abrasion.
Handling these issues promptly ensures your winching operations remain safe and effective. If any damage is found, replacing the cable is usually the best course of action.
Preparing the Winch Drum for Cable Installation
A clean and smooth winch drum is vital for the secure attachment and longevity of the cable. Here’s how to prepare it:
- Cleaning: Remove any dirt, rust, or remnants of an old cable from the drum. A clean drum ensures the new cable winds smoothly and evenly, without getting snagged or damaged.
- Inspection: Check the drum for any sharp edges, burrs, or defects that could cut into or wear down the cable. Smooth out any rough spots you find to prevent cable damage.
- Alignment: Ensure the winch drum is properly aligned with the winch’s frame and the fairlead. Misalignment can cause uneven winding, leading to premature wear or failure of the cable.
Attaching the Cable to the Winch Drum

Attaching the cable to the winch drum correctly is a crucial step in ensuring the efficiency and safety of your winch. Let’s delve deeper into the specifics of each step, why it matters, and how to do it right.
Step-by-Step Instructions for Securely Attaching the Cable to the Drum
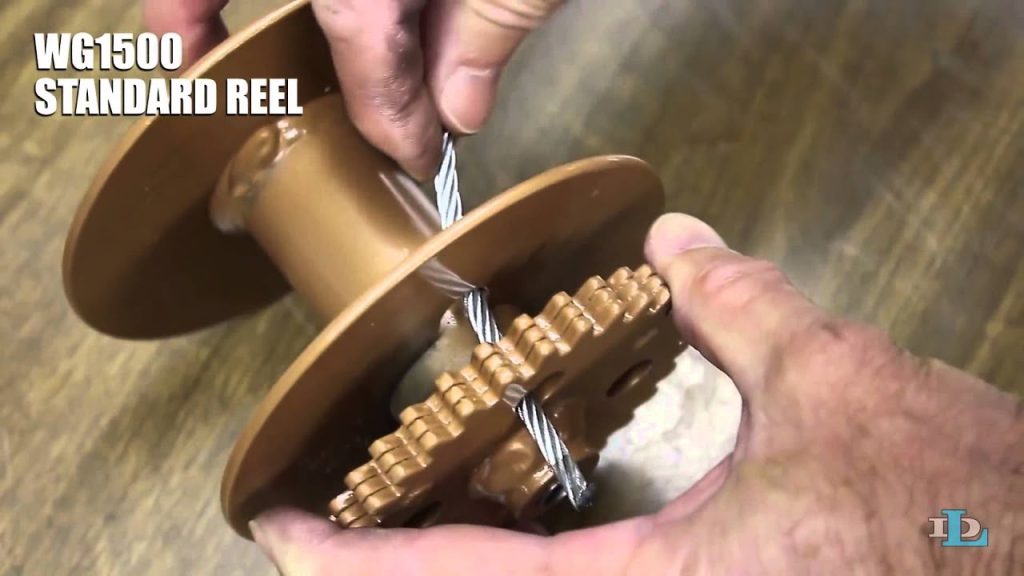
1. Threading the Cable Through the Anchor Point
The process begins with locating the anchor point on the drum.
This is typically a slot or hole designed specifically for attaching the end of the cable.
You should thread the end of the cable through this anchor point.
This is a critical step because it’s where the entire load will be initially held, so ensuring the cable is properly threaded is vital for safety and performance.
2. Securing the End
Once threaded, the end of the cable must be secured to the drum. This can be done using a clamp designed for cable ends, or by tying the cable back onto itself if your winch supports this method.
The goal here is to create a strong, secure attachment that won’t slip under load. It’s important to follow the manufacturer’s instructions closely, as the method of securing the cable can vary between winch models.
Ensuring the end is tightly secured prevents slippage and accidents when the winch is in use.
3. Winding the Cable Evenly Across the Drum
With the end secured, you begin winding the cable onto the drum. This should be done carefully to ensure the cable is laid evenly across the drum’s width, without overlaps or gaps.
Starting at one end of the drum, wind the cable tightly, moving sequentially from one side to the other.
This step is crucial for several reasons: it maximizes the amount of cable the drum can hold, prevents the cable from becoming tangled or kinked, and ensures the load is distributed evenly across the cable, reducing wear.
Proper Cable Wrapping Techniques
Achieving a tight and even wrap starts with the first layer of cable on the drum. This layer is the foundation for all subsequent layers, so it’s essential that the cables lie as close to each other as possible without overlapping.
Overlapping can cause pressure points that weaken the cable over time. Each layer should be as neat and orderly as the first, maintaining tension and alignment to prevent shifting and tangling.
Tips for Ensuring a Tight and Secure Attachment
- Use Gloves: Always wear gloves when handling winch cable, especially steel cables, to protect your hands from cuts and abrasions. Gloves also provide a better grip on the cable, allowing you to maintain tension as you wind.
- Maintain Tension: Keeping tension on the cable as it’s wound onto the drum helps it to lay flat and tight. This prevents loose coils that could get tangled or jump off the drum under load.
- Even Distribution: Pay attention to how the cable is winding onto the drum. Adjust your technique as needed to ensure the cable is distributed evenly across the width of the drum. An unevenly wound drum can lead to premature wear of the cable and potentially dangerous situations if the load is not supported properly.
Cable Tensioning and Adjustment
Cable tensioning and adjustment are pivotal steps in the setup of a hand winch, directly impacting its performance, safety, and longevity.
Let’s explore why these steps are so crucial and how to execute them correctly.
Importance of Proper Cable Tensioning
Proper cable tensioning ensures the cable is wound tightly and evenly around the drum, which is essential for several reasons:
- Preventing Slippage: If the cable isn’t tensioned properly, it can slip on the drum under load. This not only reduces the winch’s effectiveness but can also lead to dangerous situations where the load isn’t securely controlled.
- Avoiding Cable Damage: A cable that’s too loose can easily kink or become tangled, leading to damage. Conversely, overtensioning can strain the cable, potentially causing it to snap.
- Ensuring Smooth Operation: Proper tension helps maintain an orderly coil on the drum, which facilitates smoother operation of the winch, making it easier to wind and unwind the cable.
Steps for Tensioning the Cable
Tensioning the cable properly is a balance of ensuring it’s neither too tight nor too loose. Here’s how you can achieve this balance:
- Initial Winding: After attaching the cable to the drum, begin winding it by hand, maintaining a moderate amount of tension. This initial winding helps establish a base layer of tightly packed coils.
- Load Application: The most effective way to tension a winch cable is by applying a load. This can be done by attaching the cable to a stable object and using the winch to pull against it. The resistance created by the load helps tighten the cable around the drum.
- Observation and Adjustment: As you apply the load, observe the cable’s winding. It should remain tight and evenly distributed across the drum. If any sections of the cable appear loose or uneven, increase the tension slightly and continue winding. Be cautious not to overtension, as this can damage the cable.
Adjusting the Cable Length for Optimal Performance
The length of the cable on your drum also plays a critical role in the winch’s performance:
- Appropriate Length: Having too much cable on the drum can cause poor layering, leading to snags and uneven tension during operation. On the other hand, too little cable limits the winch’s reach and utility. Ensure the cable length matches your winch’s capacity and your operational needs.
- Layering: Ideally, the cable should be wound in neat, even layers. As you reach the end of one layer, start the next layer directly on top, ensuring the cables lie closely side-by-side without crossing over each other. This method of layering prevents deep grooves from forming in the cable stack, which can cause binding and wear.
Safety Considerations
Safety should be the top priority when working with hand winches and cables. Always follow the manufacturer’s instructions and wear appropriate personal protective equipment (PPE) such as gloves, safety glasses, and steel-toed boots.
Avoid potential hazards during cable installation by maintaining a safe distance from the winch and cable during operation. Never stand in the line of the cable’s path, and keep bystanders clear of the work area.
Maintenance and Inspection
Regular cable inspection and maintenance are essential for ensuring safe and reliable winch operation. Establish a schedule for inspecting the cable for signs of wear, damage, or corrosion. Replace the cable if it shows excessive fraying, kinking, or broken strands.
When not in use, store the winch cable properly to prevent damage or tangling. Coil the cable neatly and keep it in a dry, protected area away from potential sources of damage.
Troubleshooting Common Issues
Troubleshooting common issues with your winch cable is crucial for maintaining its performance and ensuring safety during operations. Let’s delve into the details of how to address these issues effectively.
Addressing Cable Slippage or Loosening
Cable slippage or loosening is not just a minor inconvenience; it’s a safety hazard that can lead to uncontrolled loads or even cable snapback. This issue often arises from improper initial tensioning or attachment of the cable to the winch drum. Here’s how to address it:
- Re-Check Attachment Point: Ensure the cable’s end is securely fastened to the drum’s anchor point. If the attachment is weak, the cable can slip under load. Reinforce this connection as necessary, following the manufacturer’s guidelines closely.
- Re-Tension the Cable: If the cable has loosened over time, it may need to be re-tensioned. You can do this by applying a load to the cable as described in the tensioning process. This helps to pull any slack out of the cable, ensuring it wraps tightly on the drum.
- Inspect for Damage: Sometimes, cable slippage can be a sign of underlying damage, such as stretching or wear. Inspect the cable carefully; if damage is found, replacing the cable might be the safest option.
Dealing with Cable Kinking or Twisting
Kinks and twists not only weaken the cable but also impair the winch’s functionality, potentially leading to dangerous situations. Preventing these issues requires attention during both use and storage:
- Avoid Sharp Bends: When operating the winch, ensure the cable runs in as straight a line as possible. Avoid dragging it over sharp corners or edges, which can cause kinks.
- Even Winding: Pay close attention to how the cable is wound onto the drum. Ensure it lays in neat, even layers without crossing over itself. Uneven winding can lead to twists and kinks as the layers become entangled.
- Proper Storage: When not in use, store the cable properly to avoid accidental kinks or twists. This may involve fully unwinding and then neatly rewinding the cable on the drum, ensuring it’s free from twists.
Resolving Cable Fraying or Breaking
Cable fraying or breaking is a clear indication of wear or damage that compromises the cable’s integrity and strength. This is how to handle it:
- Immediate Replacement: At the first sign of fraying or if the cable breaks, it’s crucial to replace it immediately. Continuing to use a damaged cable can lead to failure under load, posing serious safety risks.
- Regular Inspection: To prevent getting to the point of fraying or breaking, make regular inspections part of your routine. Look for signs of wear, such as thinning, rusting (in the case of steel cables), or visible damage to the fibers (for synthetic ropes).
- Correct Use and Handling: Ensure the winch and cable are used within their rated capacities and in accordance with manufacturer guidelines. Overloading, improper use, or neglecting regular maintenance can lead to premature wear and failure of the cable.
Conclusion
Securely attaching the cable to a hand winch is crucial for safe and efficient operation. By following the step-by-step process outlined in this guide, you can ensure a proper cable installation, maintain optimal winch performance, and minimize potential risks.
Remember to always prioritize safety, follow the manufacturer’s instructions, and conduct regular inspections and maintenance to extend the life of your winch and cable. With the right techniques and precautions, you can rely on your best hand winch for years to come.

