A snatch block is an essential tool for off-road enthusiasts and professionals, offering a versatile solution to challenging recovery situations. It enhances the pulling power of your winch, making it easier to recover stuck vehicles, clear obstacles, or handle heavy-duty tasks.
Also known as a pulley block, a snatch block is crucial for increasing your winch’s capacity or redirecting the cable’s direction during recovery operations.
In this guide, we’ll provide step-by-step instructions on how to install a snatch block on a winch, the tools you’ll need, and key safety precautions to ensure a smooth and effective setup.
Required Tools and Equipment
Before diving into the installation process, let’s gather all the necessary tools and equipment:
- The snatch block itself
- Shackles and pins for secure attachment
- Slings or straps (if not directly shackling to an anchor point)
- A wrench or pliers for tightening shackle pins
Each of these items plays a crucial role in ensuring a safe and effective winching operation.
Make sure to check the Working Load Limit (WLL) of all tools, including the snatch block and shackles, to match the capacity of your winch. Understanding mechanical advantage and load capacity is key to ensuring safe and efficient winching.
How to Install Snatch Block: Step-by-Step Installation Process
1. Ensure Winch is Securely Mounted
Before you begin, make sure your winch is firmly mounted on your vehicle. Check all the bolts and mounting points to ensure they are tight and secure.
A loose winch can not only be ineffective but also very dangerous. If the winch comes loose during operation, it could lead to severe accidents or damage to your vehicle.
2. Spool Out Enough Cable for the Job
Next, pull out enough winch cable to reach your anchor point. This step is crucial because if the cable is too short, you won’t be able to set up the snatch block properly.
As you spool out the cable, inspect it for any kinks, tangles, or damage. A damaged cable can snap under load, posing a serious safety risk.
Make sure the cable is smooth and in good condition.
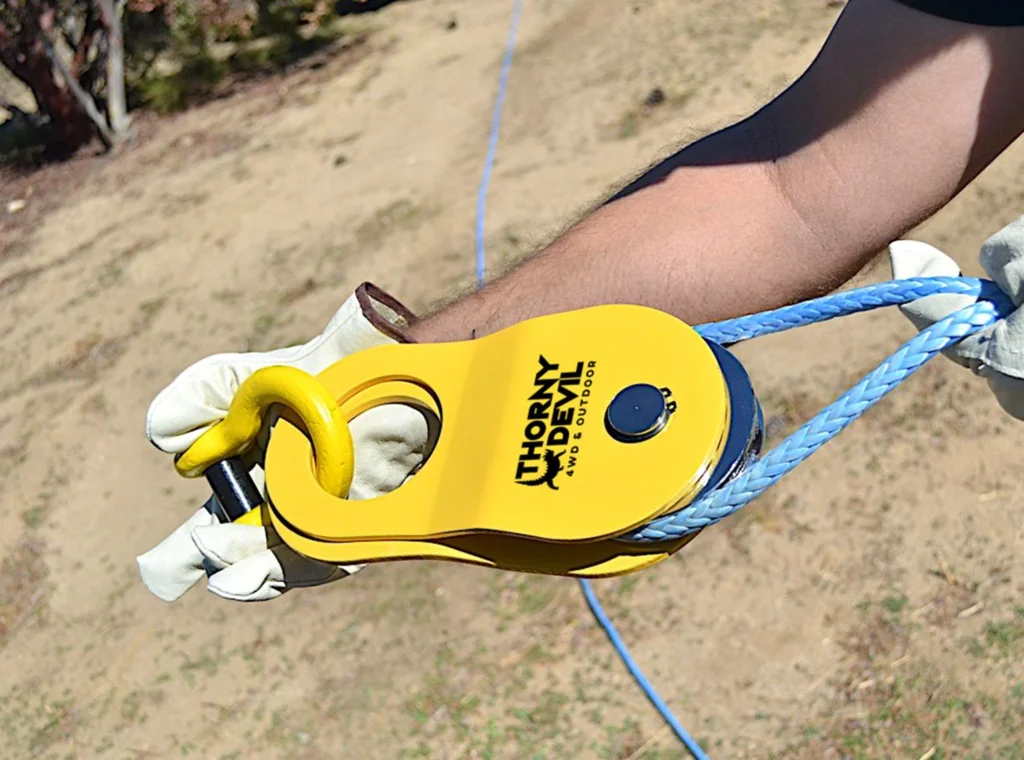
3. Attaching the Snatch Block
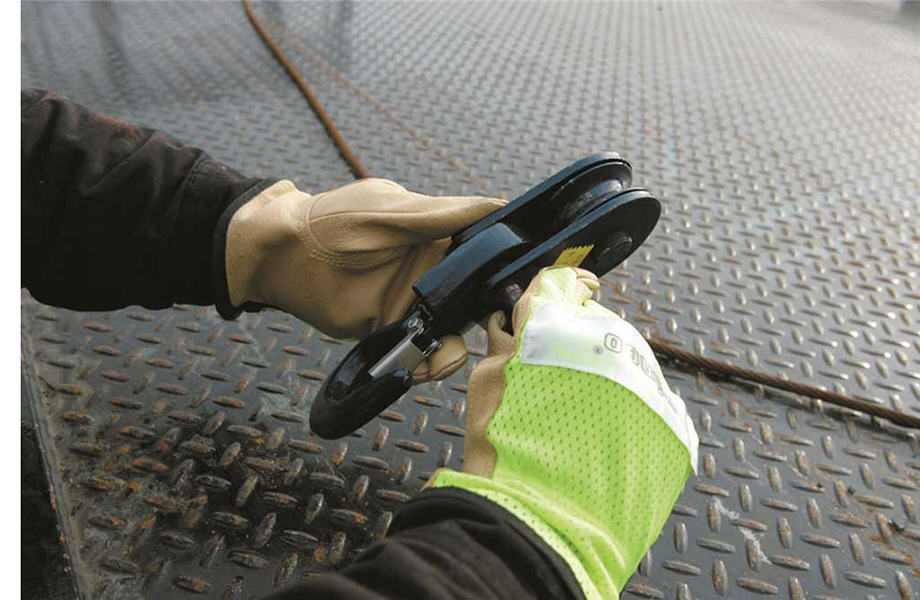
a. Open the Snatch Block’s Cheek Plates
The snatch block consists of cheek plates that protect and guide the cable. To insert the cable, you’ll need to open these plates.
This is usually done by removing or loosening a pin that holds the cheek plates together.
Once the pin is removed, the plates can be swung open to expose the sheave, which is the pulley wheel inside the snatch block.
b. Insert Winch Cable into the Sheave
With the cheek plates open, carefully place the winch cable into the groove of the sheave. Make sure the cable sits properly in the groove to avoid slipping or getting pinched.
The sheave is designed to guide the cable smoothly during operation, so correct placement is crucial for efficient and safe winching.
c. Close and Secure the Cheek Plates
After inserting the cable, close the cheek plates and secure them with the pin you removed earlier. Double-check that the pin is fully inserted and locked into place. Ensure the winch cable is properly reeved into the sheave to prevent slipping or damage during operation.
This ensures that the cable remains in the sheave and the snatch block functions correctly during use. The cheek plates should be tightly closed with no gaps.
4. Anchor Point Setup
a. Choose a Solid Anchor
Selecting a reliable anchor point is vital for a successful winching operation. Look for a solid and sturdy object such as a large tree, a heavy rock, or another vehicle.
Using a tree saver strap around the anchor point helps distribute the load evenly, preventing damage to both the tree and the winch cable. The anchor point must be able to withstand the pulling force of the winch.
If you’re unsure about the strength of your anchor point, consider finding an alternative that is more secure.
b. Use Tree Straps or Recovery Points
If you’re using a tree as an anchor, wrap a tree strap around the trunk. Tree straps are wide and flat, which helps distribute the load evenly and minimizes damage to the tree.
If you’re using another vehicle or a designated recovery point, ensure that these points are designed to handle the load.
Never wrap the winch cable directly around a tree or anchor point, as this can damage both the cable and the anchor.
c. Connect Snatch Block to Anchor with Shackles
Finally, attach the snatch block to your anchor point using shackles. Shackles are U-shaped metal pieces with a pin that can be screwed in to lock them in place. Always use D-ring shackles rated for double the winch’s pull capacity to ensure a secure connection under heavy load.
Insert the shackle through the loop of the tree strap or the recovery point, and then through the hole in the snatch block. Tighten the shackle pin securely to prevent any movement during the winching process.
Make sure all connections are tight and secure before proceeding with your winching operation.
Testing and Adjusting
Alignment Check
When we say “check that the snatch block is aligned correctly,” we’re referring to several key aspects:
a) Vertical Alignment: The snatch block should hang plumb (straight down) from its attachment point when not under load. If it’s tilting to one side, this could indicate an issue with the attachment or that the block itself is damaged.
b) Rope Path: The rope should enter and exit the sheave in a straight line, parallel to the cheek plates. Any deviation can cause the rope to rub against the cheek plates, leading to premature wear or even failure.
c) Swivel Action: Gently push the snatch block from side to side. It should rotate easily around its swivel eye or shackle. Resistance here could mean the swivel is damaged or that the shackle pin is overtightened, both of which can prevent the block from properly aligning under load.
Component Security
This step involves a hands-on check of every connection point:
a) Shackles: Ensure each shackle pin is fully screwed in. If using moused shackles (where wire is used to prevent the pin from unscrewing), check that the mousing is intact.
b) Pins: Some snatch blocks have a retaining pin for the opening cheek plate. Verify this is fully inserted and, if applicable, that any keepers or clips are in place.
c) Cheek Plates: The opening side of the snatch block should be fully closed and latched. There should be no gap, and the securing mechanism (often a spring-loaded pin or bolt) should be engaged.
d) Slings/Straps: If used, inspect that they’re not twisted and that their attachment points (often thimbles) are seated correctly in shackles.
Test Lift or Pull
This is where theory meets practice, but with a crucial safety buffer:
a) Minimal Load: The key here is “minimal.” We’re talking about enough weight to put tension on the system—maybe 10-20% of your intended working load.
This could be achieved by slightly tensioning a winch line or lifting an object that’s heavy enough to straighten the rope but not so heavy that a failure would be catastrophic.
b) Verifying System Integrity: As you apply this light load, you’re watching for several things:
- Does the snatch block orient itself naturally with the direction of pull?
- Does the sheave (pulley wheel) rotate smoothly, or is there any catching or grinding?
- Are all attachment points holding securely without slippage or deformation?
c) Unusual Noises: Listen for anything out of the ordinary. Creaking could indicate wood fibers stretching if you’re using a natural anchor.
Clicking or popping might mean a component is shifting under load when it shouldn’t. A grinding noise from the sheave is a red flag for bearing issues.
d) Movement: Some movement is normal—ropes stretch, anchors may shift slightly as they take up load. But watch for anything excessive:
- Is an anchor point bending or pulling out?
- Are shackles or the swivel eye of the snatch block deforming?
- Is the rope slipping on the sheave instead of turning it?
e) Deformation: This is any change in the shape of components. It could be subtle, like a shackle starting to straighten out, or obvious, like a cheek plate bending. Even small deformations can compromise the rated strength of rigging hardware.
Making Adjustments
If you spot any issues during this test phase, stop and reassess. Common adjustments might include:
- Repositioning the snatch block or anchor for better alignment
- Tightening (or sometimes loosening) a shackle pin to allow proper articulation
- Adding chafe protection if you notice the rope rubbing
- Reinforcing or changing an anchor point that shows signs of weakness
The goal is to resolve any problems while the system is under minimal stress. Each adjustment should be followed by another light test load to verify the fix.
Graduated Loading
Even after a successful minimal load test, it’s wise to increase the load gradually if possible. This is especially true for complex rigging setups or when working at the higher end of your equipment’s capacity.
By stepping up the load incrementally, you give yourself multiple chances to catch any developing issues before reaching full working load.
Adjusting for Optimal Performance
To ensure the best performance, you need to make a few adjustments:
Positioning the Snatch Block for Better Angles
Place the snatch block in a position that offers the best pulling angle. This helps in reducing the strain on the winch and cable.
Ensuring Cable Runs Smoothly Through Sheave
Check that the cable runs smoothly through the sheave. Any resistance can damage the cable or reduce pulling efficiency.
3. Managing Cable Tension During Setup
Maintain consistent tension on the cable during setup. This prevents slack, which can cause sudden jolts or snaps.
Safety Precautions
Safety should always be your top priority. Here are some crucial precautions to follow during winching operations:
- Inspecting all equipment for any signs of wear or damage before use. Replace faulty parts immediately to ensure safety and effectiveness.
- Never exceed the snatch block’s rated Working Load Limit (WLL). Overloading can lead to equipment failure and serious injury.
- Use a cable dampener or blanket over the winch line to reduce the impact if the line snaps, protecting both operators and bystanders.
- Always stand clear of the winch cable’s path during operation to avoid injuries in case of cable failure or tension-related issues.
- Keep hands and fingers away from moving parts, such as the sheave and cable, to prevent accidental pinching or injuries.
Troubleshooting Common Issues
Even with proper setup, issues may arise during winching operations. Here are some common problems and how to address them:
- Misaligned Cable: Check if the snatch block is hanging plumb and the winch line is aligned properly. Misalignment can cause the cable to rub against the cheek plates, leading to premature wear or damage.
- Binding Sheave: If the sheave isn’t rotating smoothly, it may need cleaning and lubrication. Inspect for dirt, debris, or bearing damage, and address these issues promptly to ensure smooth operation under load.
- Deformation: Regularly inspect shackles, cheek plates, and other components for signs of bending, cracks, or warping. Replace any deformed or damaged parts immediately to maintain safety and performance.
FAQs
How do you install a snatch block on a winch?
To install a snatch block on a winch, first spool out enough cable to reach your anchor point. Open the snatch block’s cheek plates, insert the cable around the sheave, and close the plates securely. Attach the snatch block to a solid anchor using a shackle and connect the cable back to the vehicle. Finally, ensure proper alignment and tension before starting the winching process.
What tools do you need to install a snatch block?
To install a snatch block, you need the snatch block itself, D-ring shackles, a tree saver strap or sling, and basic tools like a wrench or pliers for tightening the shackle pins.
What is the purpose of a snatch block?
A snatch block increases the pulling power of a winch by reducing the load on the winch motor and redirecting the cable to change the angle of pull. It’s especially useful for heavy recoveries or awkward winching
Conclusion
Using a snatch block with your winch can significantly enhance its pulling power and efficiency. By following the steps outlined in this guide and taking necessary safety precautions, you can tackle tough recovery situations with confidence.
With the right tools and precautions, using a snatch block can greatly enhance your winch’s efficiency.
