Today, I’m going to walk you through how to properly use one and why it should be a crucial part of your recovery gear. Let’s dive in.
Quick Summary
To use a winch damper, place it in the middle of the winch line to absorb energy and reduce snapback risks in case of line failure. Regularly maintain and inspect the damper for optimal performance and safety during recovery operations.
Step-by-Step Guide on How to Use a Winch Damper

Step 1: Prepare the Equipment
Before getting into the actual recovery process, it’s essential to gather all the necessary tools. First and foremost, you’ll need your winch, a reliable winch damper, and a good pair of gloves to protect your hands from any sharp or abrasive parts of the winch line.
One thing many people overlook is inspecting the winch line before starting the recovery. Take a few moments to check the line for any signs of wear, such as fraying, cuts, or rust, especially if you’ve used it before.
A damaged line is more likely to break under tension, making the process dangerous. Ensuring everything is in top condition sets you up for a safer recovery.
Step 2: Attach the Winch Line
After making sure everything is ready, you can now attach the winch line to the recovery point. Whether you’re recovering your vehicle or pulling something out of a tricky spot, the attachment process is crucial.
Make sure that the hook or shackle you’re using is securely fastened to a strong, reliable anchor point, such as a tree trunk, another vehicle, or a purpose-built recovery point.
Pay close attention to how the line is laid out. It should be straight and free from knots or tangles. Tangled lines create uneven tension, which can increase the likelihood of the winch line snapping. Double-check the connection before moving forward.
Step 3: Placing the Winch Damper
This is one of the most critical steps in using a winch damper. After securing the winch line, it’s time to place the damper. The correct placement of the damper can make all the difference in ensuring safety.
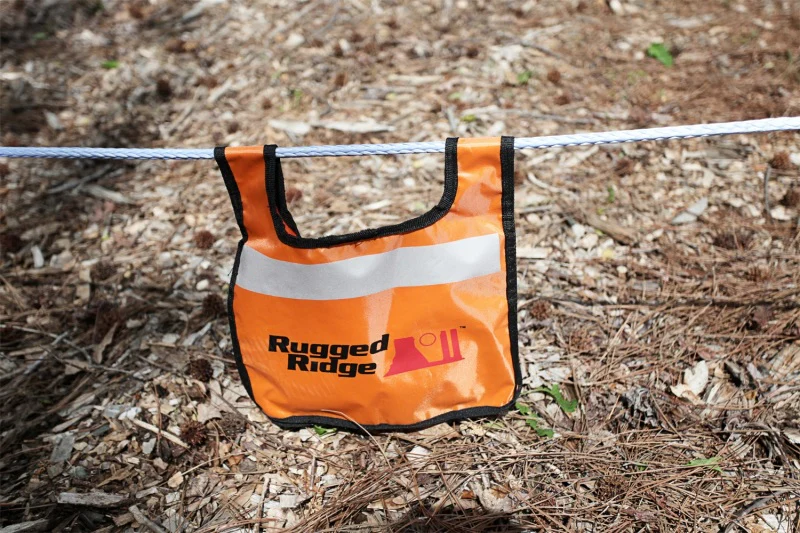
Ideally, you should place the damper around the midpoint of the winch line, between your vehicle and the anchor point.
If your winch line is particularly long, it’s okay to move the damper slightly closer to the vehicle or anchor, but it’s important to ensure it’s somewhere in the middle to evenly distribute the weight.
The damper’s weight will act as a cushion in case the winch line fails, slowing down the energy release and reducing the chance of the line whipping back dangerously.
Step 4: Operating the Winch
Now comes the moment where the winch does its work. Start winching slowly and carefully, allowing the line to build tension gradually. It’s crucial to keep a close eye on the winch line throughout the process.
Make sure the line stays taut, and check that the winch damper remains in its proper place. If the damper slips or shifts out of position, stop and reposition it. While operating the winch, always maintain a safe distance from the line.
It’s tempting to stand nearby to monitor the situation, but standing too close puts you at unnecessary risk if something goes wrong. Staying a safe distance back is one of the best ways to protect yourself during recovery operations.
Step 5: Releasing the Tension
Once the winching process is complete and your vehicle or object has been safely recovered, it’s important to release the tension in the winch line slowly.
Quick, jerky releases can cause the line to snap back, even after a successful recovery. As you slowly let off the tension, carefully remove the winch damper from the line.
Be cautious during this step, as the line may still be under slight tension. Once the tension is fully released, you can coil the winch line and store both the line and the damper properly for future use.
Taking the time to clean and store your equipment ensures that it’s ready and safe for the next recovery situation.
Where to Place a Winch Damper

The position of a winch damper is key to its effectiveness. Typically, you should place the damper right in the middle of the winch line, between your vehicle and the anchor point.
This midpoint placement helps distribute the weight evenly, ensuring that if the winch line snaps, the damper absorbs most of the energy and reduces the risk of the line whipping back.
However, there are situations where you may need to adjust the placement slightly. If the winch line is very long, placing the damper closer to the vehicle or the anchor point can still provide the necessary weight to slow down any snapback.
The important thing is to ensure the damper covers enough of the line’s length to be effective in absorbing energy. Keep in mind that having it too close to either end will limit its ability to protect you in case of a failure.
Common Mistakes When Using a Winch Damper
Incorrect Placement
A common error when using a winch damper is placing it too close to either the vehicle or the anchor point. If the damper is not properly centered on the winch line, it won’t effectively absorb the energy if the line breaks.
The damper’s job is to weigh down the middle of the line to prevent dangerous snapback, so placing it off-center reduces its ability to do that. Always aim for the middle of the line for the best results.
Neglecting to Use a Damper
Another mistake is skipping the use of a winch damper altogether. Some people may think it’s unnecessary, especially if they’ve never experienced a line breaking before. However, this is risky.
Winch lines hold a lot of tension during recovery, and even a minor mistake or weak spot in the line can cause it to snap. Without a damper, the released energy can cause the line to whip dangerously, which can lead to serious injuries or damage.
Always use a damper, no matter how confident you are in your equipment.
Maintaining Your Winch Damper
To ensure your winch damper is always ready when you need it, regular maintenance is essential. After every recovery operation, especially in harsh conditions like mud, snow, or heavy rain, it’s important to inspect the damper closely for any signs of wear or damage.
Over time, the material can weaken, especially if exposed to sharp objects, rough terrain, or extreme weather conditions. Even small tears or abrasions can reduce the damper’s ability to perform in an emergency.
Start by checking the fabric for any cuts, fraying, or areas where the stitching might be coming loose. These can be weak points that could fail under tension, making the damper less effective.
If the damper has pockets for adding extra weight, make sure those are in good condition as well, with no tears or weak seams.
Cleaning your damper is also crucial. Mud, dirt, and moisture can degrade the fabric over time, leading to mold, mildew, or material breakdown. After each use, wipe off any dirt or debris, and if it’s particularly dirty, give it a proper wash according to the manufacturer’s instructions.
Once clean, it’s essential to let the damper dry completely before storing it. Storing a damp damper can lead to mold growth or unpleasant odors, and in some cases, weaken the material over time.
Once dry, store your winch damper in a cool, dry place, away from direct sunlight, which can cause fading or weakening of the material. Proper storage helps prolong the life of your damper, ensuring it’s in peak condition when you need it most.
By regularly inspecting, cleaning, and storing your winch damper properly, you’re ensuring that it will perform effectively during recovery operations, keeping you and your equipment safe.
For winches designed with safety in mind, refer to our guide to the best winches for safe operation.
Conclusion
Using a winch damper is one of the easiest ways to stay safe during a recovery. It’s not just a precaution—it’s a necessity.
By following the steps above and using the right techniques, you can protect yourself, your vehicle, and your winching equipment from harm.


