Replacing a steel winch cable with a synthetic rope improves safety, reduces weight, and simplifies handling during off-road recovery. This step-by-step guide explains how to safely remove your old steel cable, prep the drum, and install a synthetic rope with the correct knots and fairlead for maximum durability.
Quick Answer
How do you replace a winch cable with a synthetic rope?
To replace a winch cable with a synthetic rope:
- Unspool and detach the steel cable from the winch drum completely.
- Inspect and smooth the winch drum — use a file or grinder to remove sharp edges.
- Install an aluminum hawse fairlead if switching from a roller fairlead (to prevent rope fraying).
- Attach the synthetic rope using a proper knot (like a bowline or eye splice) or the manufacturer’s anchor method.
- Spool the rope evenly under load/tension to prevent overlap or tangling.
- Check the compatibility of the synthetic rope with your winch’s rated capacity and drum size.
Why Switch to Synthetic Rope?
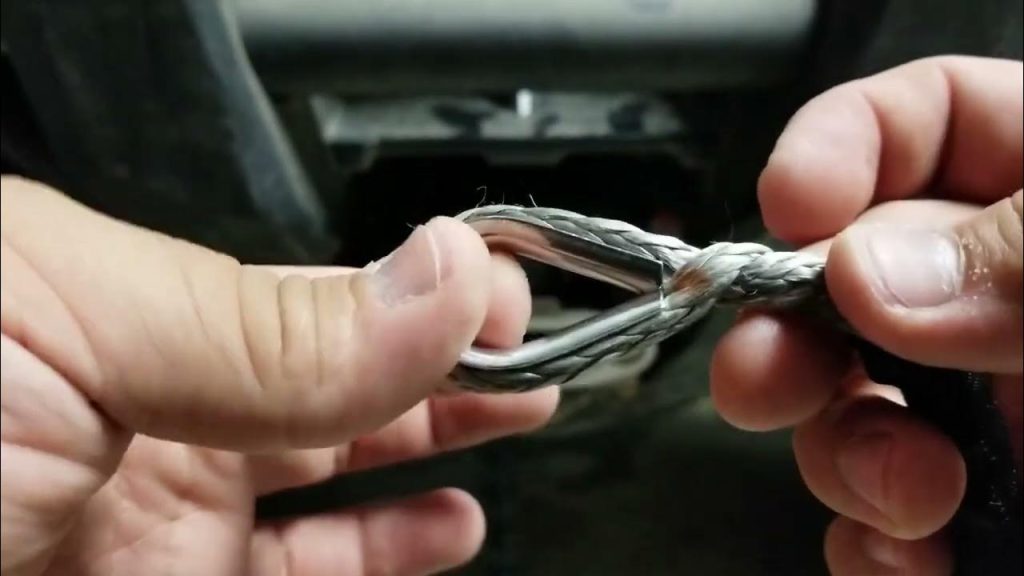
Switching to synthetic winch rope from traditional steel cables is a significant upgrade for several reasons, particularly in terms of performance, safety, and ease of use.
Synthetic rope vs. steel cable: Synthetic rope is lighter, safer, and easier to handle compared to steel cables, which are prone to kinking and corrosion.
Let’s dive deeper into these aspects to understand the benefits more fully.
Abrasion-resistant synthetic ropes: Modern synthetic ropes come with protective coatings, enhancing their durability against abrasion and UV exposure.
Also check out the list of best Synthetic Winch Ropes
Performance
Synthetic ropes have an impressive strength-to-weight ratio, allowing them to handle the same or greater loads than steel cables while being significantly lighter.
This weight advantage makes handling and transportation much easier, especially in situations where every pound matters, such as off-roading or recovery operations.
The lighter weight doesn’t just make installation and handling easier; it also reduces the overall weight of your vehicle, which can lead to better fuel efficiency and less wear on your vehicle’s components.
Safety
One of the most critical advantages of synthetic ropes is their safety profile. Unlike steel cables, which can develop sharp burrs over time, synthetic ropes are much safer to handle and pose a lower risk of injury from cuts or punctures.
Moreover, in the event of a breakage under load, steel cables can snap back with deadly force due to the stored kinetic energy.
In contrast, synthetic ropes store far less kinetic energy, causing them to fall to the ground instead of snapping back, which significantly reduces the risk of injury or damage.
Durability and Maintenance
Synthetic ropes are highly resistant to kinking, splitting, and, importantly, corrosion—problems that are all too common with steel cables, especially in harsh or marine environments.
While synthetic ropes are susceptible to UV damage and abrasion, many come with protective coatings that extend their life and performance.
They are also much easier to inspect for damage, as wear and tear are usually visible on the surface.
Ease of Use
Handling synthetic rope is much easier than dealing with heavy, unwieldy steel cables. Synthetic ropes can be quickly spooled and unspooled, and their flexibility allows for easier knotting and attachment.
This flexibility also means that synthetic ropes can be more easily stored and require less space than steel cables, which must be carefully coiled to avoid kinks or damage.
Environmental Considerations
Synthetic ropes are often seen as a more environmentally friendly option. They don’t rust or leave behind metal particles in the environment, and because they’re lighter and require less energy to produce and transport, their overall carbon footprint is typically lower than that of steel cables.
Upfront Cost vs. Long-term Value
While synthetic ropes generally have a higher upfront cost than steel cables, their durability, lower maintenance requirements, and longer lifespan can make them a more cost-effective option over time.
Additionally, the potential costs associated with injuries from handling steel cables or damage from cable snap-back incidents can make synthetic ropes a more economical choice in terms of both direct and indirect costs.
Preparing for the Switch
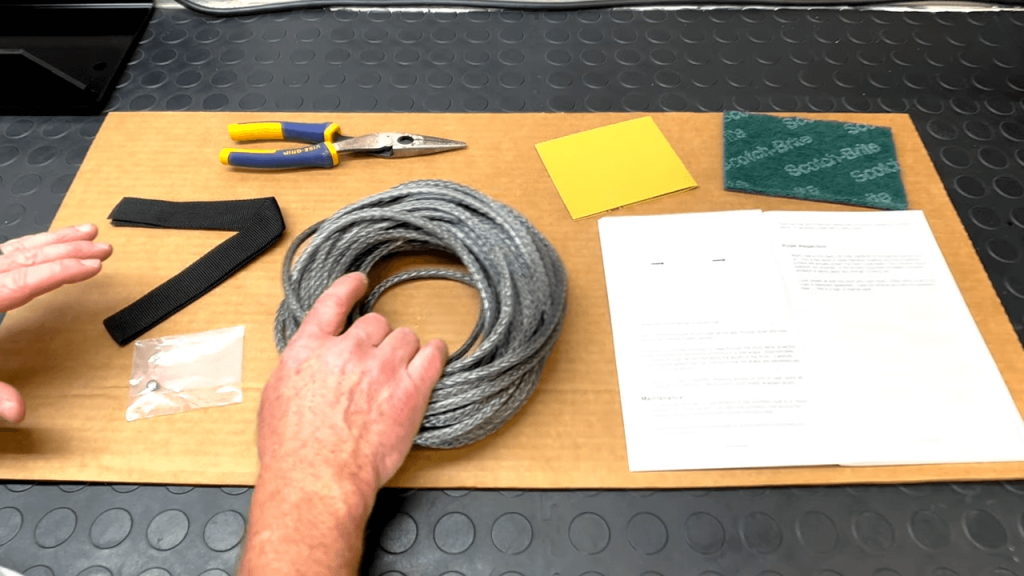
Preparing for the switch from a steel winch cable to synthetic rope involves several crucial steps to ensure a smooth transition and maintain the longevity and efficiency of your winch system.
Rope splicing techniques:
Consider splicing the synthetic rope for added strength and durability when attaching it to the winch drum. Proper splicing can help distribute tension evenly and reduce the risk of failure under heavy loads.
Here’s a detailed walkthrough:
Safety Precautions
Before beginning any work on your winch, it’s essential to prioritize safety:
- Wear Protective Gloves: Handling winch cables, especially steel ones, can be hazardous. Steel cables can fray and produce sharp strands that could easily penetrate skin, causing serious injuries. Gloves will protect your hands from these hazards as well as from any dirt or grease present on the winch.
- Winch fairlead compatibility: Replace your roller fairlead with a hawse fairlead designed for synthetic ropes to minimize wear and prevent abrasion. A smooth aluminum hawse fairlead is ideal for protecting the rope during winching operations.
Inspection of Winch and Drum
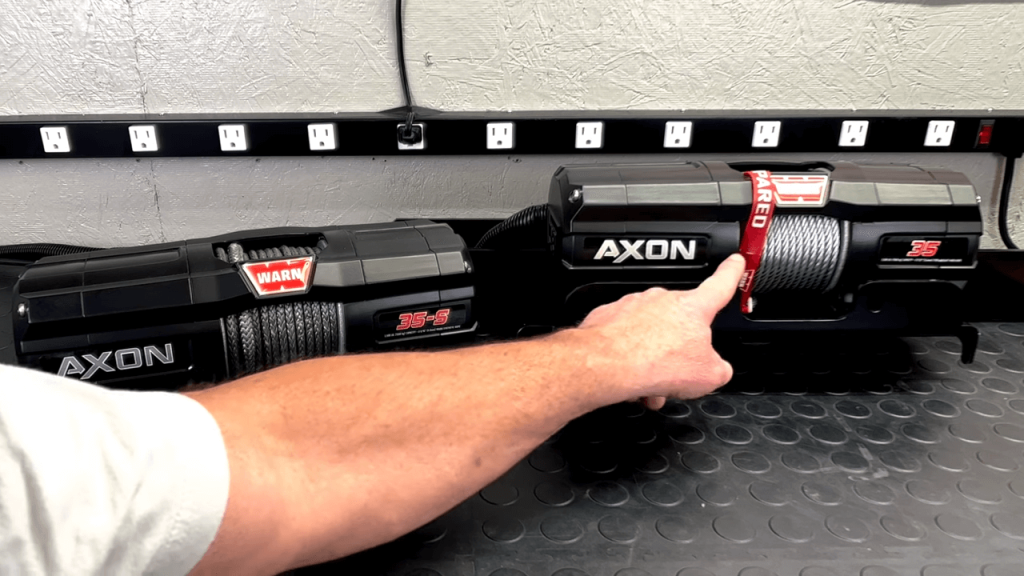
A thorough inspection of your winch and drum is crucial for identifying any potential issues that could affect the performance of the synthetic rope:
- Check for Wear and Damage: Inspect the winch drum, fairlead, and any other components for signs of wear, damage, or corrosion. Pay particular attention to the surface of the drum; it should be smooth and free of any burrs, sharp edges, or significant grooves. Such imperfections can damage the synthetic rope over time, reducing its lifespan and potentially leading to failure under load.
- Clean the Drum and Components: Ensure the winch drum and all related components are clean. Dirt, mud, and grit can embed into the synthetic rope, causing internal wear that weakens the rope. Use a cloth and appropriate cleaning solution to remove any grease, grime, or rust from the drum and fairlead.
Understanding the Importance
The preparatory phase is not merely about ensuring that the equipment is ready for the new rope; it’s about laying the groundwork for optimal performance and safety.
Synthetic ropes have different characteristics and requirements compared to steel cables. They are susceptible to abrasion, UV damage, and contamination by dirt and particles.
A well-maintained and correctly prepared winch system minimizes these risks, ensuring that the benefits of synthetic rope—lighter weight, easier handling, and increased safety—are fully realized.
Removing the Old Cable
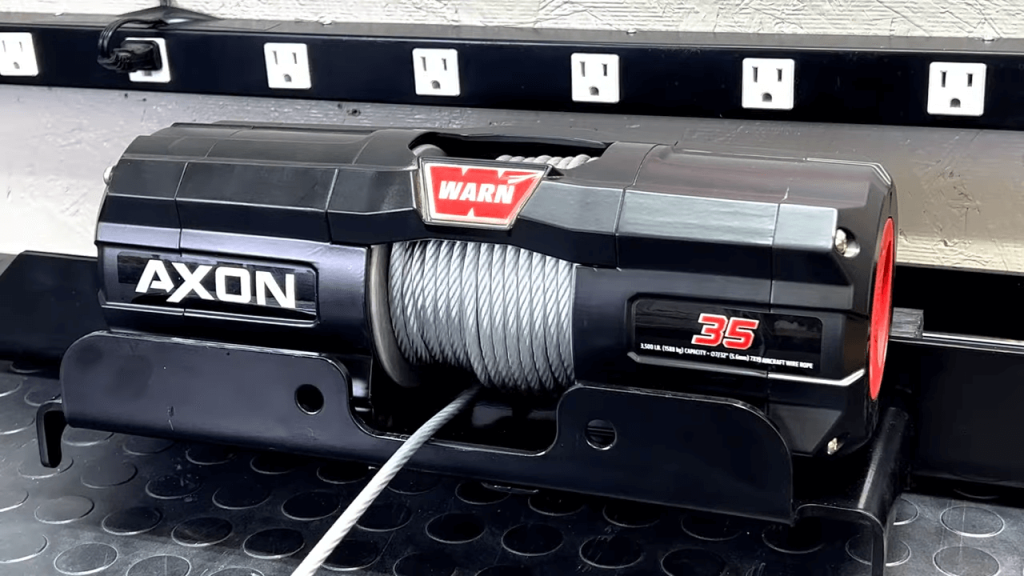
Removing the old cable from your winch requires careful attention to detail and patience. This step is crucial for ensuring a smooth transition to a synthetic rope, and it involves several key actions:
Step-by-step winch cable replacement: Begin by inspecting how the steel cable is attached. Unspool it completely and ensure you handle the cable carefully to avoid injuries from burrs or sharp edges. Use gloves and a controlled method to unwind the cable safely.
Identifying the Attachment Method
Firstly, you need to identify how the cable is attached to the winch drum. Common methods include a set screw (or Allen screw) that clamps the cable in place, or a locking bead system where the cable is looped through a slot and secured with a bead.
Understanding the specific attachment method used on your winch is essential for the removal process.
Loosening the Set Screw or Locking Bead
- For Set Screw Attachments: Locate the set screw on the drum. Using an Allen wrench, turn the screw counterclockwise to loosen it. Be cautious not to strip the head of the screw. Once loose, you should be able to pull the end of the cable free from the drum. If the cable is threaded through any holes or slots in the drum, gently guide it out to avoid damaging the drum or the cable.
- For Locking Bead Attachments: This system typically involves a loop at the end of the cable that is secured with a metal bead. To remove it, you may need to push the cable slightly back through the drum to relieve tension on the bead, then lift or slide the bead out of its slot, allowing you to free the loop and pull the cable out of the drum.
Unspooling the Cable
With the end of the cable detached from the drum, you’ll need to unspool it.
This might require setting your winch to free spool mode, allowing you to manually unwind the cable.
Handle the steel cable with care as you unspool it to avoid injury from sharp edges or burrs.
Inspection and Cleaning
After removal, it’s an excellent opportunity to inspect the winch drum and the fairlead for any wear, burrs, or damage that could affect the new synthetic rope.
Use this time to clean any dirt, grease, or rust from these components. A smooth, clean drum and fairlead will help extend the life of your synthetic rope.
Safety Tips
- Always wear gloves when handling steel winch cables to protect your hands from cuts.
- If the cable is under tension, release it slowly to avoid sudden movement that could cause injury.
- Be aware of your surroundings, ensuring that the cable doesn’t snap back or cause damage during removal.
Inspecting and Preparing the Winch Drum
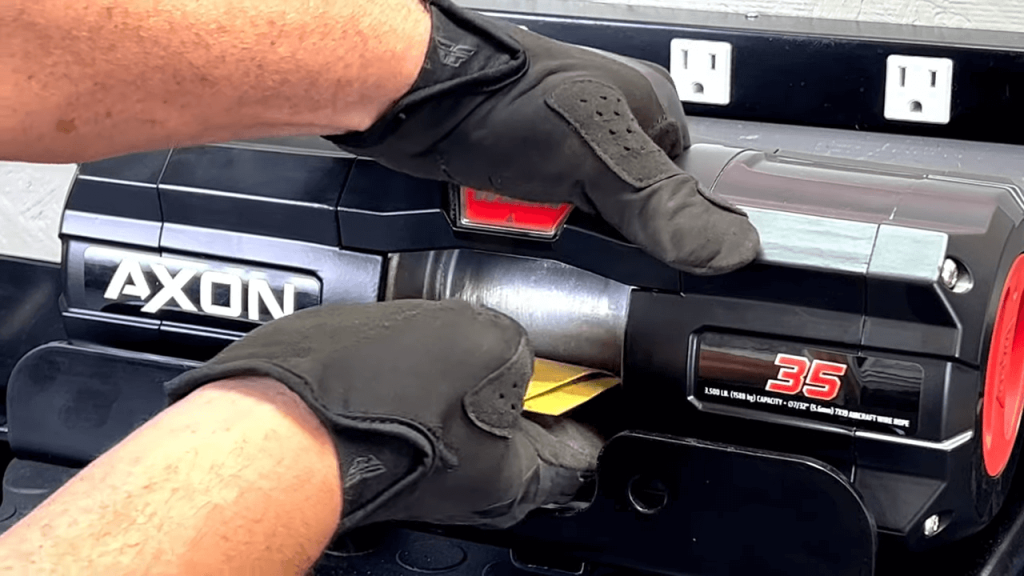
Inspecting and preparing the winch drum for the installation of synthetic rope is a crucial step in the process of switching from a steel cable.
This stage ensures that the winch drum is in optimal condition to work with the synthetic rope, which, unlike steel cable, can be more susceptible to abrasion and wear from rough surfaces.
Winch drum maintenance tips: Clean and smooth the drum surface with sandpaper to remove any imperfections, burrs, or sharp edges that could fray the synthetic rope. This simple step helps extend the life of the rope and ensures reliable performance during winching.
Here’s how to thoroughly inspect and prepare your winch drum:
Inspecting the Drum
Look for Damage: Carefully examine the drum for any signs of wear, damage, or corrosion. Pay special attention to the surface where the rope will spool.
You’re looking for any grooves, ridges, or sharp edges that could potentially damage the synthetic rope. These imperfections can quickly wear down the rope when under tension or during regular use.
Check for Smoothness: The entire surface of the drum should be smooth.
Unlike steel cables that can sometimes work with minor imperfections on the drum’s surface, synthetic ropes are much more prone to being cut or frayed by rough areas.
This is because synthetic fibers can be more delicate and less resistant to abrasion compared to metal wires.
Preparing the Drum
Smooth Out Imperfections: If you find any rough spots, grooves, or ridges, you’ll need to address these before installing the synthetic rope.
Use a metal file or sandpaper to smooth out these areas. Be thorough but gentle; removing too much material can weaken the drum, while not enough smoothing can leave damaging imperfections.
Clean the Drum: Once the drum’s surface is smooth, clean it thoroughly to remove any dirt, grease, or rust. A clean surface will not only protect the synthetic rope but also ensure it spools correctly and operates smoothly.
Use a mild detergent and a soft brush or cloth to clean the drum, and then dry it completely to prevent any rust.
Apply a Protective Coating (Optional): Some prefer to apply a light, protective coating to the drum to help protect both the drum and the synthetic rope. This can be a specific product designed for winches or a general protective spray that doesn’t degrade synthetic fibers. Ensure any product used is compatible with synthetic ropes and won’t cause damage over time.
Final Checks
Ensure Proper Alignment: Before installing the rope, double-check that everything else in the winch system, such as the fairlead and mounting points, is correctly aligned and in good condition. Misalignment can cause uneven wear on the rope or reduce its efficiency.
Test the Drum Mechanism: With the drum clean and prepared, briefly test the winch mechanism to ensure everything turns smoothly and correctly. This is a good time to check for any operational issues that could affect performance after the rope is installed.
Measuring and Cutting the Synthetic Rope
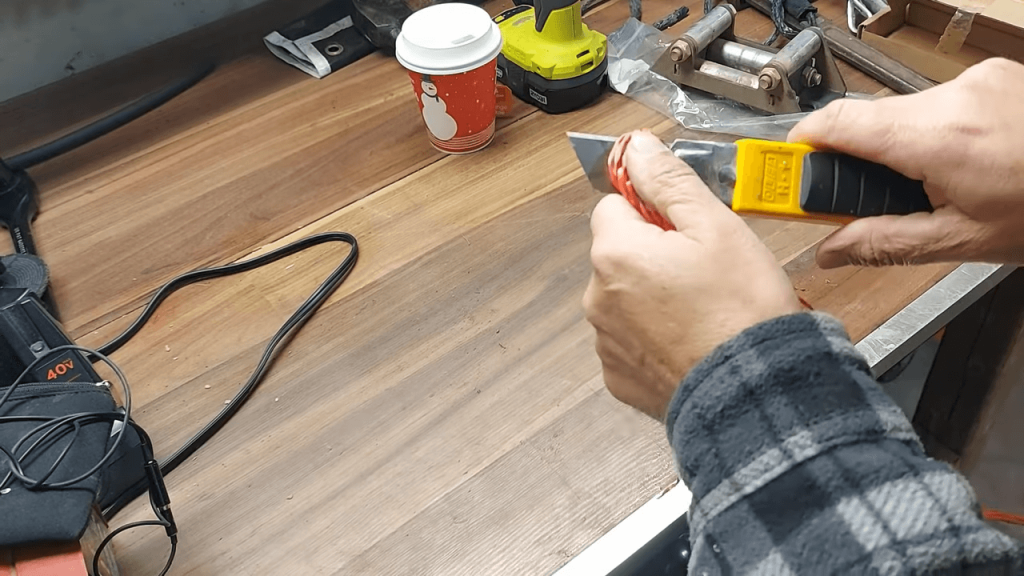
Measuring and cutting synthetic rope for your winch involves precision and understanding of your specific winching needs.
This process is essential not just for ensuring the rope fits your winch drum correctly, but also for maintaining the rope’s integrity and performance over time. Here’s a detailed look into how to do it right:
Understanding Rope Length Requirements
Before you measure or cut anything, you need to know the length of rope required for your winch.
This information is typically provided by the winch manufacturer and is based on the winch drum size and the rope’s thickness.
Using a rope that’s too long or too short can lead to issues with spooling and could affect the winch’s performance.
- Too Short: A rope that’s too short may not reach the anchor point when you need it most, limiting your winching capabilities.
- Too Long: Conversely, a rope that’s too long can overcrowd the winch drum, leading to poor spooling and potential damage to the rope.
Measuring the Rope
- Check Manufacturer’s Recommendations: Start by consulting your winch and rope manufacturer’s guidelines for the recommended length and diameter of rope for your specific winch model.
- Consider Your Usage: Think about how you typically use your winch. If you find yourself needing a bit more length based on past experiences, consider adding a few extra feet to the manufacturer’s recommendation, keeping in mind the maximum capacity of your winch drum.
- Use a Tape Measure: Extend the tape measure along the length of the synthetic rope, ensuring it’s laid out straight without any twists or kinks.
Cutting the Rope
- Mark the Cut Point: Once you’ve measured the appropriate length, mark the spot on the rope where you’ll make the cut. Use a piece of tape or a marker that’s visible on the rope’s material.
- Choose the Right Tool: For cutting synthetic rope, a sharp knife or scissors might work, but the best tool is often a hot knife. A hot knife will cut through the synthetic material easily and seal the ends simultaneously, preventing fraying.
- Secure the Rope: Before cutting, make sure the rope is securely laid out on a flat, stable surface. If you’re using a hot knife, it’s especially important to ensure the area is well-ventilated and you’re taking necessary safety precautions to avoid burns.
- Cut and Seal: If using a hot knife, carefully cut through the marked spot on the rope. The heat from the knife should melt the synthetic fibers, creating a seal as it cuts. If using scissors or a sharp knife, you may need to use a heat source like a lighter or a soldering iron to carefully melt the ends of the rope after cutting, achieving a similar sealing effect.
Final Inspection and Adjustments
After cutting, inspect the end of the rope to ensure it’s properly sealed and there are no frayed edges. If necessary, apply additional heat to the cut end to further seal and smooth any irregularities.
Once satisfied with the cut and seal, your synthetic rope is ready to be attached to the winch drum.
Attaching the Synthetic Rope to the Winch Drum
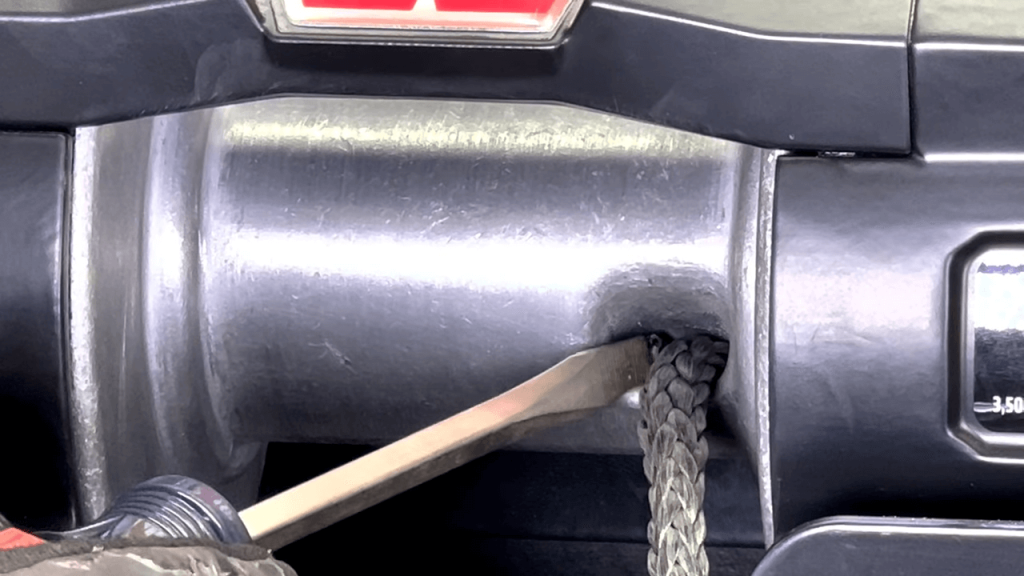
Attaching synthetic rope to the winch drum is a pivotal step in upgrading your winch setup. The attachment method must ensure the rope is securely anchored to the drum to prevent slippage or detachment under load.
Here’s how to approach this process with precision and care:
Understanding the Attachment Options
There are primarily two methods for attaching synthetic rope to a winch drum: direct knotting or using a splice. The method you choose depends on the design of your winch drum and the recommendations of the rope manufacturer.
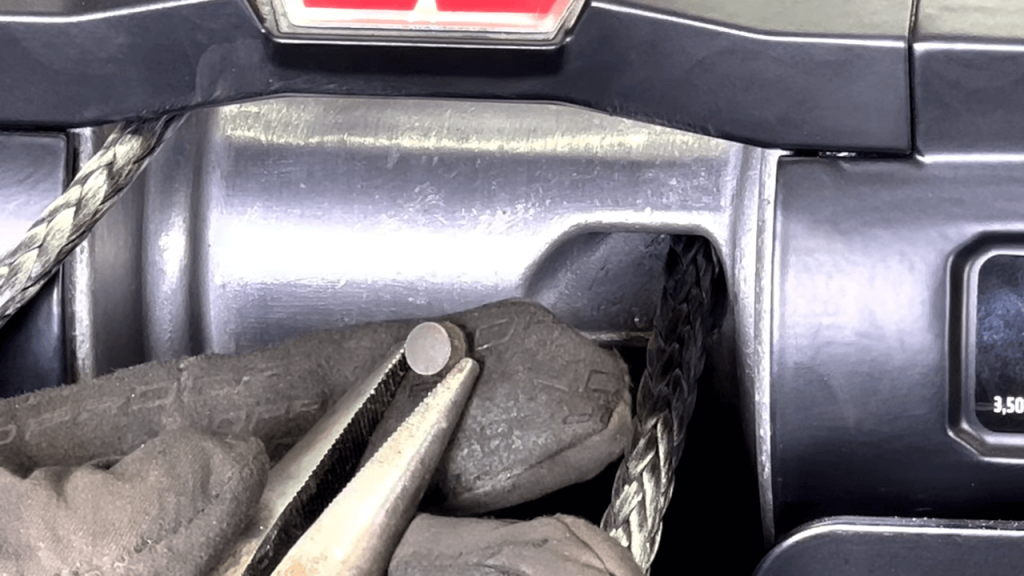
Knotting: This method involves tying a secure knot at the end of the rope that attaches directly to the drum. A common knot used for this purpose is a figure-eight follow-through knot, known for its strength and simplicity in tying. This knot minimizes the risk of slippage under tension.
Splicing: Splicing creates a loop at the end of the rope, which is then attached to the drum. This method is often preferred for its strength and efficiency in distributing load evenly across the rope fibers. An eye splice or a drum attachment splice can be used, depending on the drum design.
Step-by-Step Guide to Attachment
For Knotting: Learn How to
- Prepare the End: Measure and mark the point on the rope where the knot will be tied, ensuring enough tail is left for the knot to hold securely.
- Tie the Knot: Follow the steps to tie the selected knot tightly. The figure-eight follow-through is effective: make a figure-eight loop near the end, pass the tail through the drum attachment point, and then follow the figure-eight pattern back through with the tail.
- Secure the Knot: Pull on both ends of the rope to tighten the knot securely. Ensure the knot sits snugly against the drum attachment point without any slack.
For Splicing: Learn How to
- Measure the Rope: Determine where the splice will begin, typically a few inches from the end, to allow enough room for the splice to form a loop.
- Begin the Splice: Unravel the end of the rope slightly to work with individual strands. Follow the splicing method appropriate for your rope type, whether it’s an eye splice for creating a loop or another method suited for direct drum attachment.
- Secure the Splice: Use whipping twine or a similar material to secure the end of the splice, ensuring it won’t unravel under load. The splice should be tight and neat, with the loop or attachment point cleanly integrated into the drum.
Final Checks and Adjustments
After attaching the rope, conduct a thorough check to ensure the knot or splice is secure and there’s no risk of it coming loose. It’s crucial that the attachment holds firm under the types of loads you expect to encounter. A well-attached rope is the foundation of a reliable winching system, essential for safety and effectiveness in winching operations.
Maintenance Tips
Regularly inspect the attachment point for signs of wear, damage, or loosening. Synthetic rope, while durable, can suffer from abrasion or UV damage over time, which can compromise the attachment. Replace the rope or redo the attachment as necessary to maintain the integrity of your winching system.
Installing the Rope Guard and Fairlead
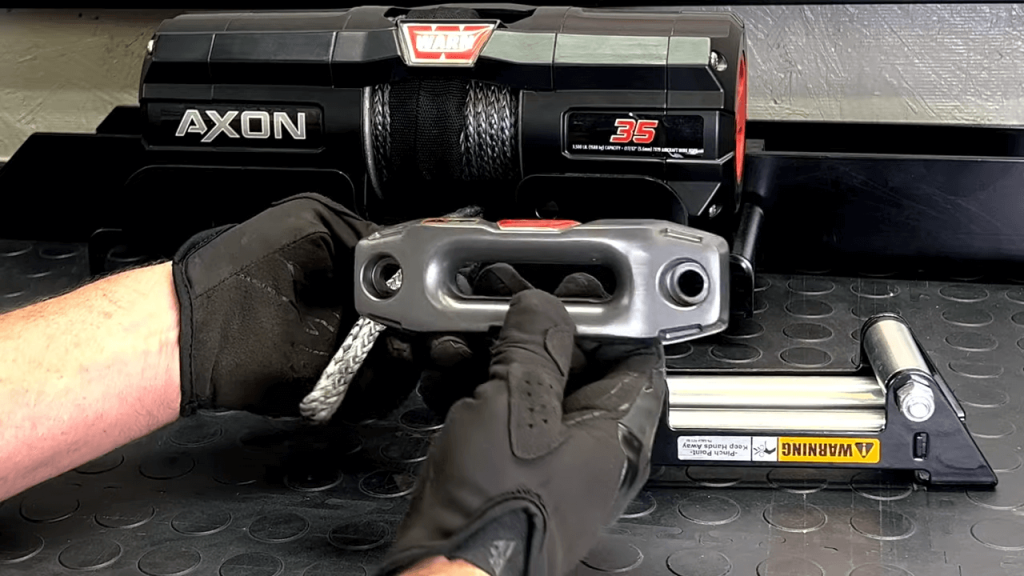
Installing a rope guard and fairlead when transitioning from a steel winch cable to synthetic rope is a critical step that ensures the longevity and efficiency of the synthetic rope in your winching system.
The fairlead serves to guide the rope onto the winch drum smoothly, while the rope guard protects the rope from abrasion and damage.
Here’s a detailed look into each component’s role and how to install them correctly:
Understanding the Role of Fairleads
Fairleads come in two main types: roller and hawse. The type of fairlead you should use depends on the synthetic rope and your winching needs.
- Roller Fairleads: These have rollers on each side that help reduce friction and wear on the rope when winching at an angle. However, for synthetic rope, the traditional roller fairlead might not always be the best choice unless the rollers are smooth and free of burrs that can damage the rope.
- Hawse Fairleads: Made from polished aluminum or steel, hawse fairleads offer a smooth, flat surface that is ideal for synthetic ropes. They help in guiding the rope back onto the drum and are less likely to cause snags or abrasion compared to roller fairleads with damaged rollers.
Choosing the Right Fairlead
When selecting a fairlead for synthetic rope:
- Opt for a hawse fairlead designed specifically for use with synthetic rope. These are typically made from aluminum and have a smooth surface to minimize friction and wear on the rope.
- Ensure the fairlead’s dimensions are compatible with your winch mount and the rope’s diameter for optimal performance.
Installing the Fairlead
- Remove the Old Fairlead: If upgrading from a steel cable, you’ll likely need to replace the existing roller fairlead with a hawse fairlead. Unscrew and remove the old fairlead from the winch mount.
- Align the New Fairlead: Place the hawse fairlead over the mounting holes on the winch plate. Ensure it is oriented correctly, with the wider side facing outwards, to guide the rope smoothly.
- Secure the Fairlead: Using the provided bolts and nuts, secure the fairlead to the winch mount. Tighten the bolts to the manufacturer’s recommended torque settings to ensure it stays in place during operation.
Installing a Rope Guard (If Applicable)
A rope guard protects the synthetic rope from external elements and abrasion when not in use. Not all setups require a rope guard, but if your winching environment exposes the rope to harsh conditions, consider installing one.
- Choose a Compatible Rope Guard: Select a rope guard that fits your winch model and is designed to work with synthetic rope. It should offer adequate coverage without restricting the rope’s movement or access to the winch.
- Follow the Manufacturer’s Installation Instructions: Attach the rope guard according to the instructions. This may involve bolting it directly onto the winch housing or the vehicle’s frame, depending on the design.
- Ensure Easy Access to the Winch: Install the rope guard in a way that allows easy access to the winch for operation and maintenance. The guard should protect the rope without hindering winch usability.
Spooling the Synthetic Rope
Spooling synthetic rope onto your winch drum is a critical process that ensures the rope is wound tightly and evenly, preventing issues such as snags, kinks, and rapid wear.
Proper spooling improves the rope’s lifespan and ensures your winch operates efficiently when you need it.
Proper spooling techniques for synthetic rope: Ensure the rope is spooled tightly under tension and evenly distributed across the drum. This prevents snags, maintains even layering, and reduces the risk of the rope digging into lower layers during heavy pulls. Using slight tension during spooling ensures optimal performance.
Here’s a detailed guide on how to spool synthetic rope correctly:
Step 1: Prepare the Winch and Rope
Before starting, make sure the winch is off and the drum is in the free-spool mode, allowing you to manually pull the rope out. Ensure the synthetic rope is free from knots or tangles.
It’s crucial to start with a straight, smooth rope to avoid complications during the spooling process.
Step 2: Attach the Rope to the Drum
Begin by threading the end of the rope through the fairlead and attaching it to the winch drum using the method detailed in the winch’s instruction manual.
This could involve tying a knot, using a splice, or securing it with a fastener, depending on your winch model. Ensure the attachment is secure to prevent the rope from coming loose under load.
How to Make a Loop in a Synthetic Winch Rope
- Threading the Rope: Fold the rope at the marked point, creating a loop to your desired size. Ensure the tail end runs alongside the main part of the rope, creating a parallel line.
- Securing the Loop: You can secure the loop using a splice or a knot. Splicing is preferred for its strength and efficiency, preserving the rope’s integrity. Thread the tail through the rope’s weave several times to create a splice. For a quicker solution, a sturdy knot like the bowline can also work, but it might reduce the rope’s strength slightly.
- Finishing Touches: Use a heat source to carefully melt the rope’s end, preventing fraying. This step is crucial for maintaining your rope’s durability.
Step 3: Start Spooling the Rope
With the rope attached to the drum, start winding the rope onto the drum by hand, keeping a consistent tension.
It’s essential to spool the first layer of rope as neatly and tightly as possible because it sets the foundation for the subsequent layers.
Ensure the rope lies flat against the drum, with no overlaps or gaps between the coils.
Step 4: Apply Tension to the Rope
To spool the rope tightly, it’s necessary to apply tension. This can be done by attaching the free end of the rope to a fixed point, like a tree or another vehicle, and then using the winch’s power to slowly wind the rope onto the drum.
Maintain a steady, slow pace to ensure the rope winds evenly and tightly. If possible, wear gloves and guide the rope with your hands to distribute it evenly across the drum, but be cautious to keep your hands away from the fairlead to avoid injury.
Step 5: Check for Even Distribution
As you wind, periodically stop to check that the rope is evenly distributed across the width of the drum.
The goal is to avoid piling too much rope in one area, which can cause the upper layers to slide off under load or get pinched, damaging the rope.
If you notice uneven distribution, you may need to manually adjust the coils before continuing.
Step 6: Continue Winding in Layers
After the first layer is fully and tightly wound on the drum, continue winding the next layers. Each layer should be as tight and even as the first.
The tightness of the spooling helps prevent the rope from digging into the layers below during winching operations, which could otherwise damage the rope and reduce its effectiveness.
Step 7: Leave Enough Rope Unspooled
Ensure you leave enough rope unspooled to reach your anchor point during use. Do not wind the rope so tightly that you can’t easily pull out enough length when needed.
Step 8: Final Inspection
Once the rope is fully spooled, do a final inspection to ensure everything looks correct. The rope should be neatly organized in tight, even layers across the drum, without any loose sections or misalignments.
Reattaching the Winch Hook
Reattaching the winch hook to your synthetic rope is a crucial step in ensuring that your winching setup is ready for use.
This process involves securely fastening the hook to the end of the rope, allowing it to connect to various loads or anchor points safely.
Here’s a detailed look at how to do this correctly:
1. Select the Appropriate Hook
First, ensure that the hook is suitable for use with your synthetic rope. The hook should be compatible in terms of size and strength rating with the rope and your winching needs.
Some hooks are specifically designed for synthetic ropes, featuring smooth surfaces to reduce wear on the rope.
2. Prepare the End of the Rope
If your synthetic rope doesn’t already have a loop spliced at the end, you may need to create one. Splicing a loop into synthetic rope is a preferred method for attaching hooks, as it maintains the rope’s strength and integrity.
The splice should be tight and secure to prevent the rope from unraveling.
3. Attach the Hook
Once you have a loop at the end of your rope, you can attach the hook. This typically involves:
- Inserting a Pin or Bolt: Many hooks are designed to attach to the rope’s loop via a pin or bolt. Slide the pin through the loop and then through the hook’s attachment point. Ensure the pin or bolt is compatible with the diameter of the rope’s loop and the hook’s attachment hole.
- Securing the Connection: Once the pin or bolt is in place, secure it with a nut or a cotter pin, depending on the design. Tighten the nut or bend the cotter pin to ensure the hook cannot detach from the rope during use.
4. Use a Thimble (If Applicable)
In some cases, it’s advisable to use a thimble within the loop to protect the rope from wear and pinch points.
A thimble is a small, metal (or sometimes plastic for synthetic ropes) insert that sits inside the loop to provide a smooth, hard surface for the hook or shackle to connect to.
This can significantly extend the life of your rope by reducing wear at the connection point.
5. Final Inspection
After attaching the hook, conduct a thorough inspection of the connection to ensure everything is secure. Pull on the hook and rope to test the strength of the attachment, ensuring there is no slippage or movement.
It’s crucial that this connection holds firm under the types of loads you expect to encounter during winching operations.
6. Regular Maintenance Checks
Regularly inspect the hook and the attachment point for signs of wear, damage, or loosening. Synthetic rope can suffer from abrasion, UV damage, and other forms of wear over time, which can compromise the attachment.
Inspect the rope for fraying, the thimble for wear, and the hook for any deformation. Replace or repair any components as necessary to maintain the integrity of your winching system.
Maintenance Tips for Synthetic Rope
Maintaining synthetic winch rope is key to ensuring its longevity and reliability. Synthetic rope, while strong and durable, can be susceptible to wear and damage from environmental factors, improper use, or inadequate care.
Here are detailed maintenance tips to keep your synthetic rope in top condition:
Regular Cleaning
- Rinse with Water: After each use, especially in muddy or sandy conditions, rinse the rope with clean water to remove debris and dirt. Particles trapped in the fibers can act like sandpaper, wearing the rope internally.
- Use Mild Soap: For more thorough cleaning, use a mild soap and water solution to wash the rope. Avoid harsh chemicals or detergents that could degrade the rope fibers.
- Air Dry: Before storing, ensure the rope is completely dry. Lay it out in a well-ventilated area away from direct sunlight, as UV exposure can weaken synthetic fibers over time.
Inspection for Damage
- Check for Abrasion: Regularly inspect the rope for signs of abrasion or fraying. Pay special attention to areas that come into frequent contact with the fairlead, winch drum, or any sharp edges on your vehicle.
- Look for UV Damage: Synthetic ropes can degrade with prolonged exposure to UV light. Look for signs of fading, brittleness, or strength loss.
- Inspect for Cuts: Even a small cut can significantly reduce the strength of your rope. If you find cuts, consider cutting the damaged section out and re-splicing the rope, if the length allows, or replacing it if necessary.
Proper Storage
- Avoid Direct Sunlight: Store your rope in a cool, dry place out of direct sunlight. Continuous exposure to UV rays can weaken the rope over time.
- Keep It Loose: Don’t store the rope under tension. When winding it on the drum for storage, do so loosely to avoid stressing the fibers.
- Use a Protective Cover: If your winch is mounted on a vehicle that’s regularly used outdoors, consider using a winch cover to protect both the rope and the winch from the elements.
Handling Best Practices
- Avoid Sharp Bends: Sharp bends can stress the rope and cause internal damage. Always use a wide-radius fairlead and avoid pulling the rope over sharp edges.
- Use a Line Dampener: In the event of a rope failure, a line dampener can help reduce the risk of injury by absorbing some of the energy released.
- Rotate the Rope: Periodically unwind and rewind the rope evenly across the drum. This practice helps distribute wear more evenly along the length of the rope.
Also check: Synthetic Winch Rope vs Steel Cable
FAQs
Can I use any synthetic rope on my winch?
No, not all synthetic ropes are suitable for every winch. It’s crucial to select a rope that matches your winch’s capacity and drum size. Check the manufacturer’s recommendations for rope diameter and length to ensure compatibility and optimal performance.
How often should I replace my synthetic winch rope?
The lifespan of synthetic winch rope depends on its usage, care, and exposure to harsh conditions. Inspect your rope regularly for signs of wear, abrasion, or UV damage. As a general rule, replace the rope if you notice any fraying, cuts, or significant fading, as these can compromise its strength.
Can synthetic rope be repaired if it gets damaged?
Minor damage to synthetic ropes can sometimes be repaired by splicing, depending on the type and extent of the damage. However, if the rope has significant wear or structural damage, it’s safer to replace it entirely. Always consult with a professional if you’re unsure about the integrity of your rope.
Is synthetic rope safer than steel cable?
Yes, synthetic rope is generally considered safer than steel cable in winching applications. Unlike steel cable, which can store kinetic energy and cause severe injuries if it snaps, synthetic rope is much lighter and tends to drop to the ground if broken, reducing the risk of injury.
How do I properly clean and maintain my synthetic winch rope?
Rinse the synthetic rope with mild soapy water to remove dirt and debris, then air dry completely before rewinding it. Store it loosely coiled, away from harsh chemicals and UV light, to prevent kinks and degradation. Regular inspections for damage and proper spooling will also help extend the rope’s lifespan.
Can synthetic rope be used in all types of winching situations?
While synthetic rope is versatile and strong, its suitability depends on the specific winching scenario. Synthetic rope is excellent for most applications, especially where weight and safety are concerns. However, in environments with high abrasion risks, additional protection for the rope might be necessary, or a steel cable might be more suitable.
What are the best practices for spooling synthetic rope onto the winch drum?
To spool synthetic rope onto the drum correctly, start by ensuring the drum is clean and free of burrs. Attach the rope securely to the drum, and spool the rope under slight tension to avoid loose layers. Ensure the rope is evenly distributed across the drum, without overlaps or gaps between the coils.
Does switching to synthetic rope require any modifications to my winch setup?
Switching to synthetic rope may require changing your fairlead to a model that’s compatible with synthetic rope, such as a smooth hawse fairlead, to reduce wear and tear. Inspect your winch setup to ensure compatibility and optimal performance with synthetic rope.
Conclusion
Switching to synthetic winch rope is more than just an upgrade; it’s a smart choice for safety, efficiency, and ease of use. With the right preparation and care, your winching tasks will be smoother and safer, letting you focus on the adventure or job at hand.
Upgrading to synthetic rope not only boosts safety and efficiency but also reduces wear on your winch system. With proper maintenance and spooling techniques, synthetic ropes can provide long-lasting performance in off-road and recovery operations.

